Year 2
CAD
Models
Photoshop
Revit
Rhino
Technical CAD drawing
Revit modeling and plan generation
Photoshop graphical rendering
Extensive Rhino modeling
Model building & experimentation
This year was the introduction of structures courses which granted me industry relevant experiences and skills, utilizing more technical software to deliver projects. It also gave the opportunity to use my outside skills in the adobe suite.
One Week Sprint
One Week Sprint
In the first week of studio…
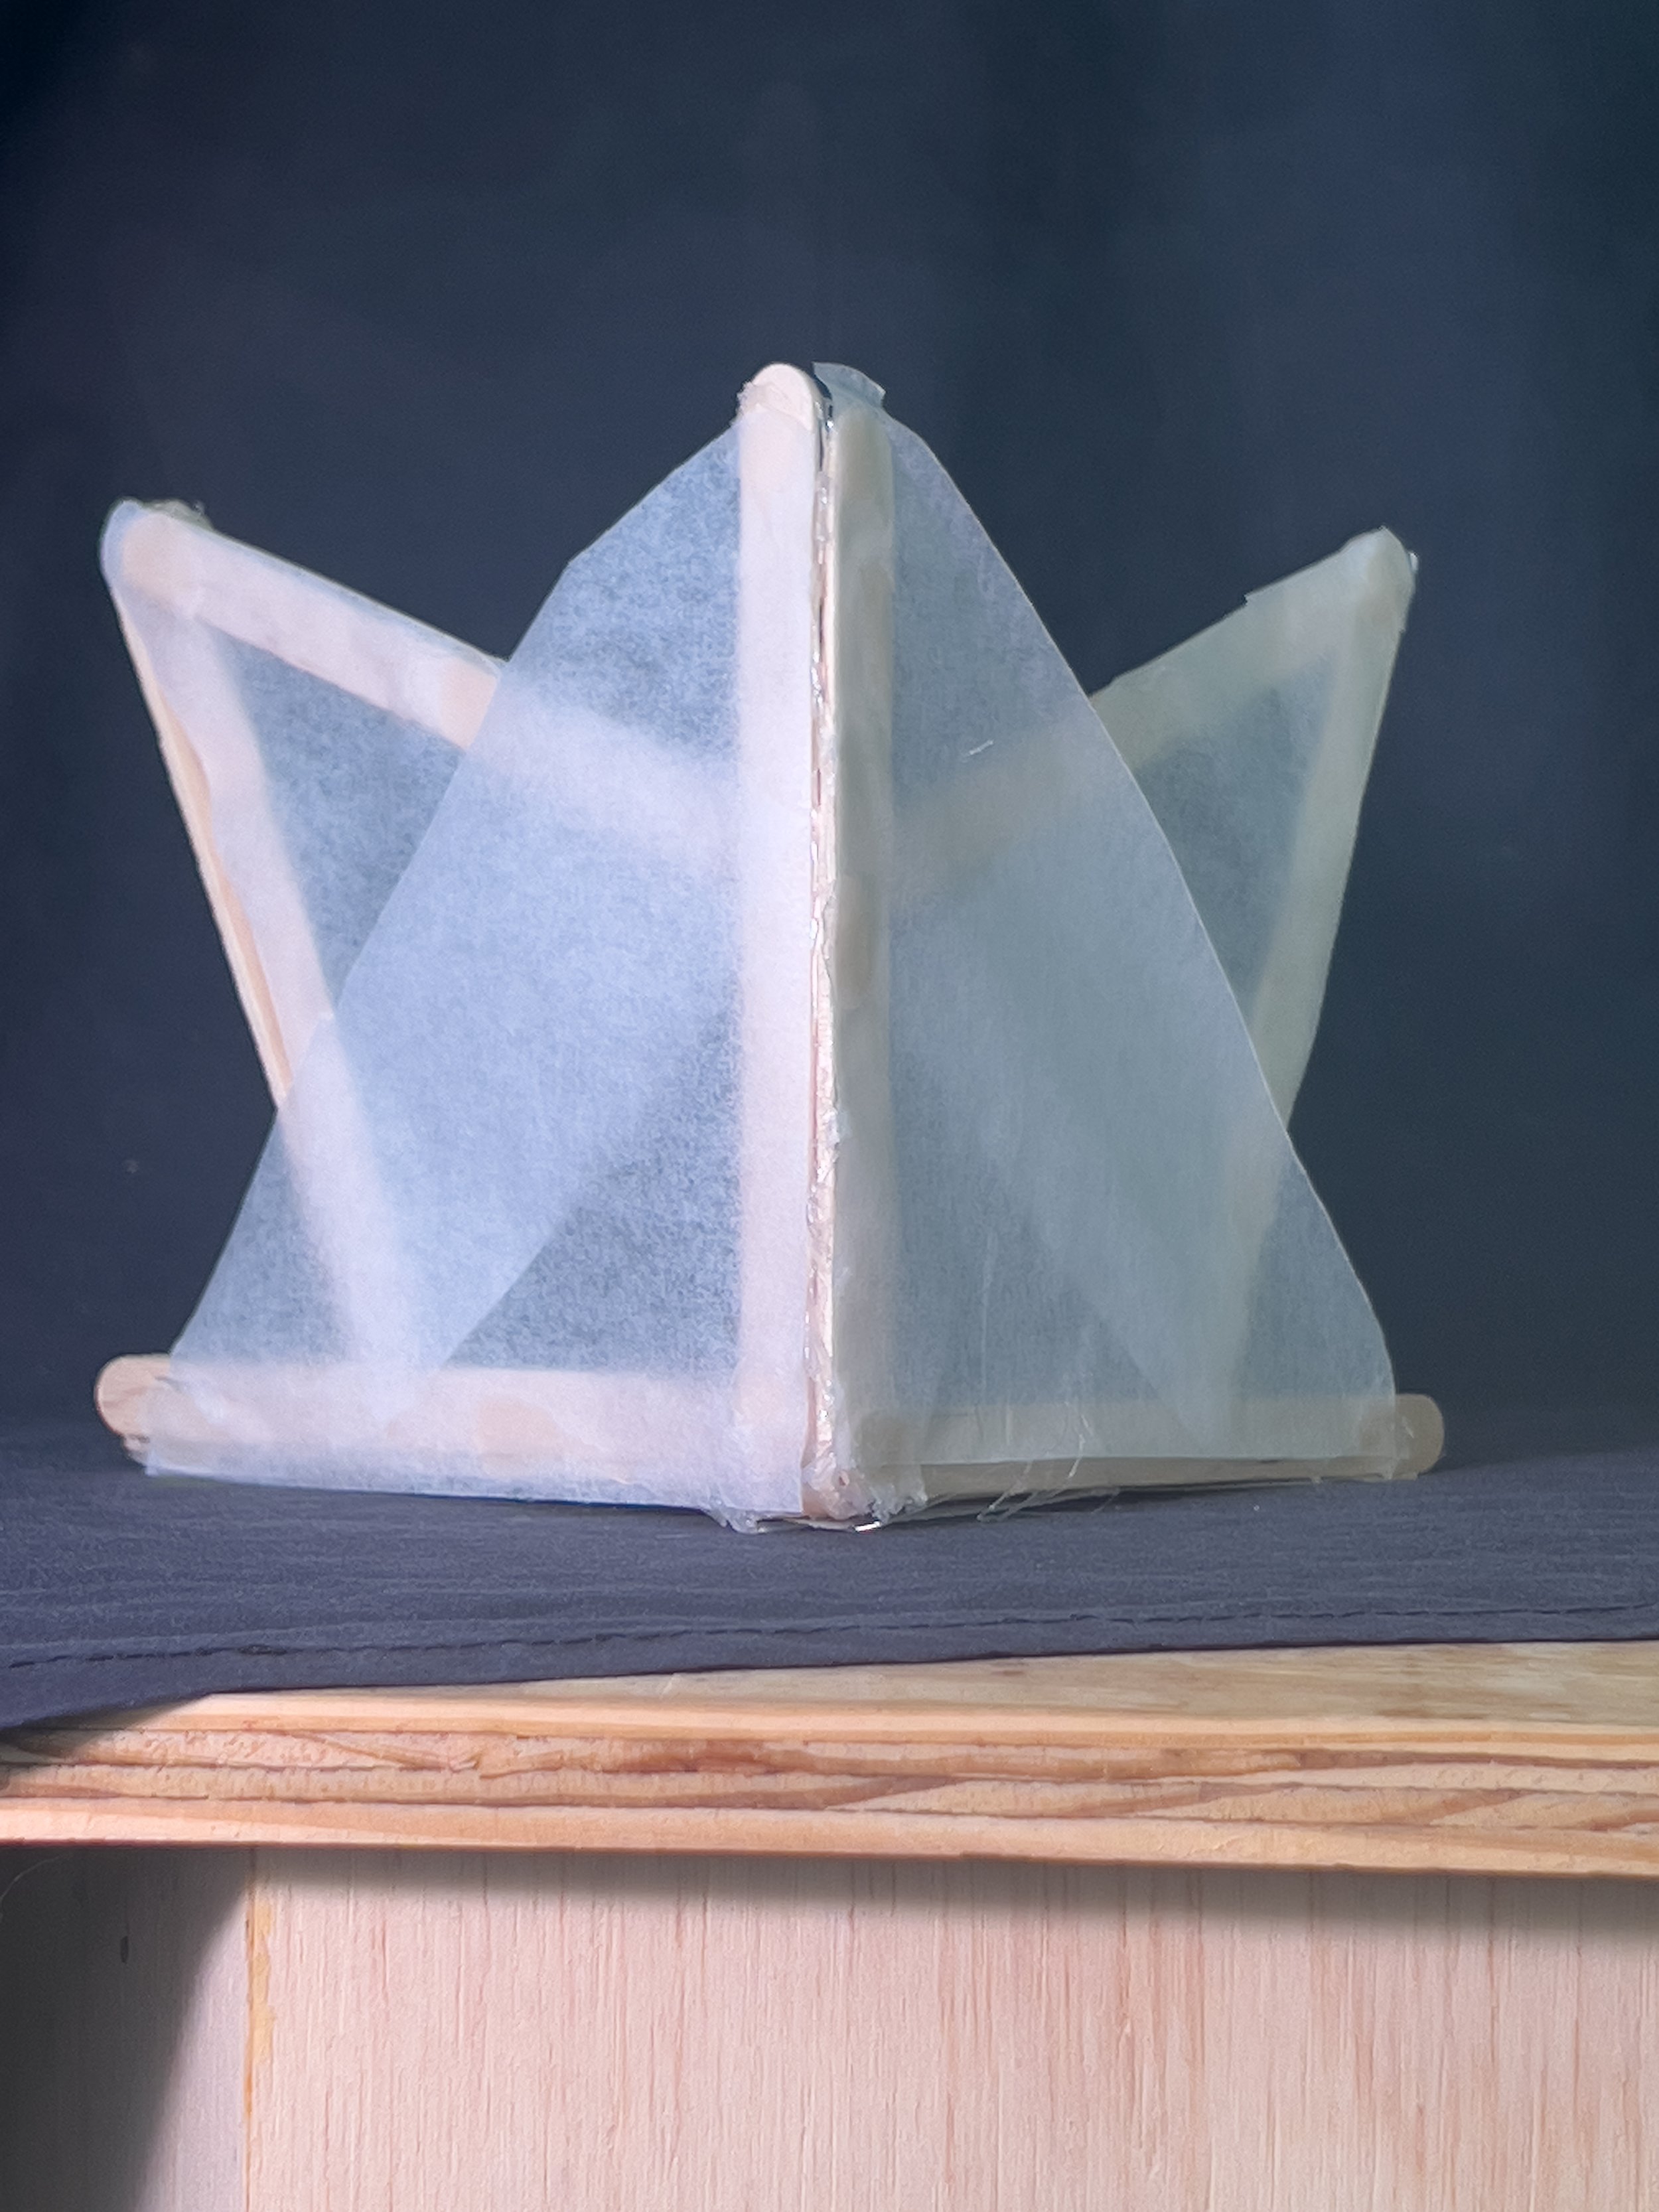
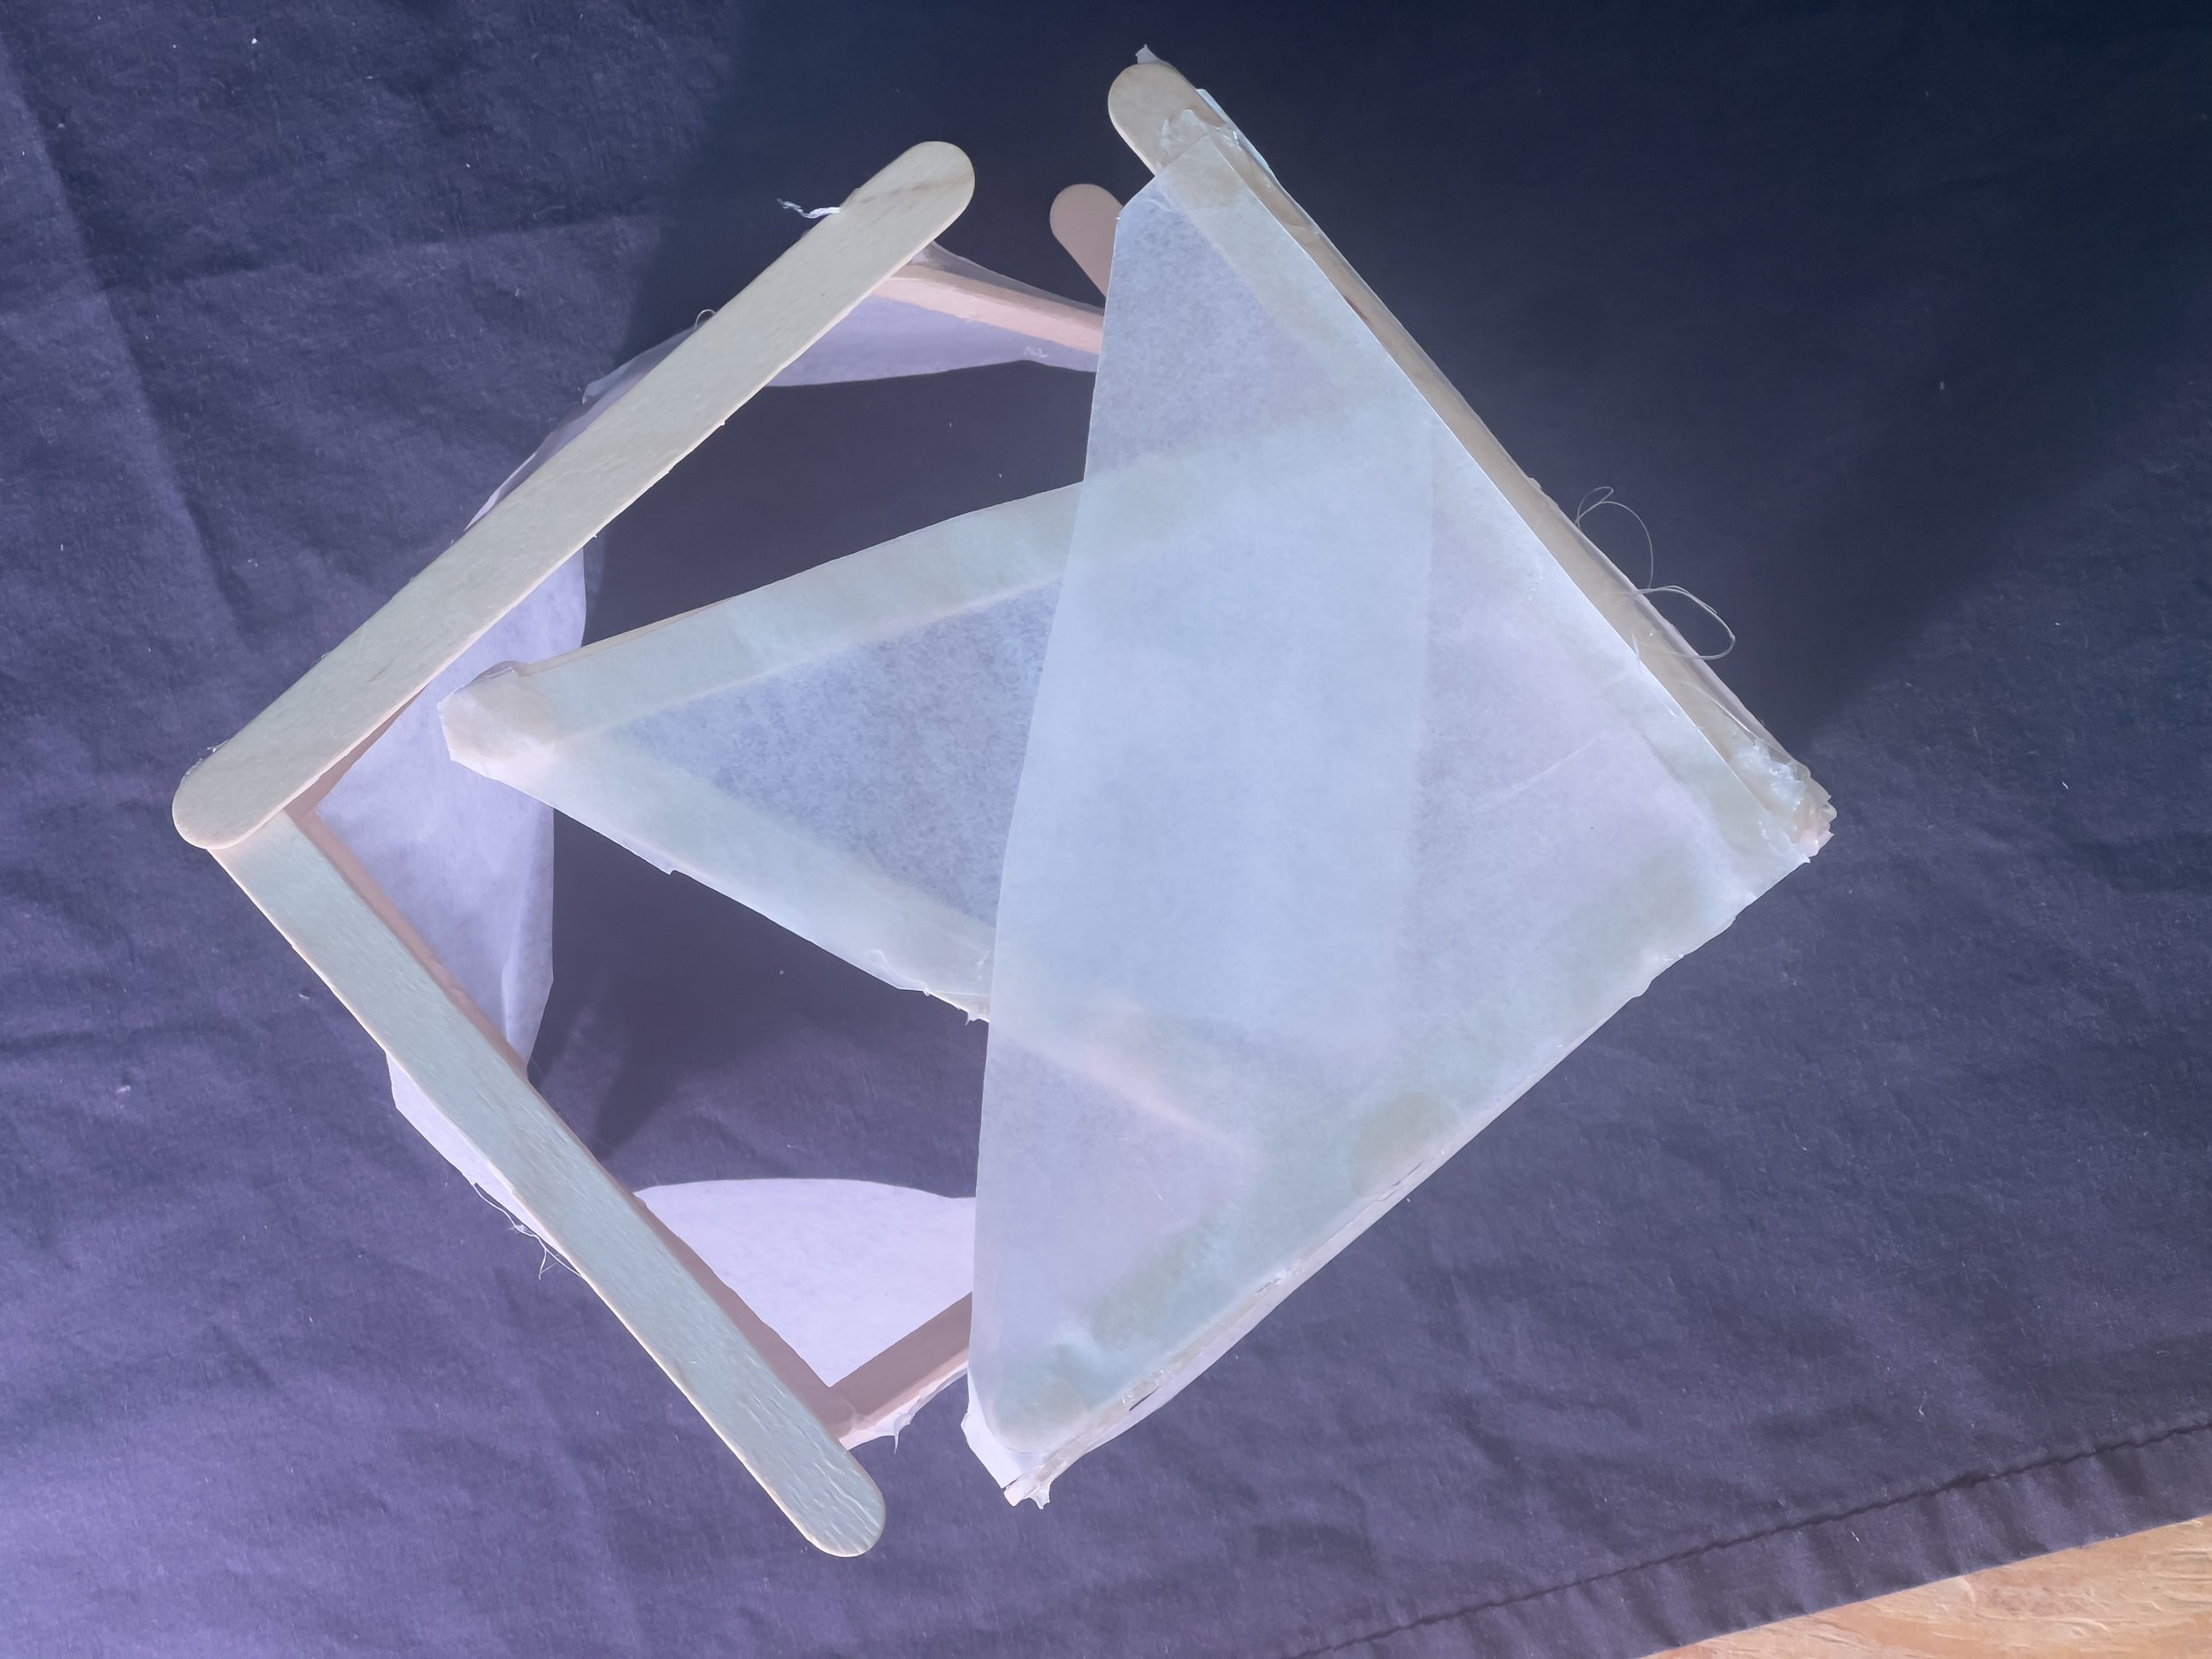
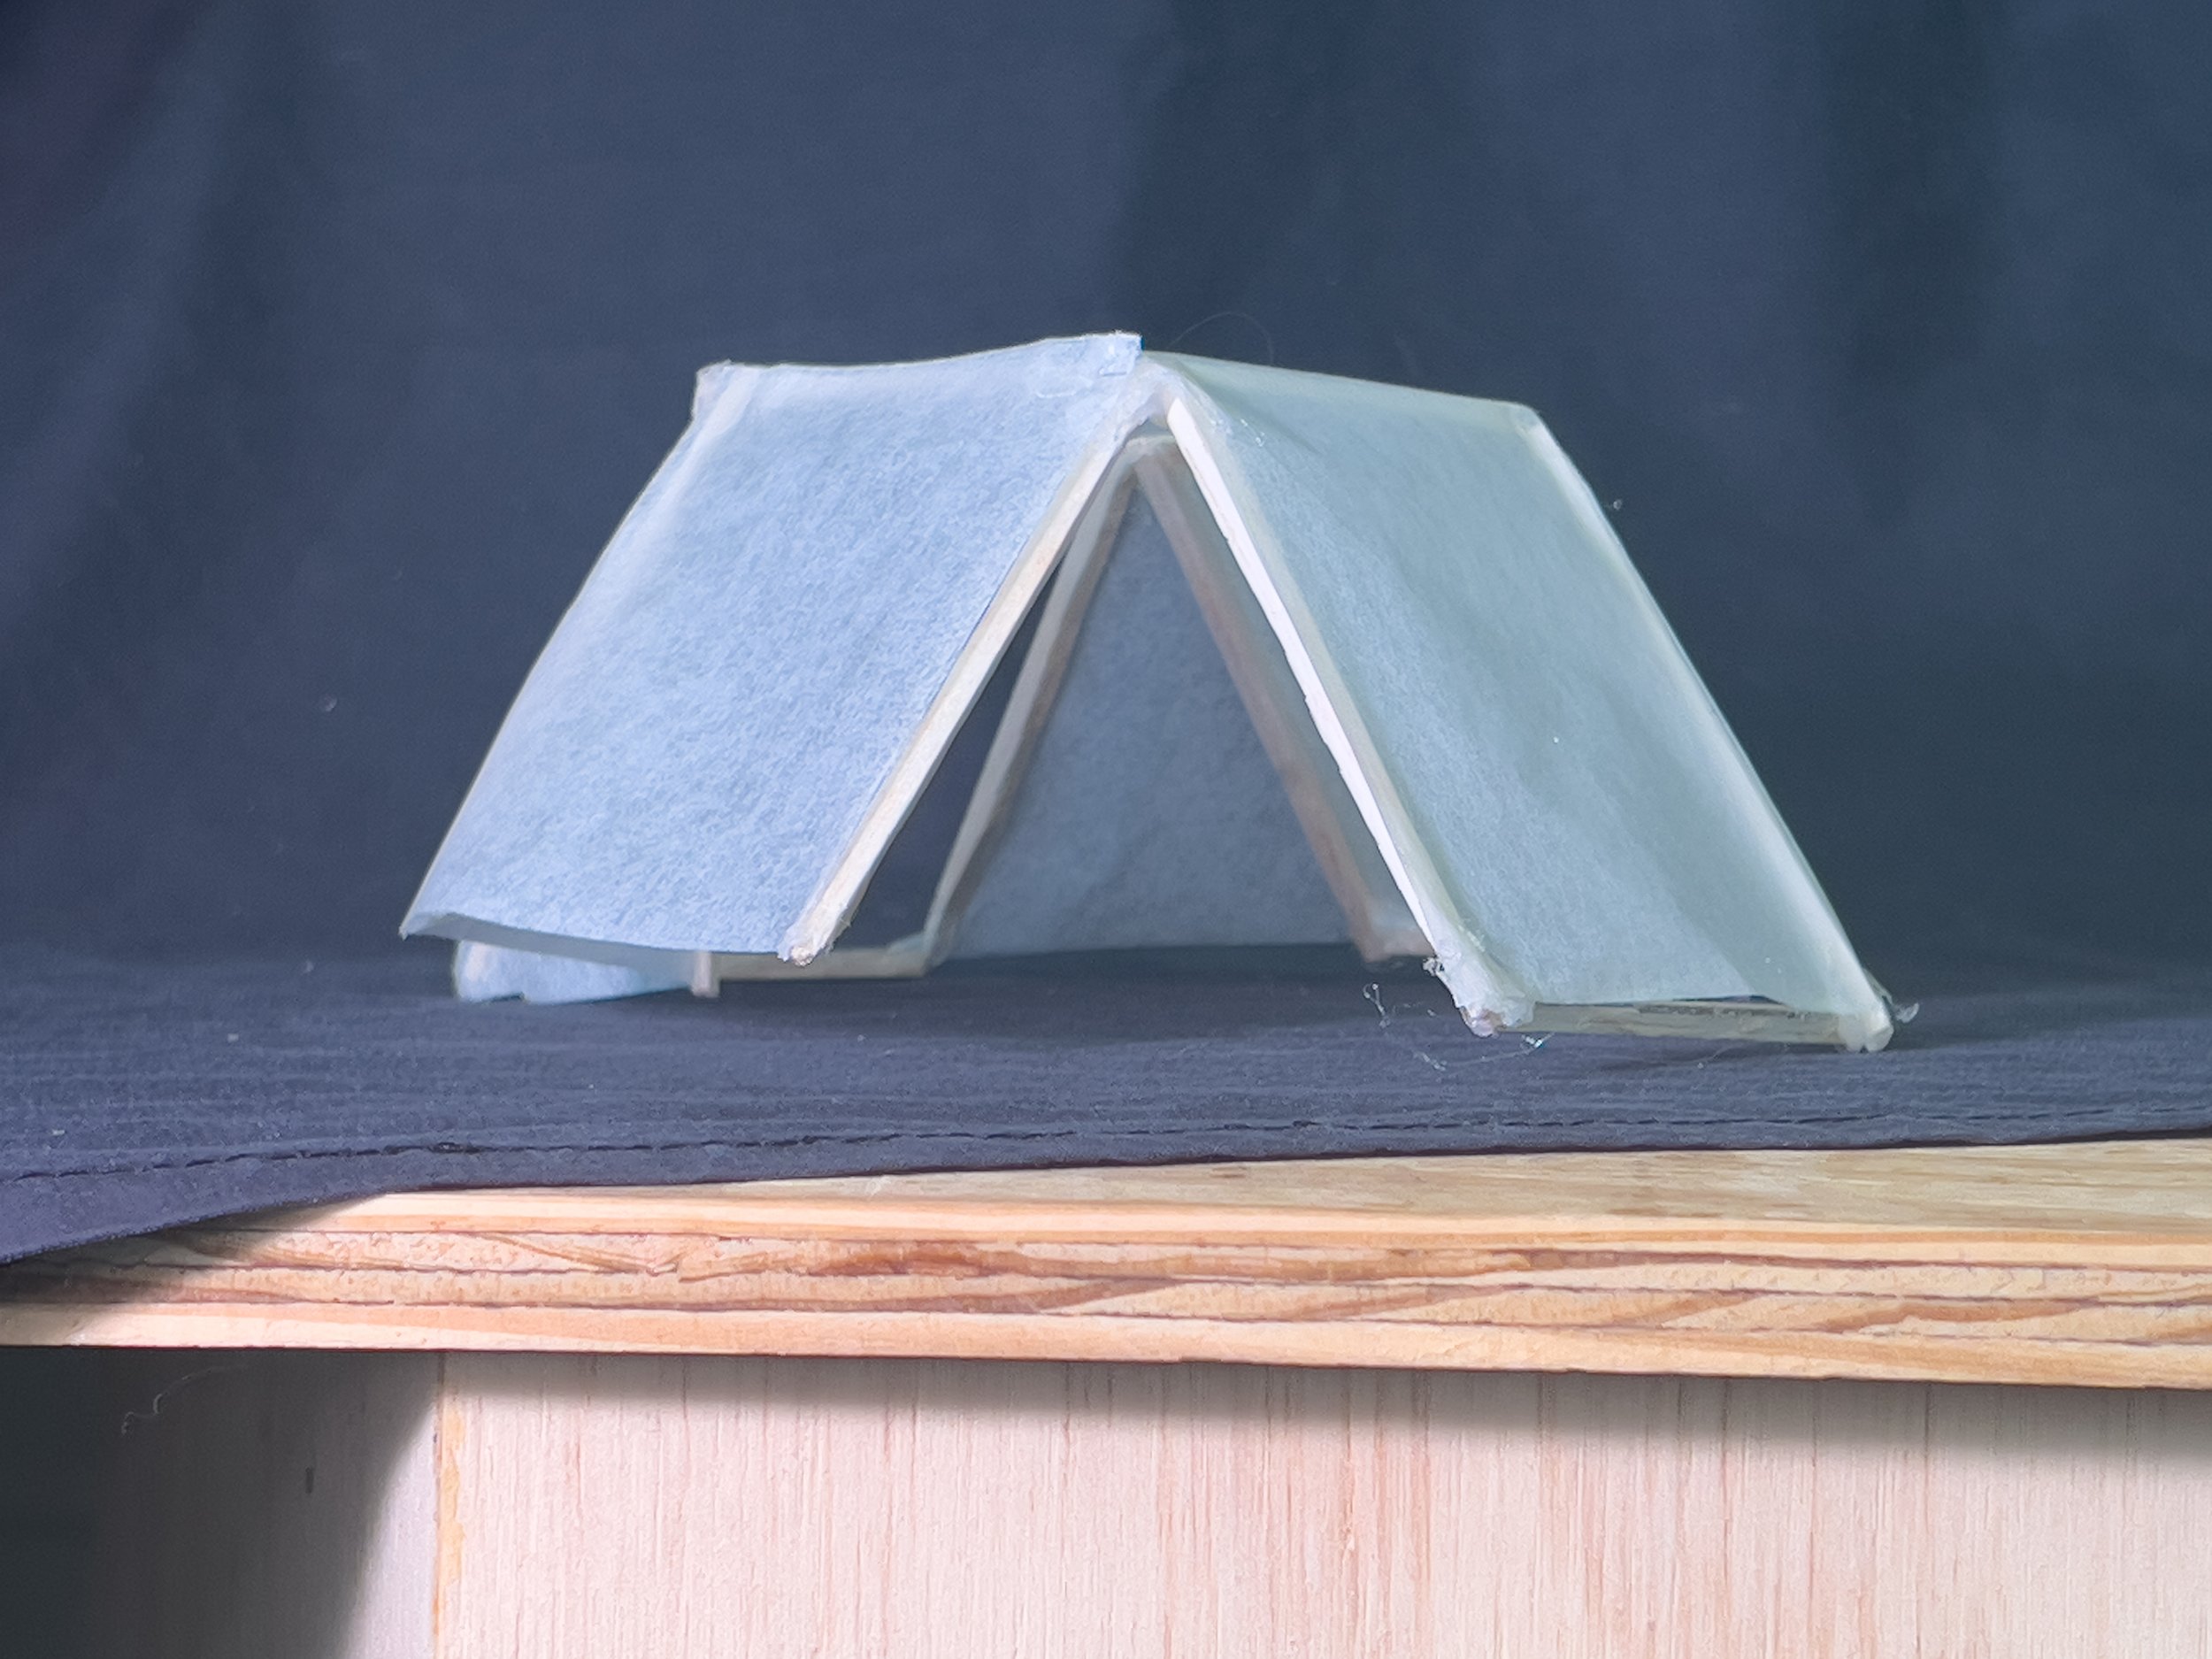
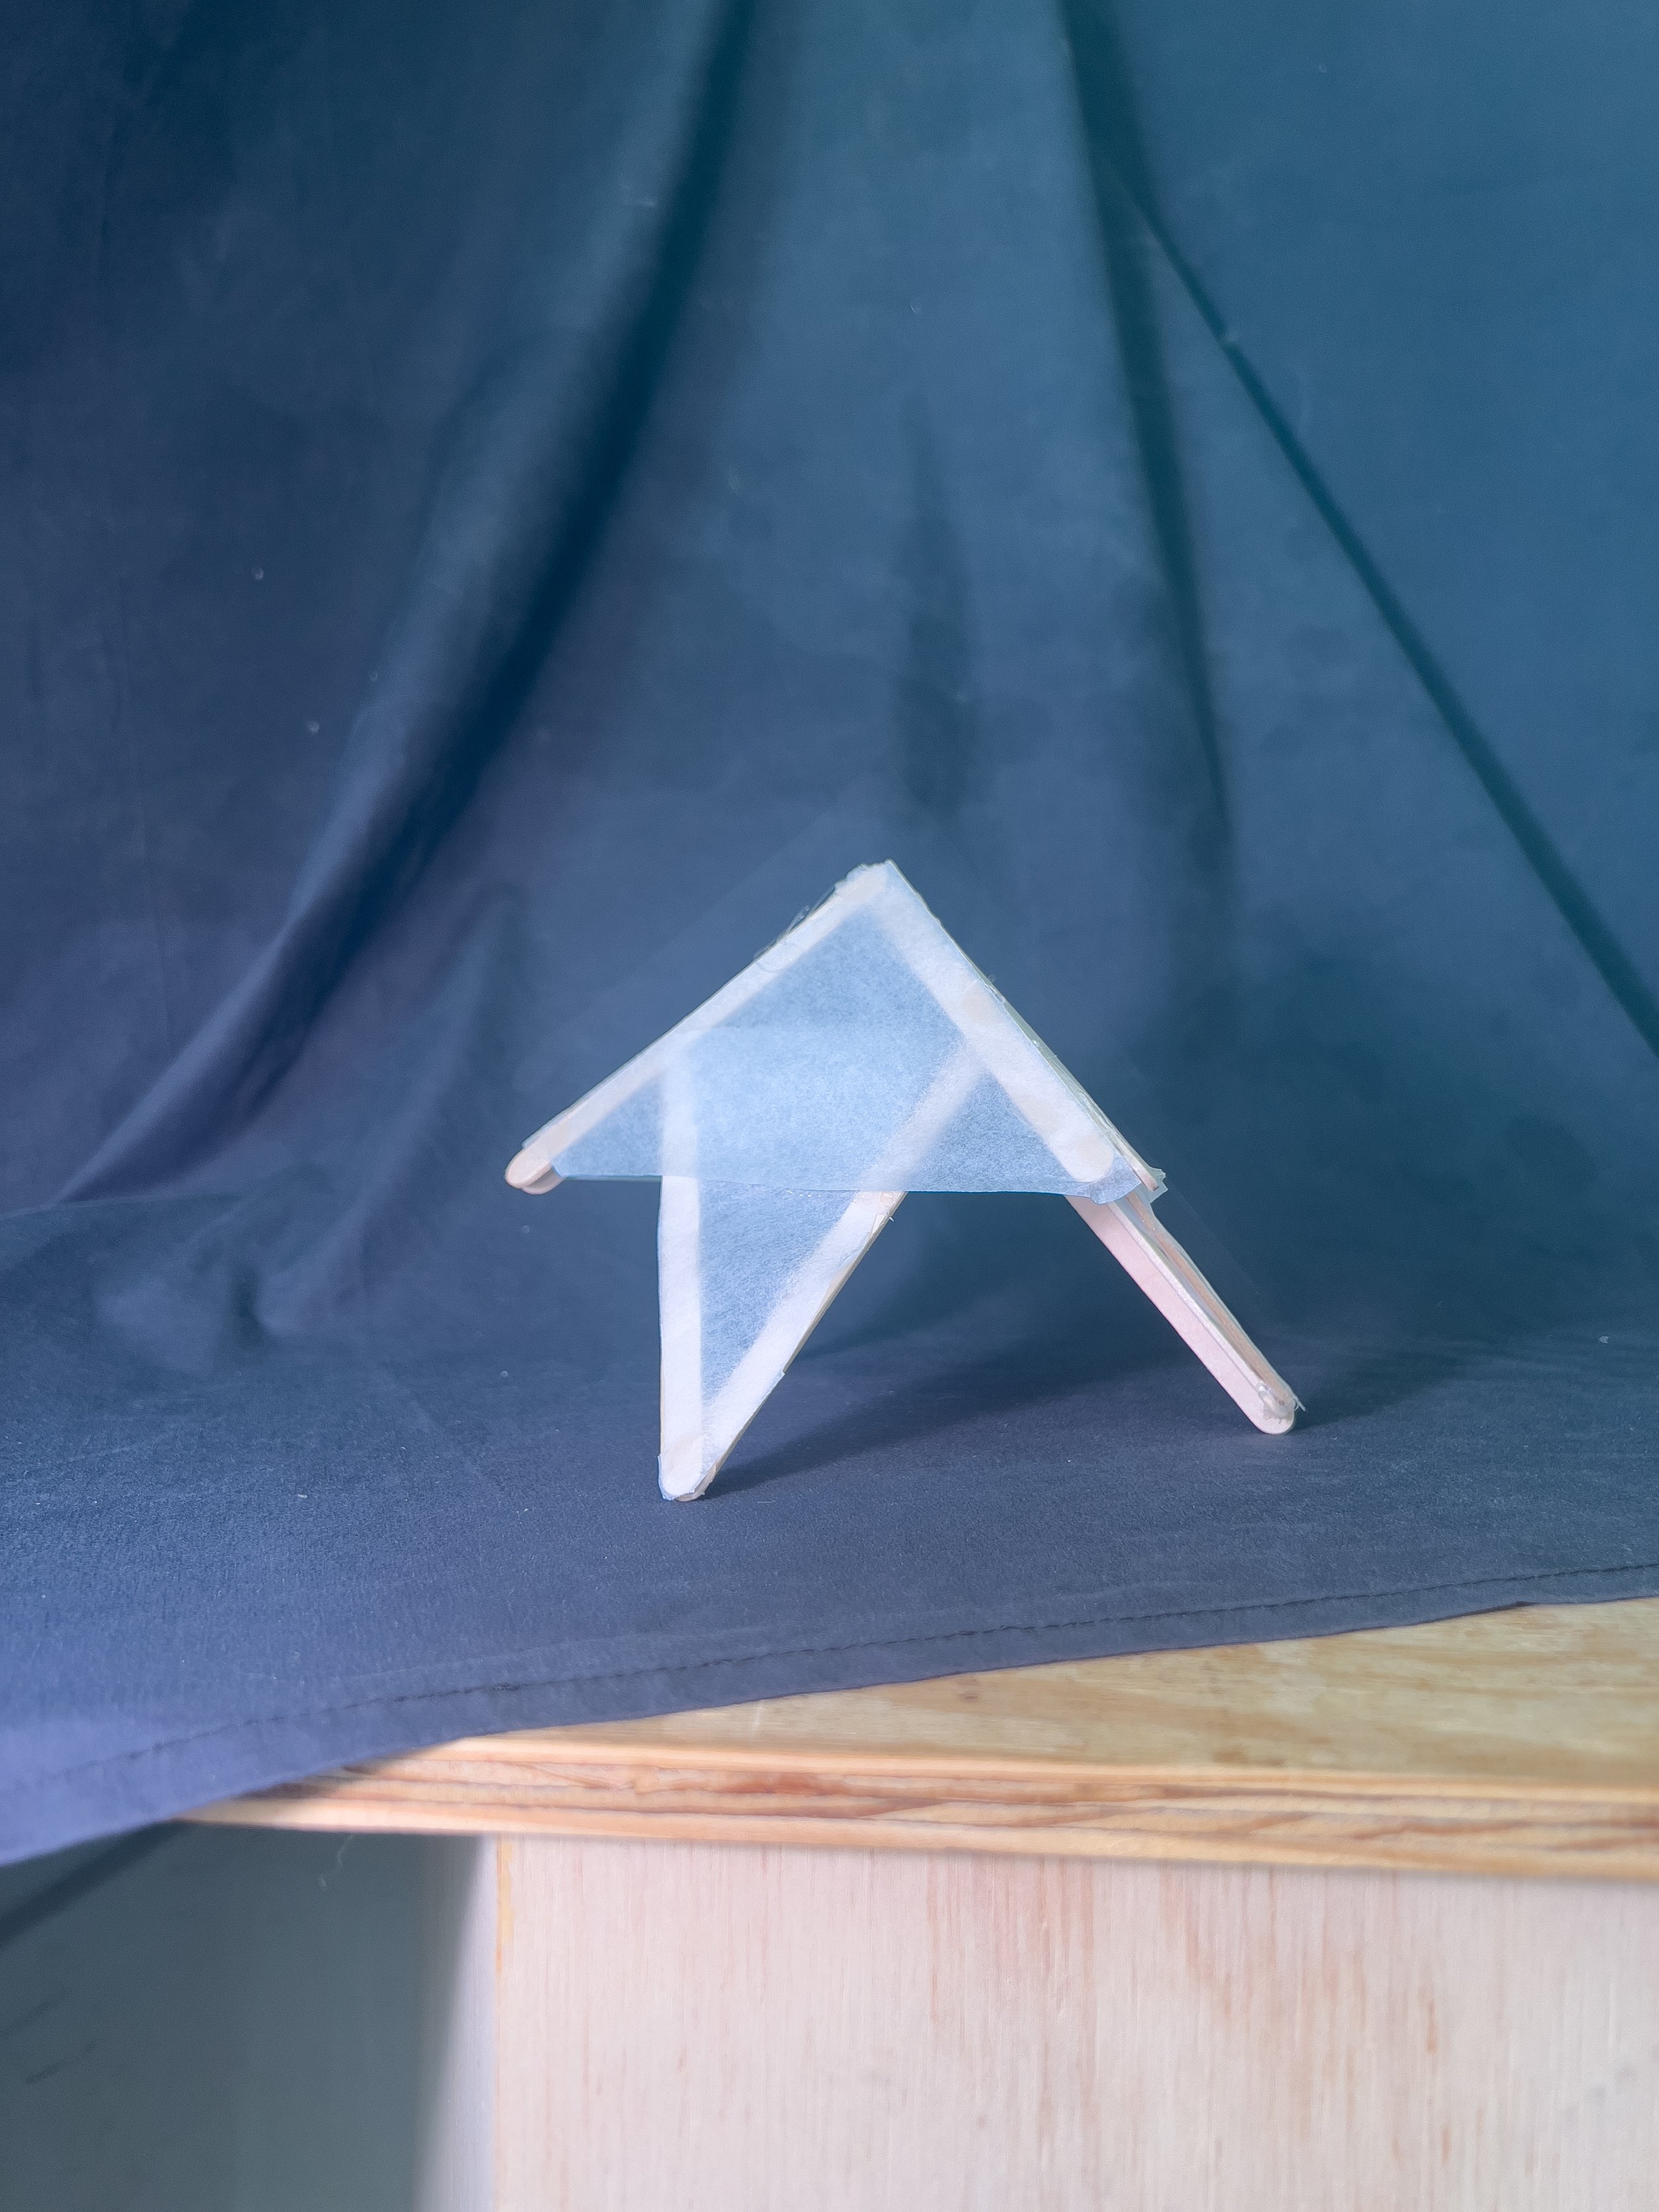
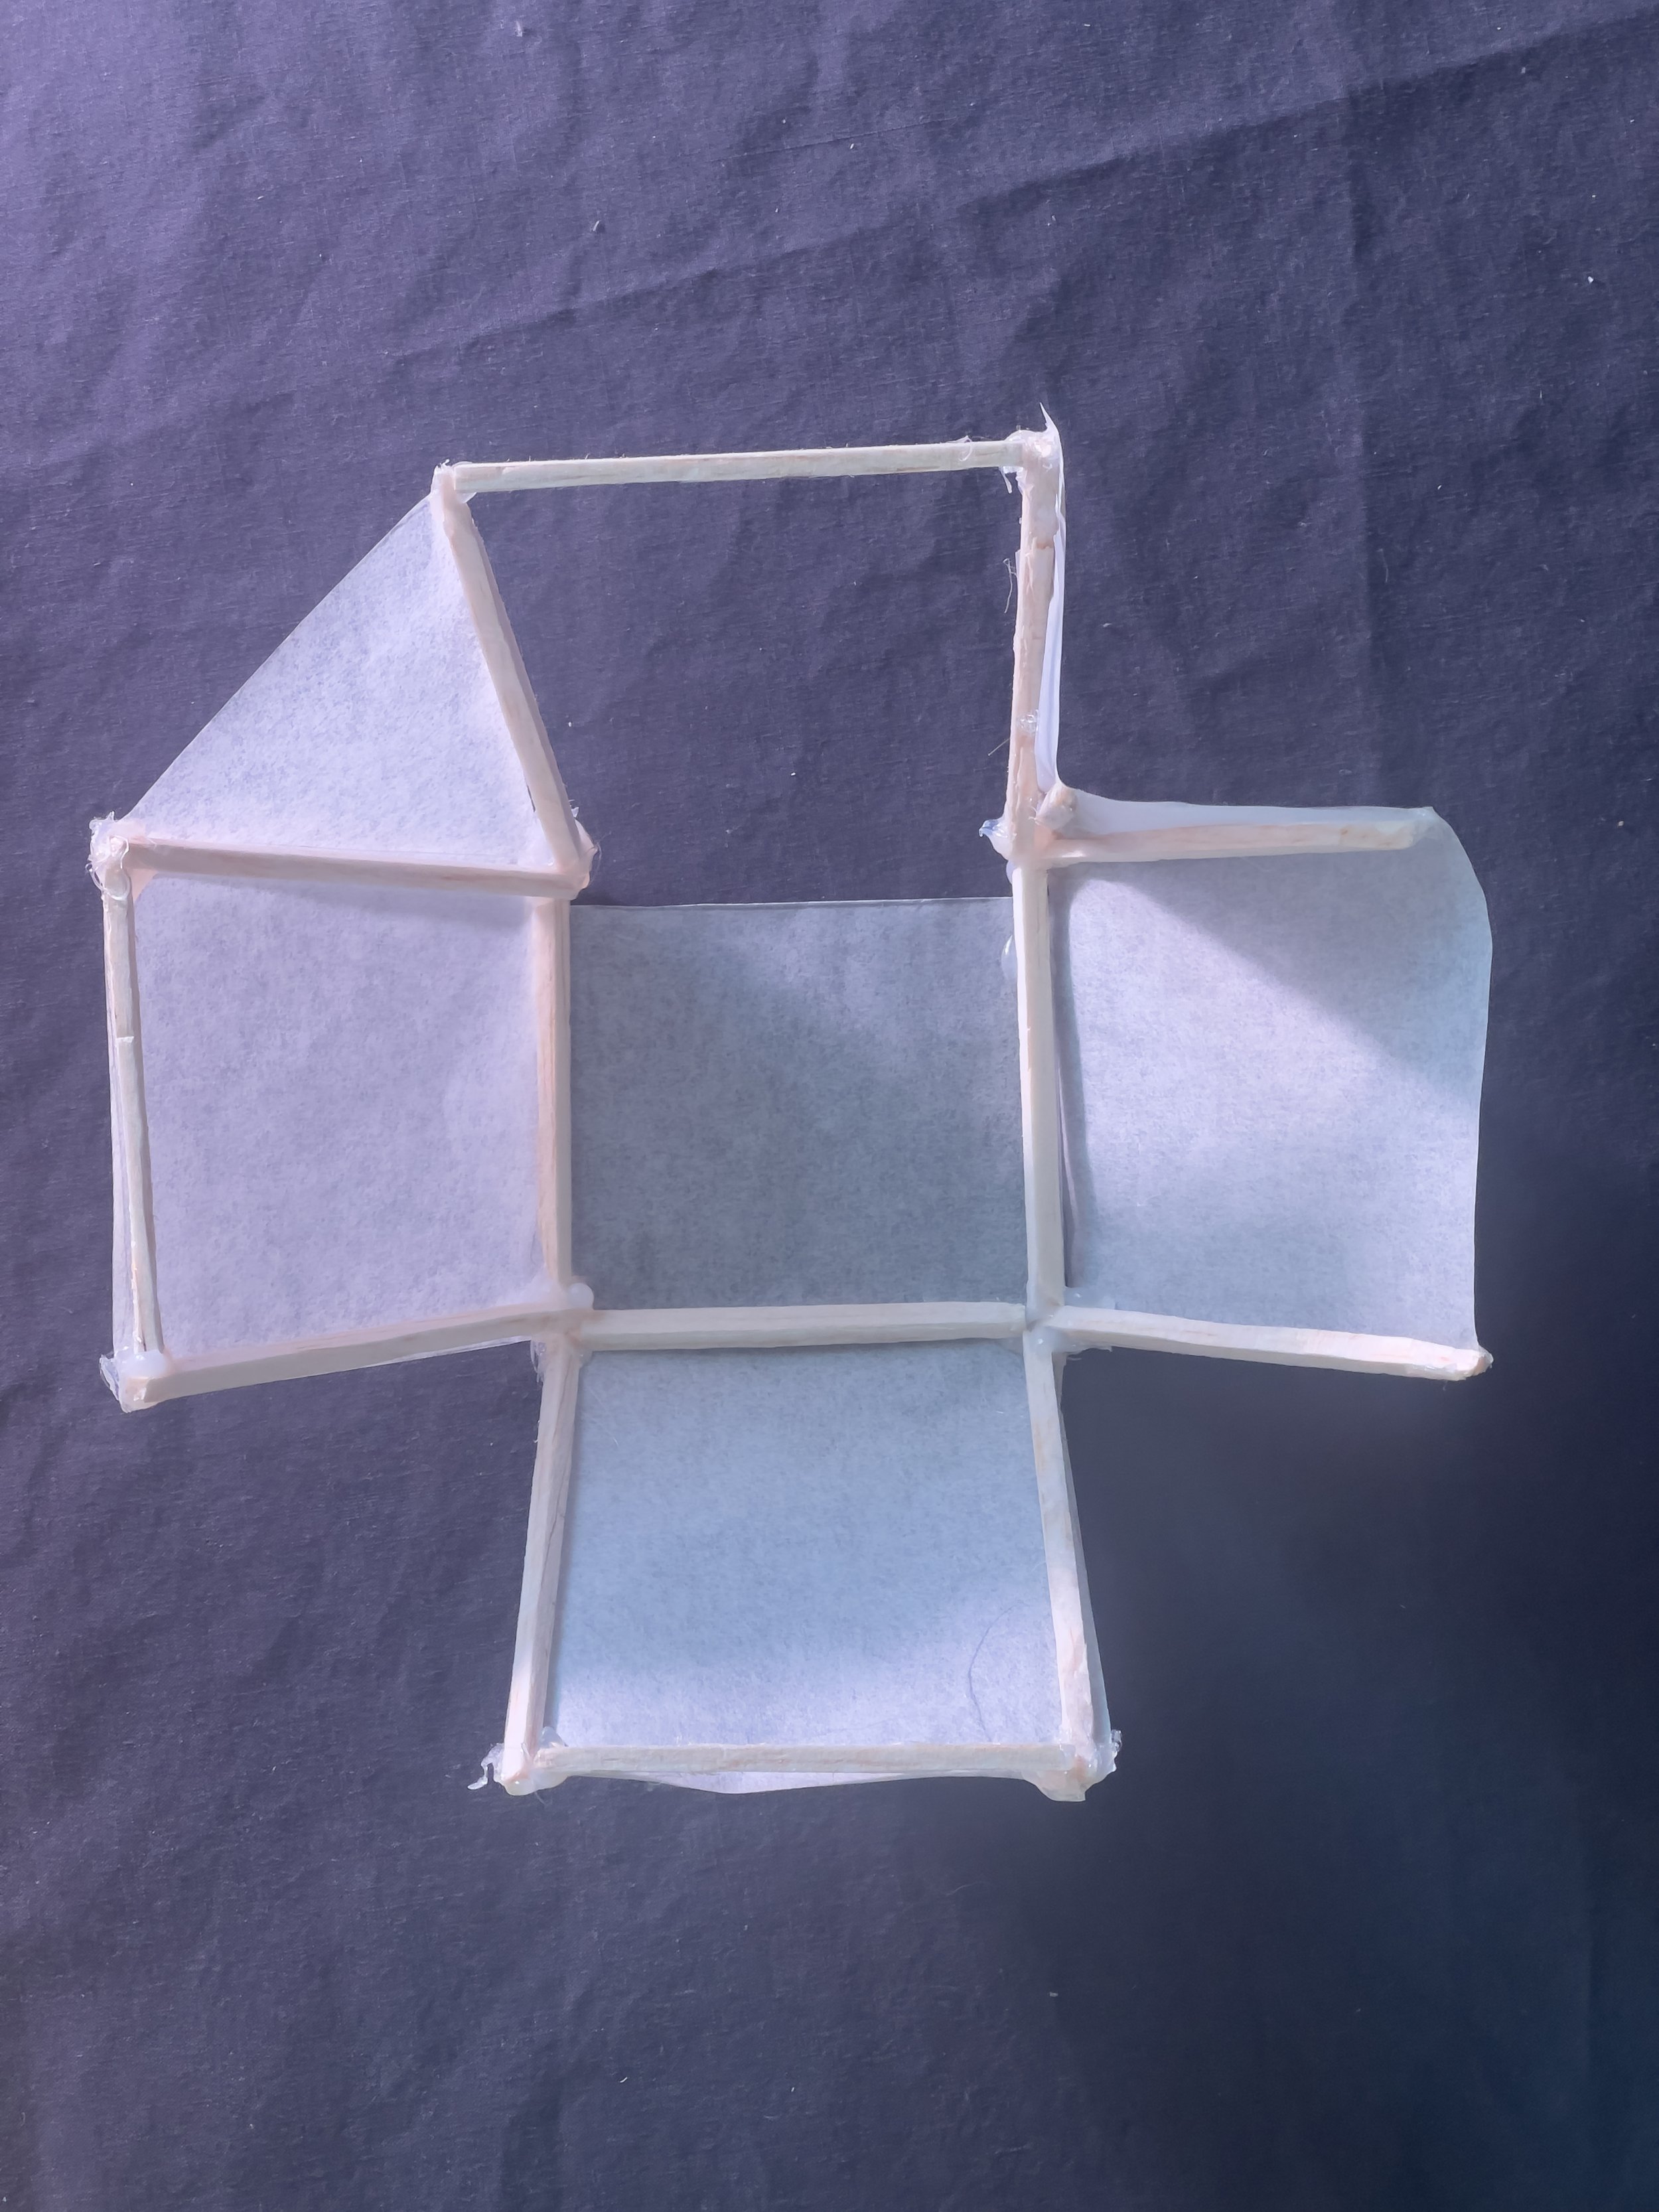
Our professor put forward a prompt where each student was to create a model with the following constraints:
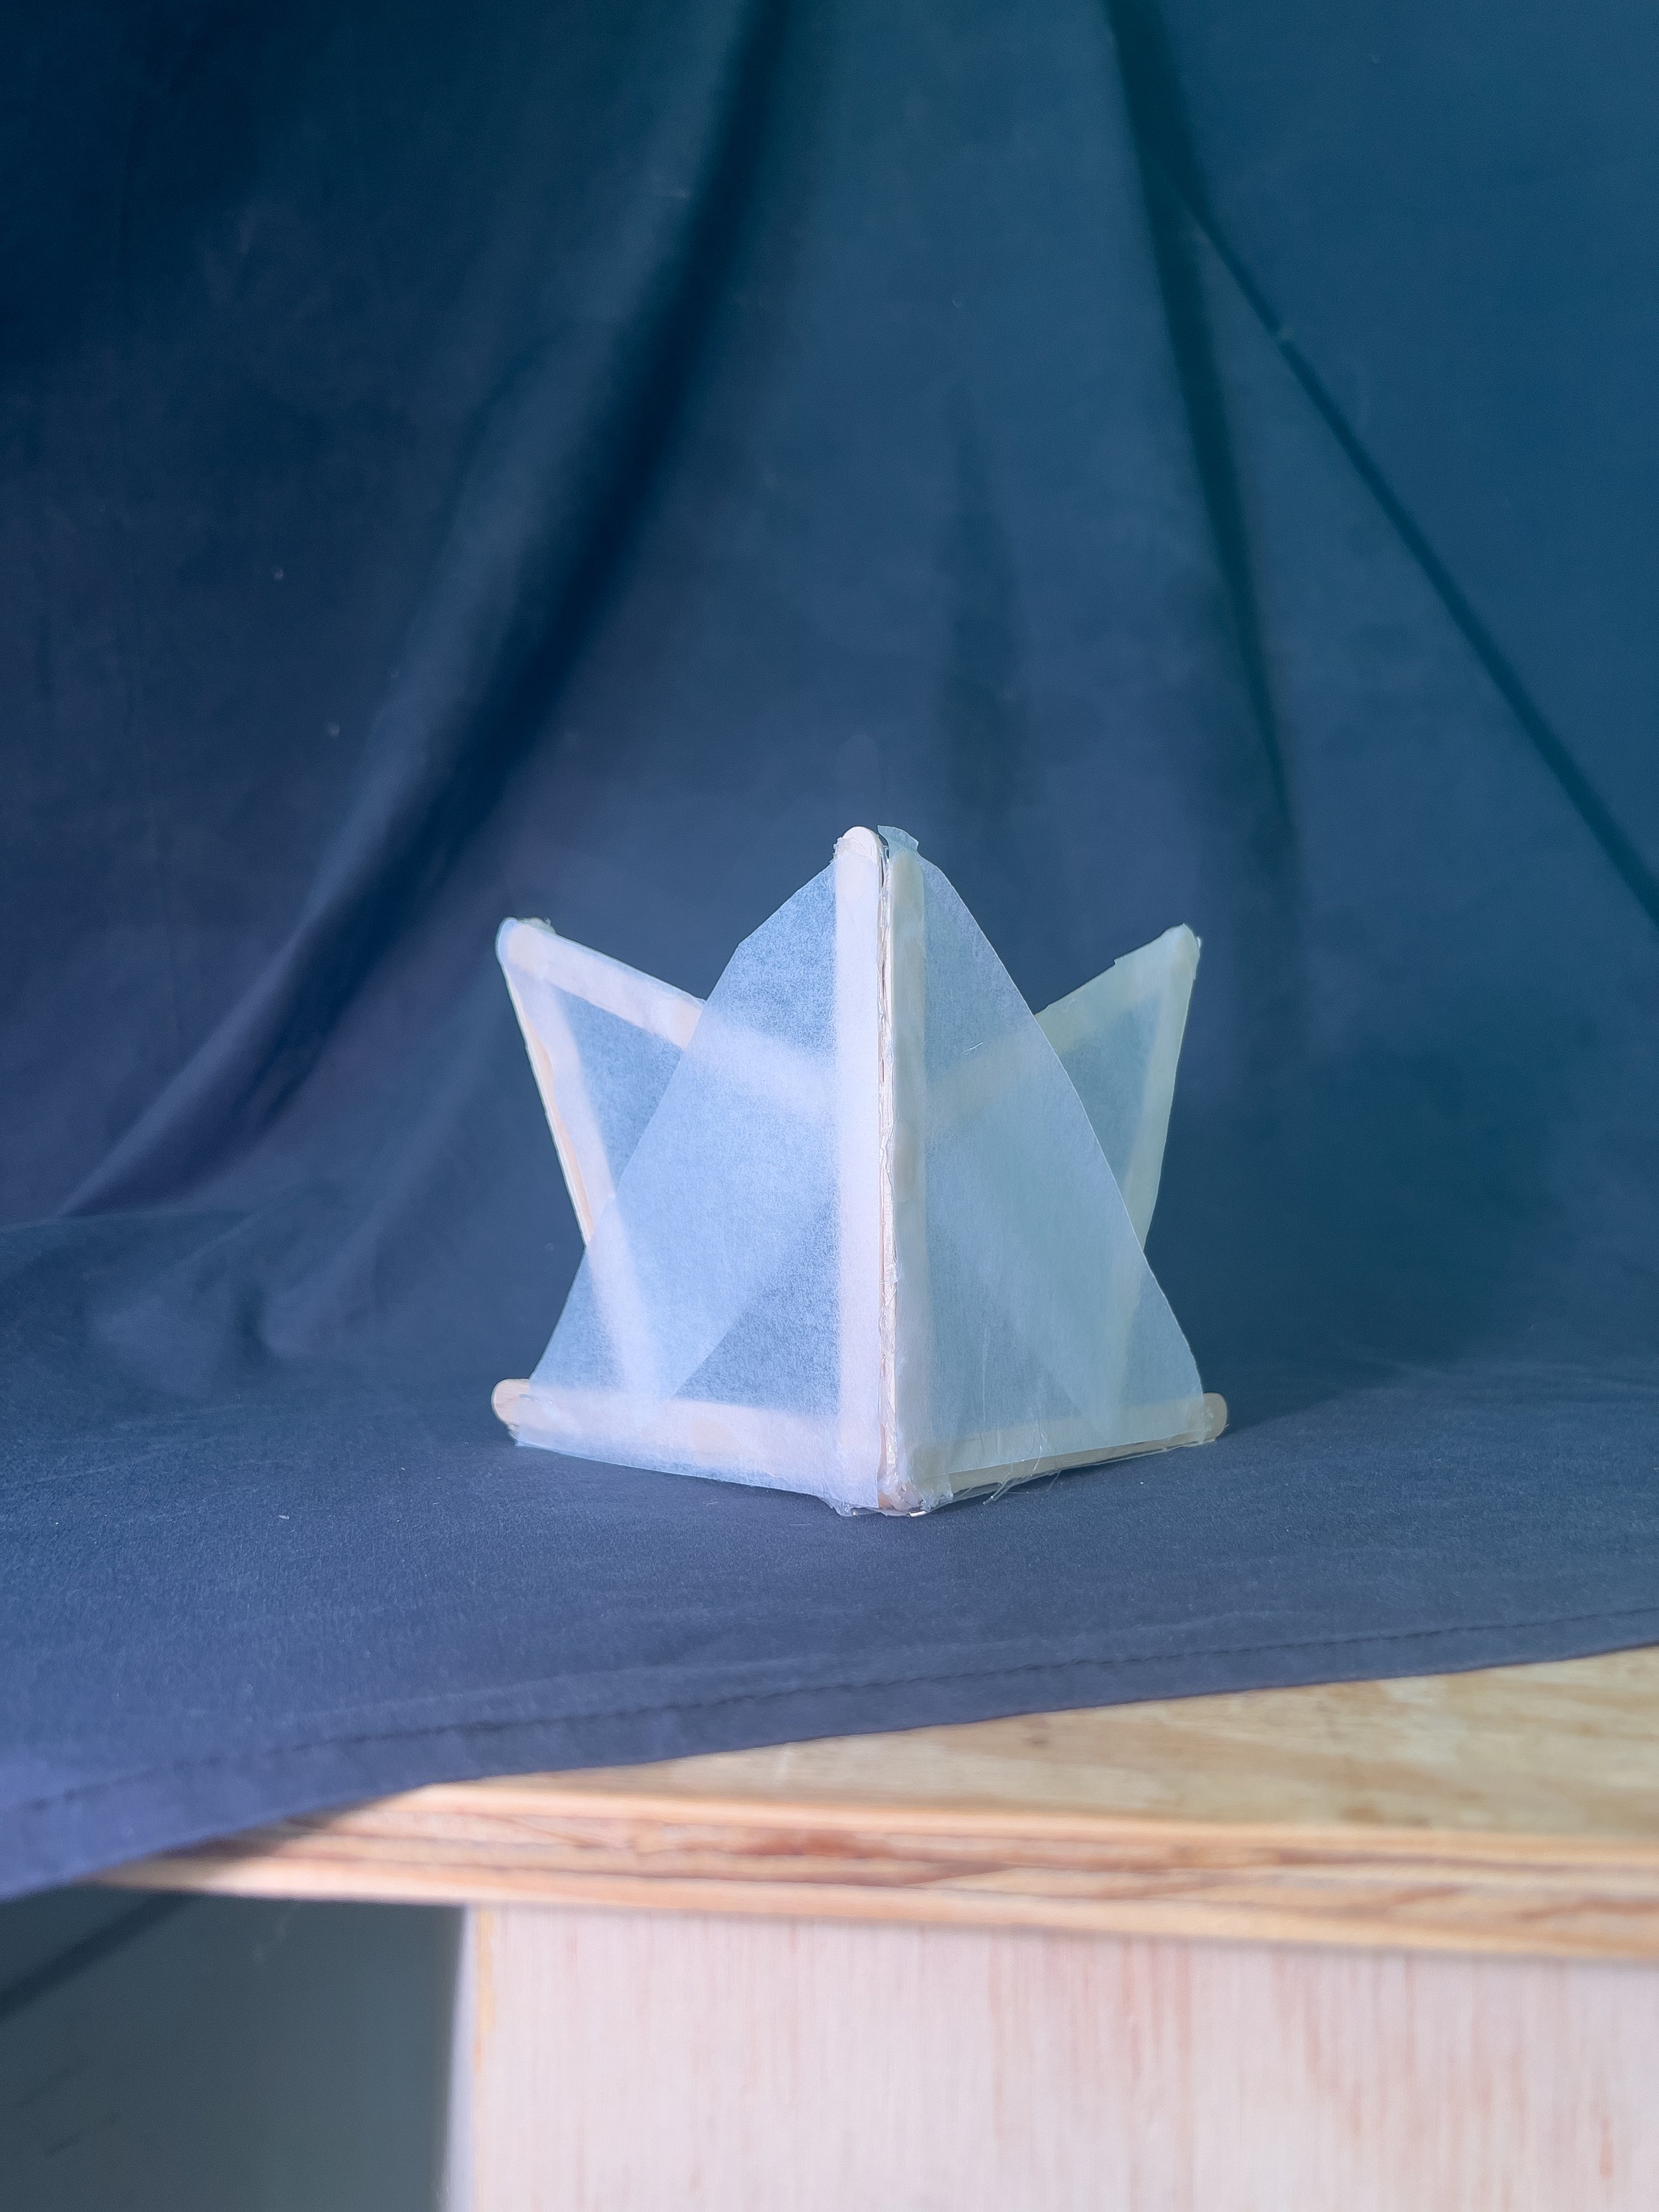
Two materials only:
Balsa wood
Trace Paper
A randomly assigned verb determining the project
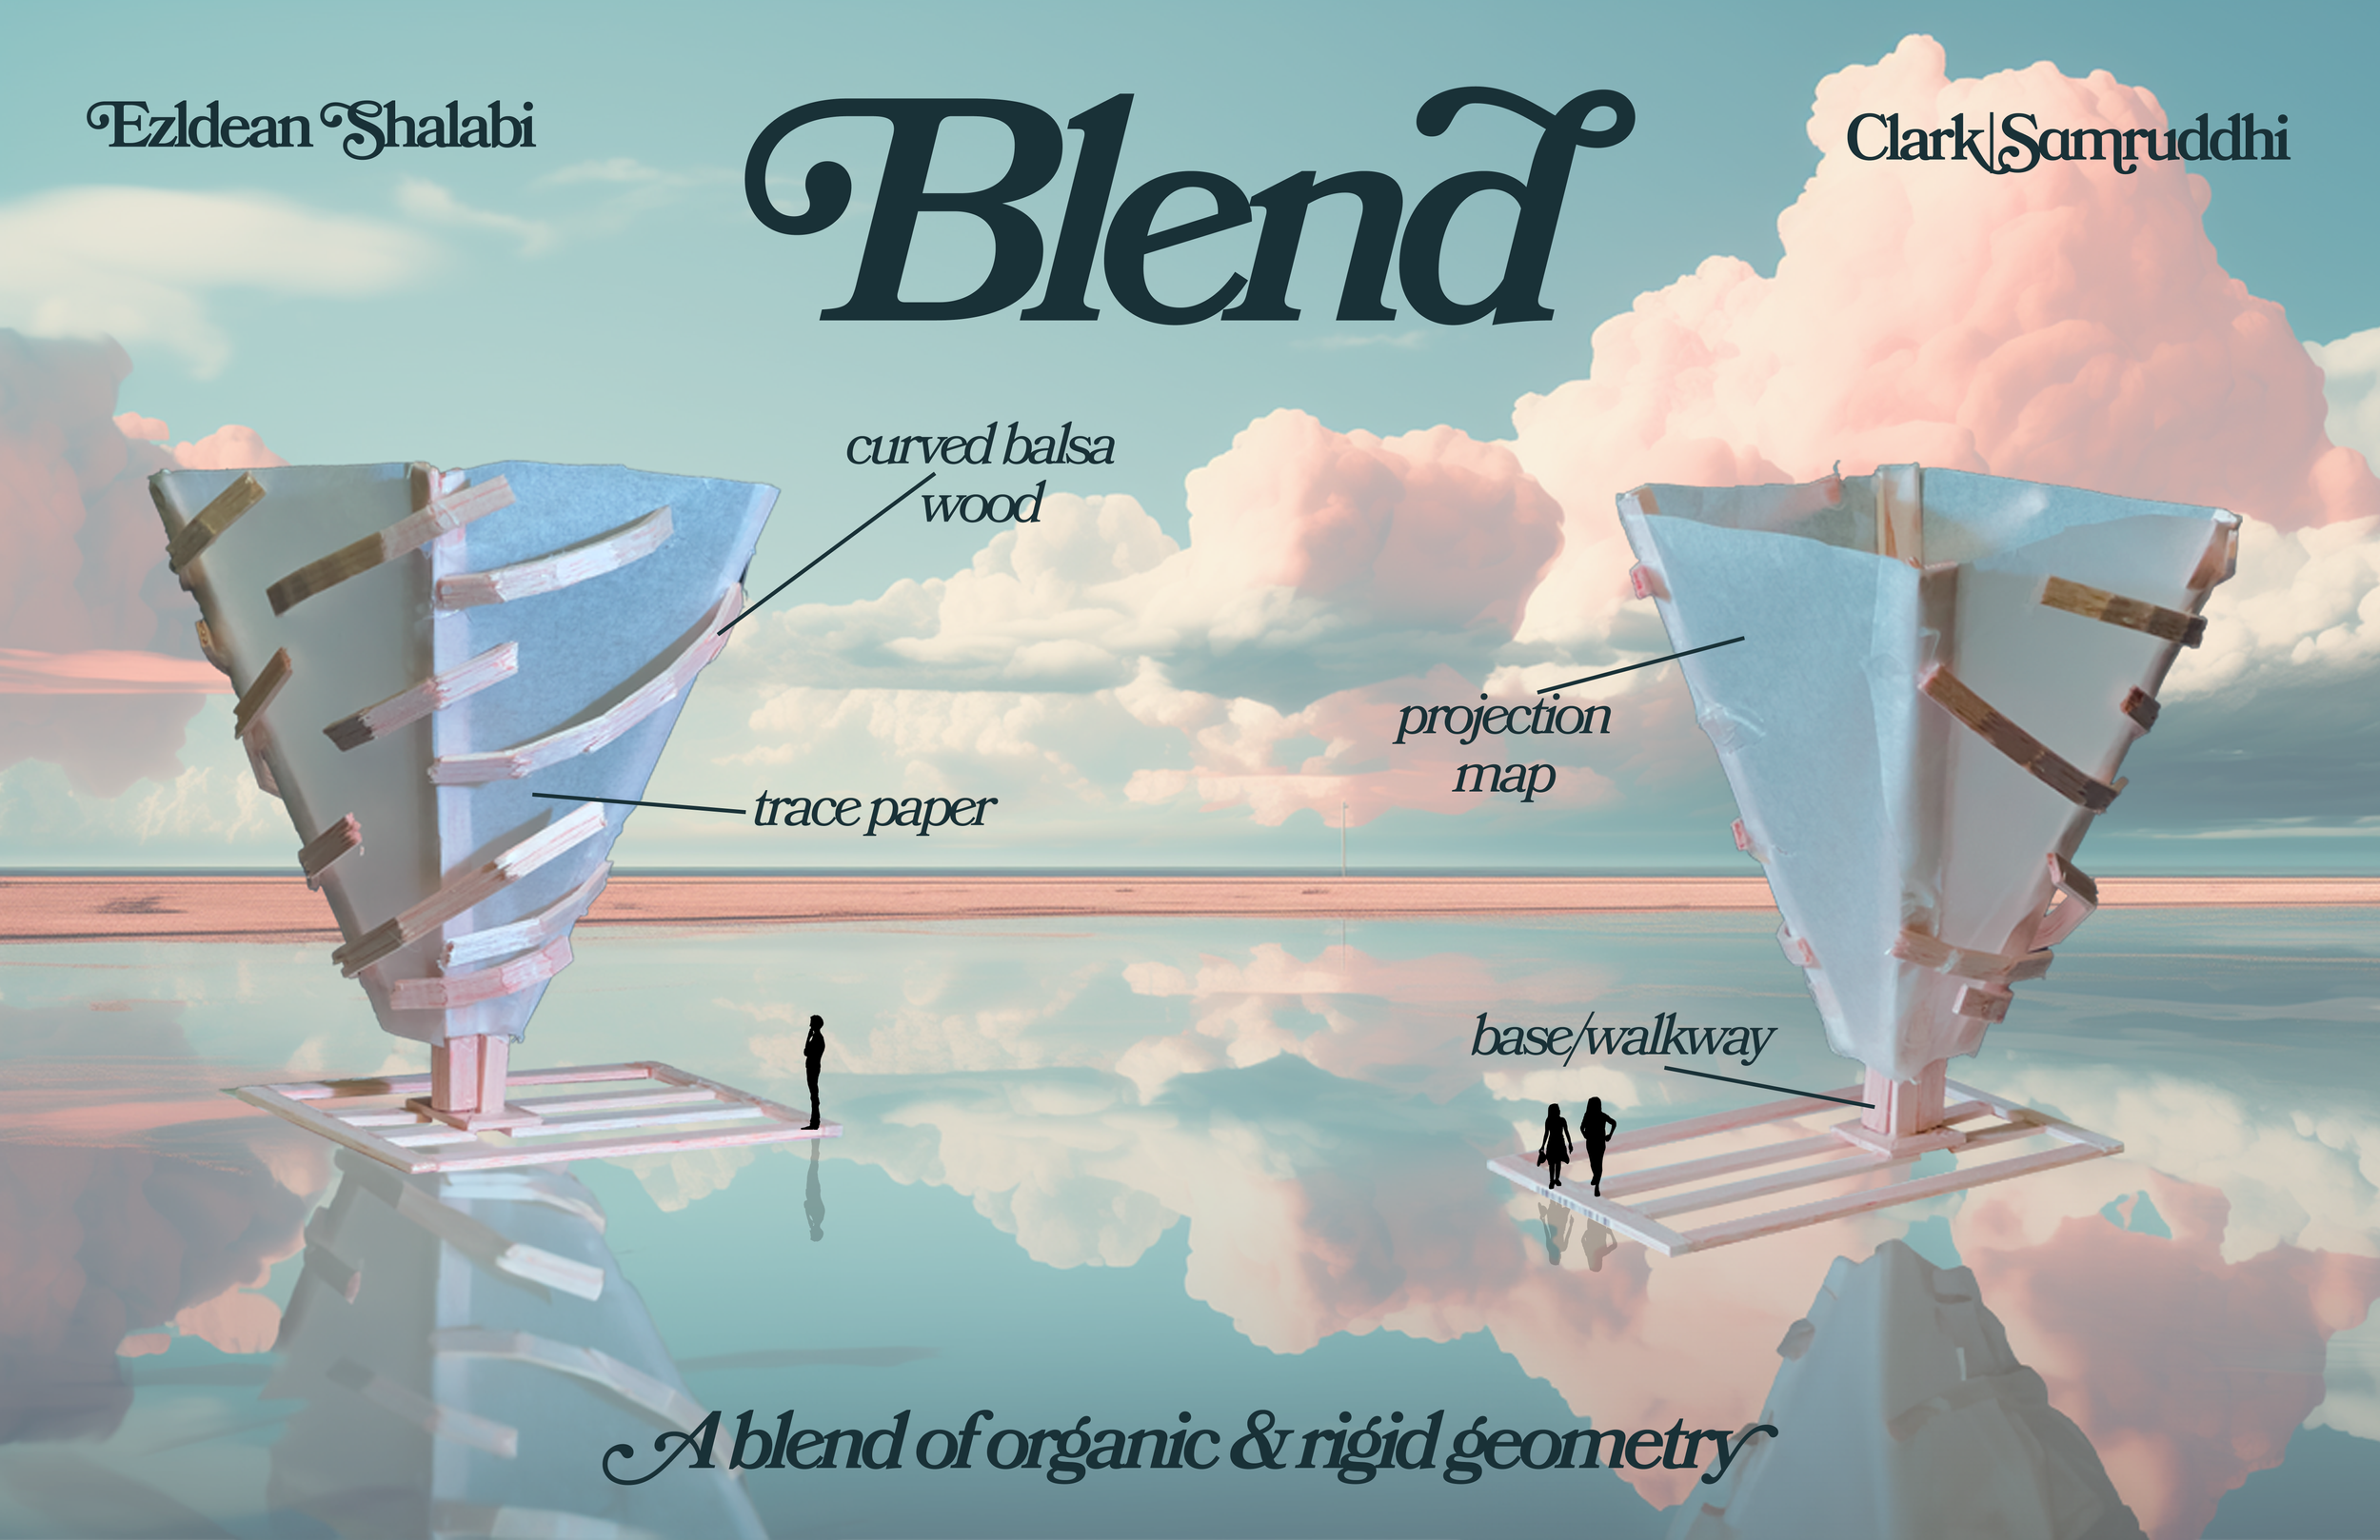
“blend”
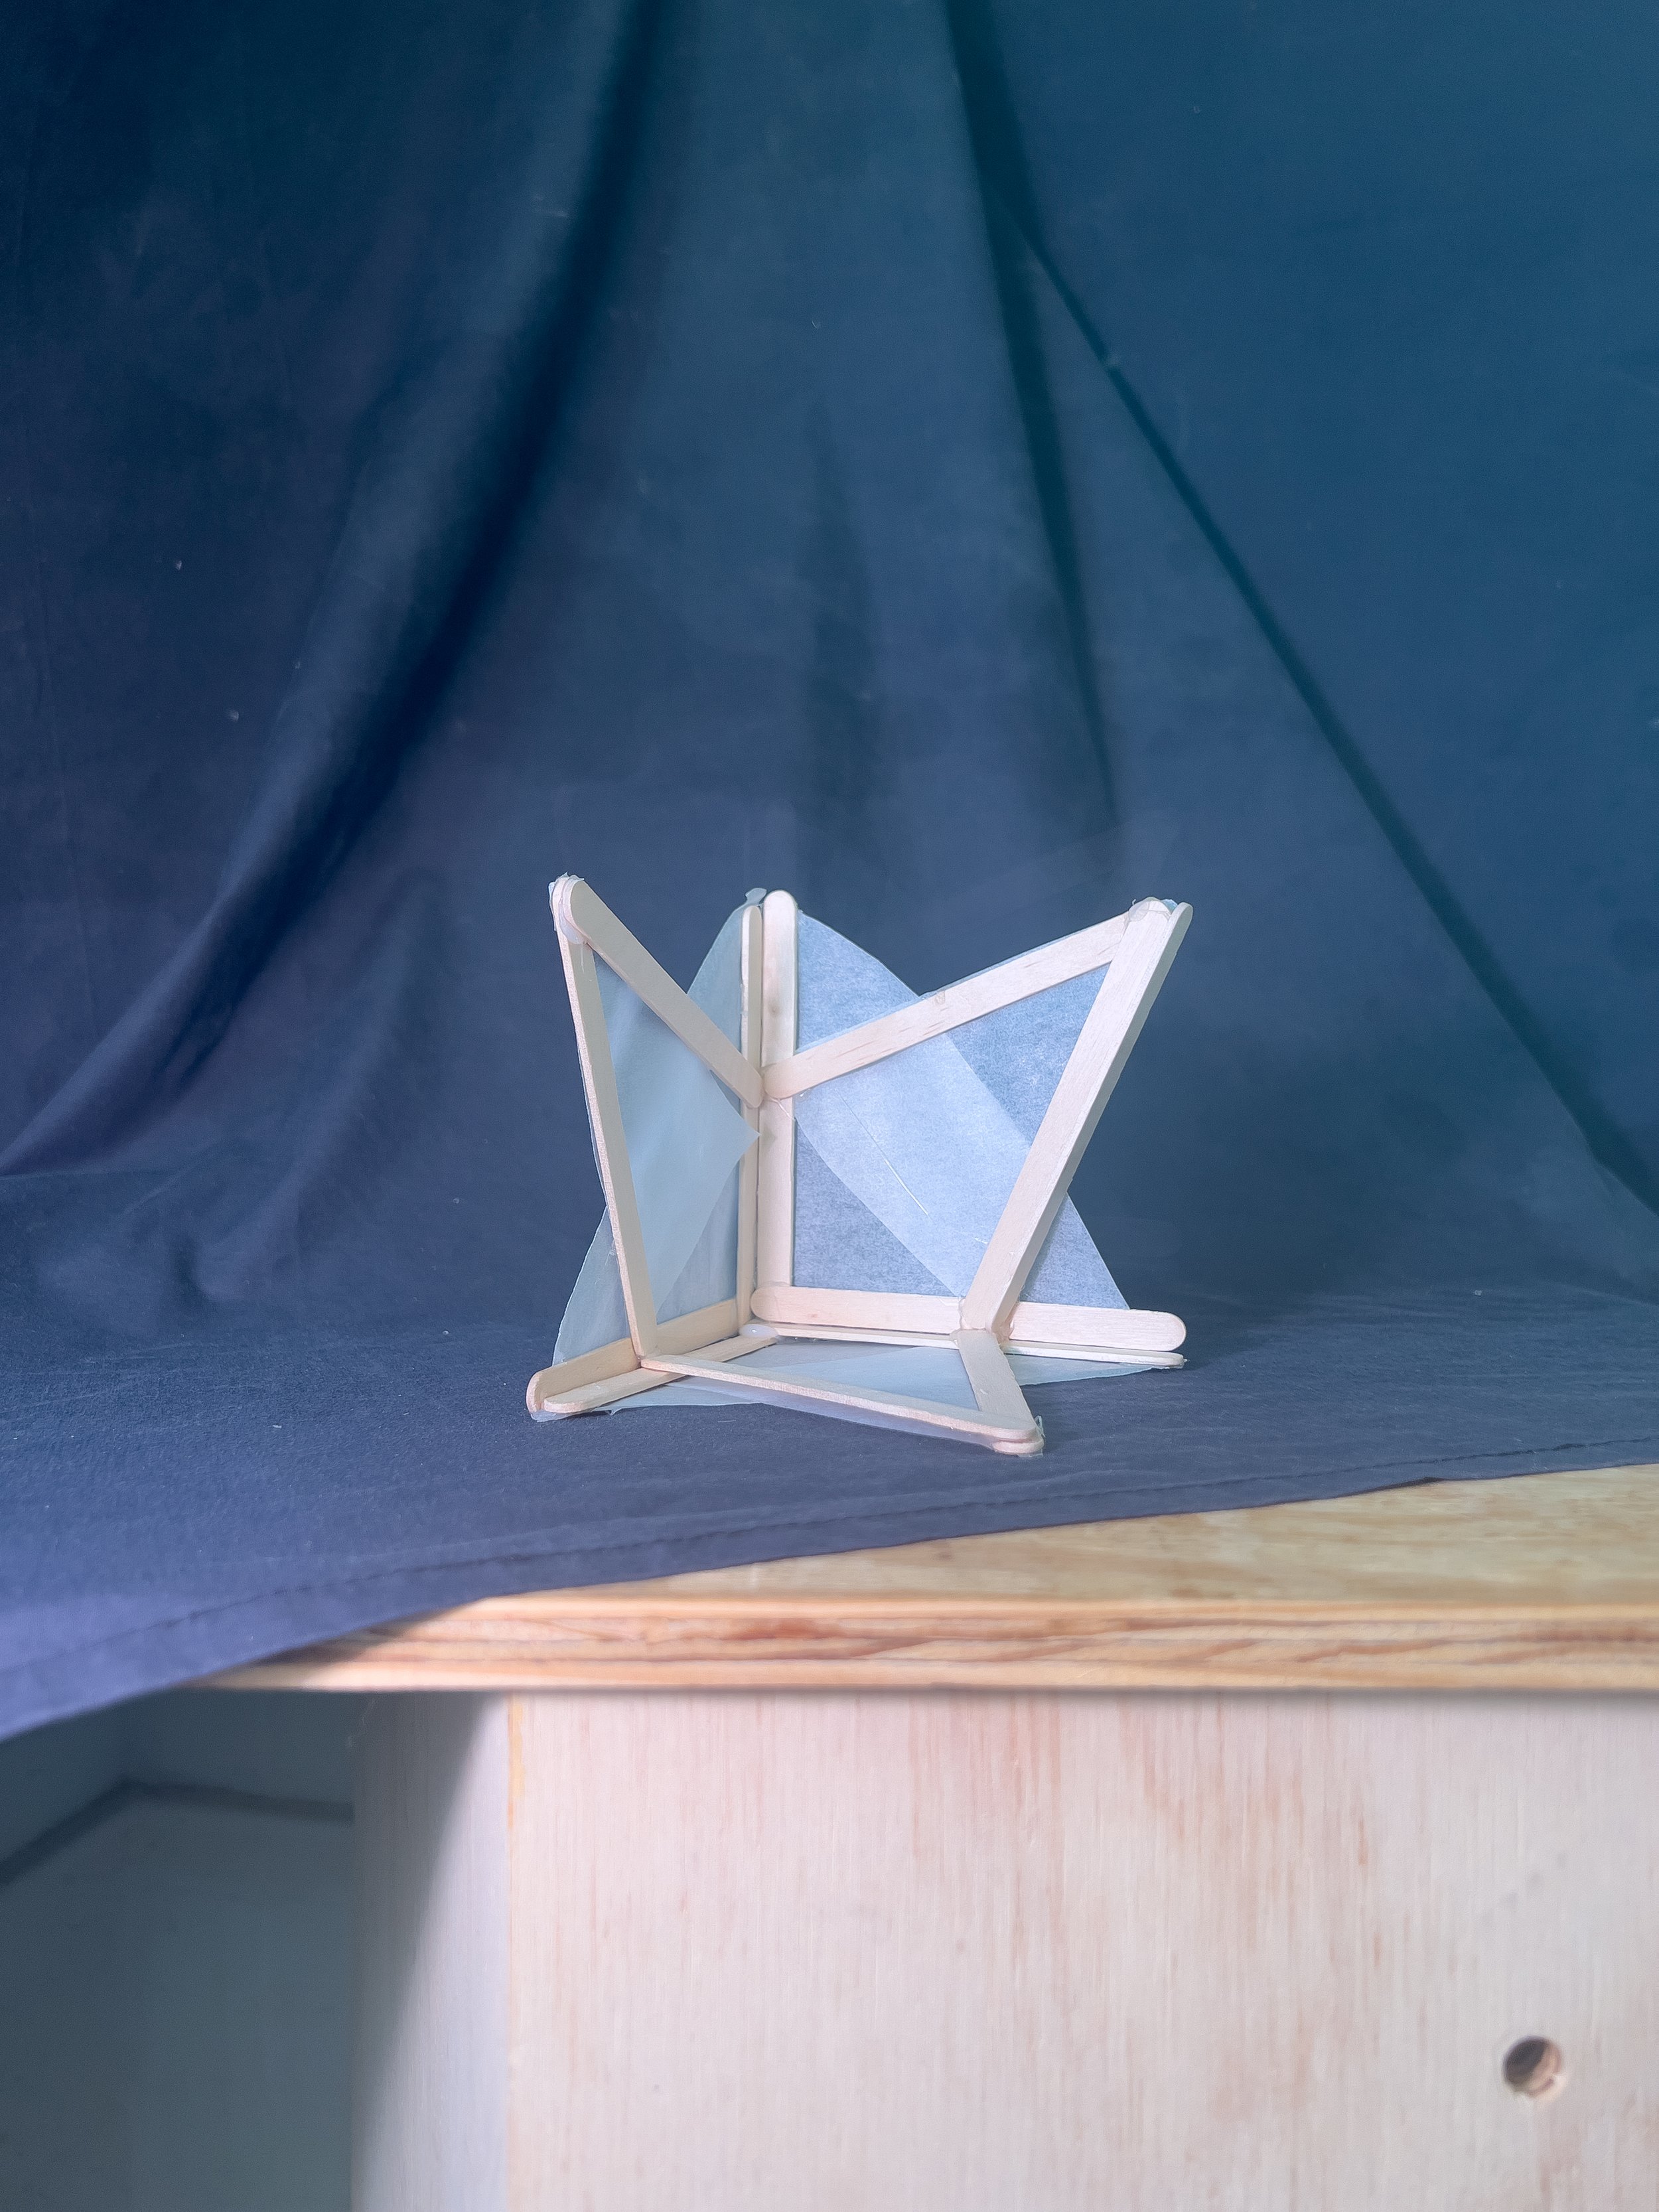
Process:
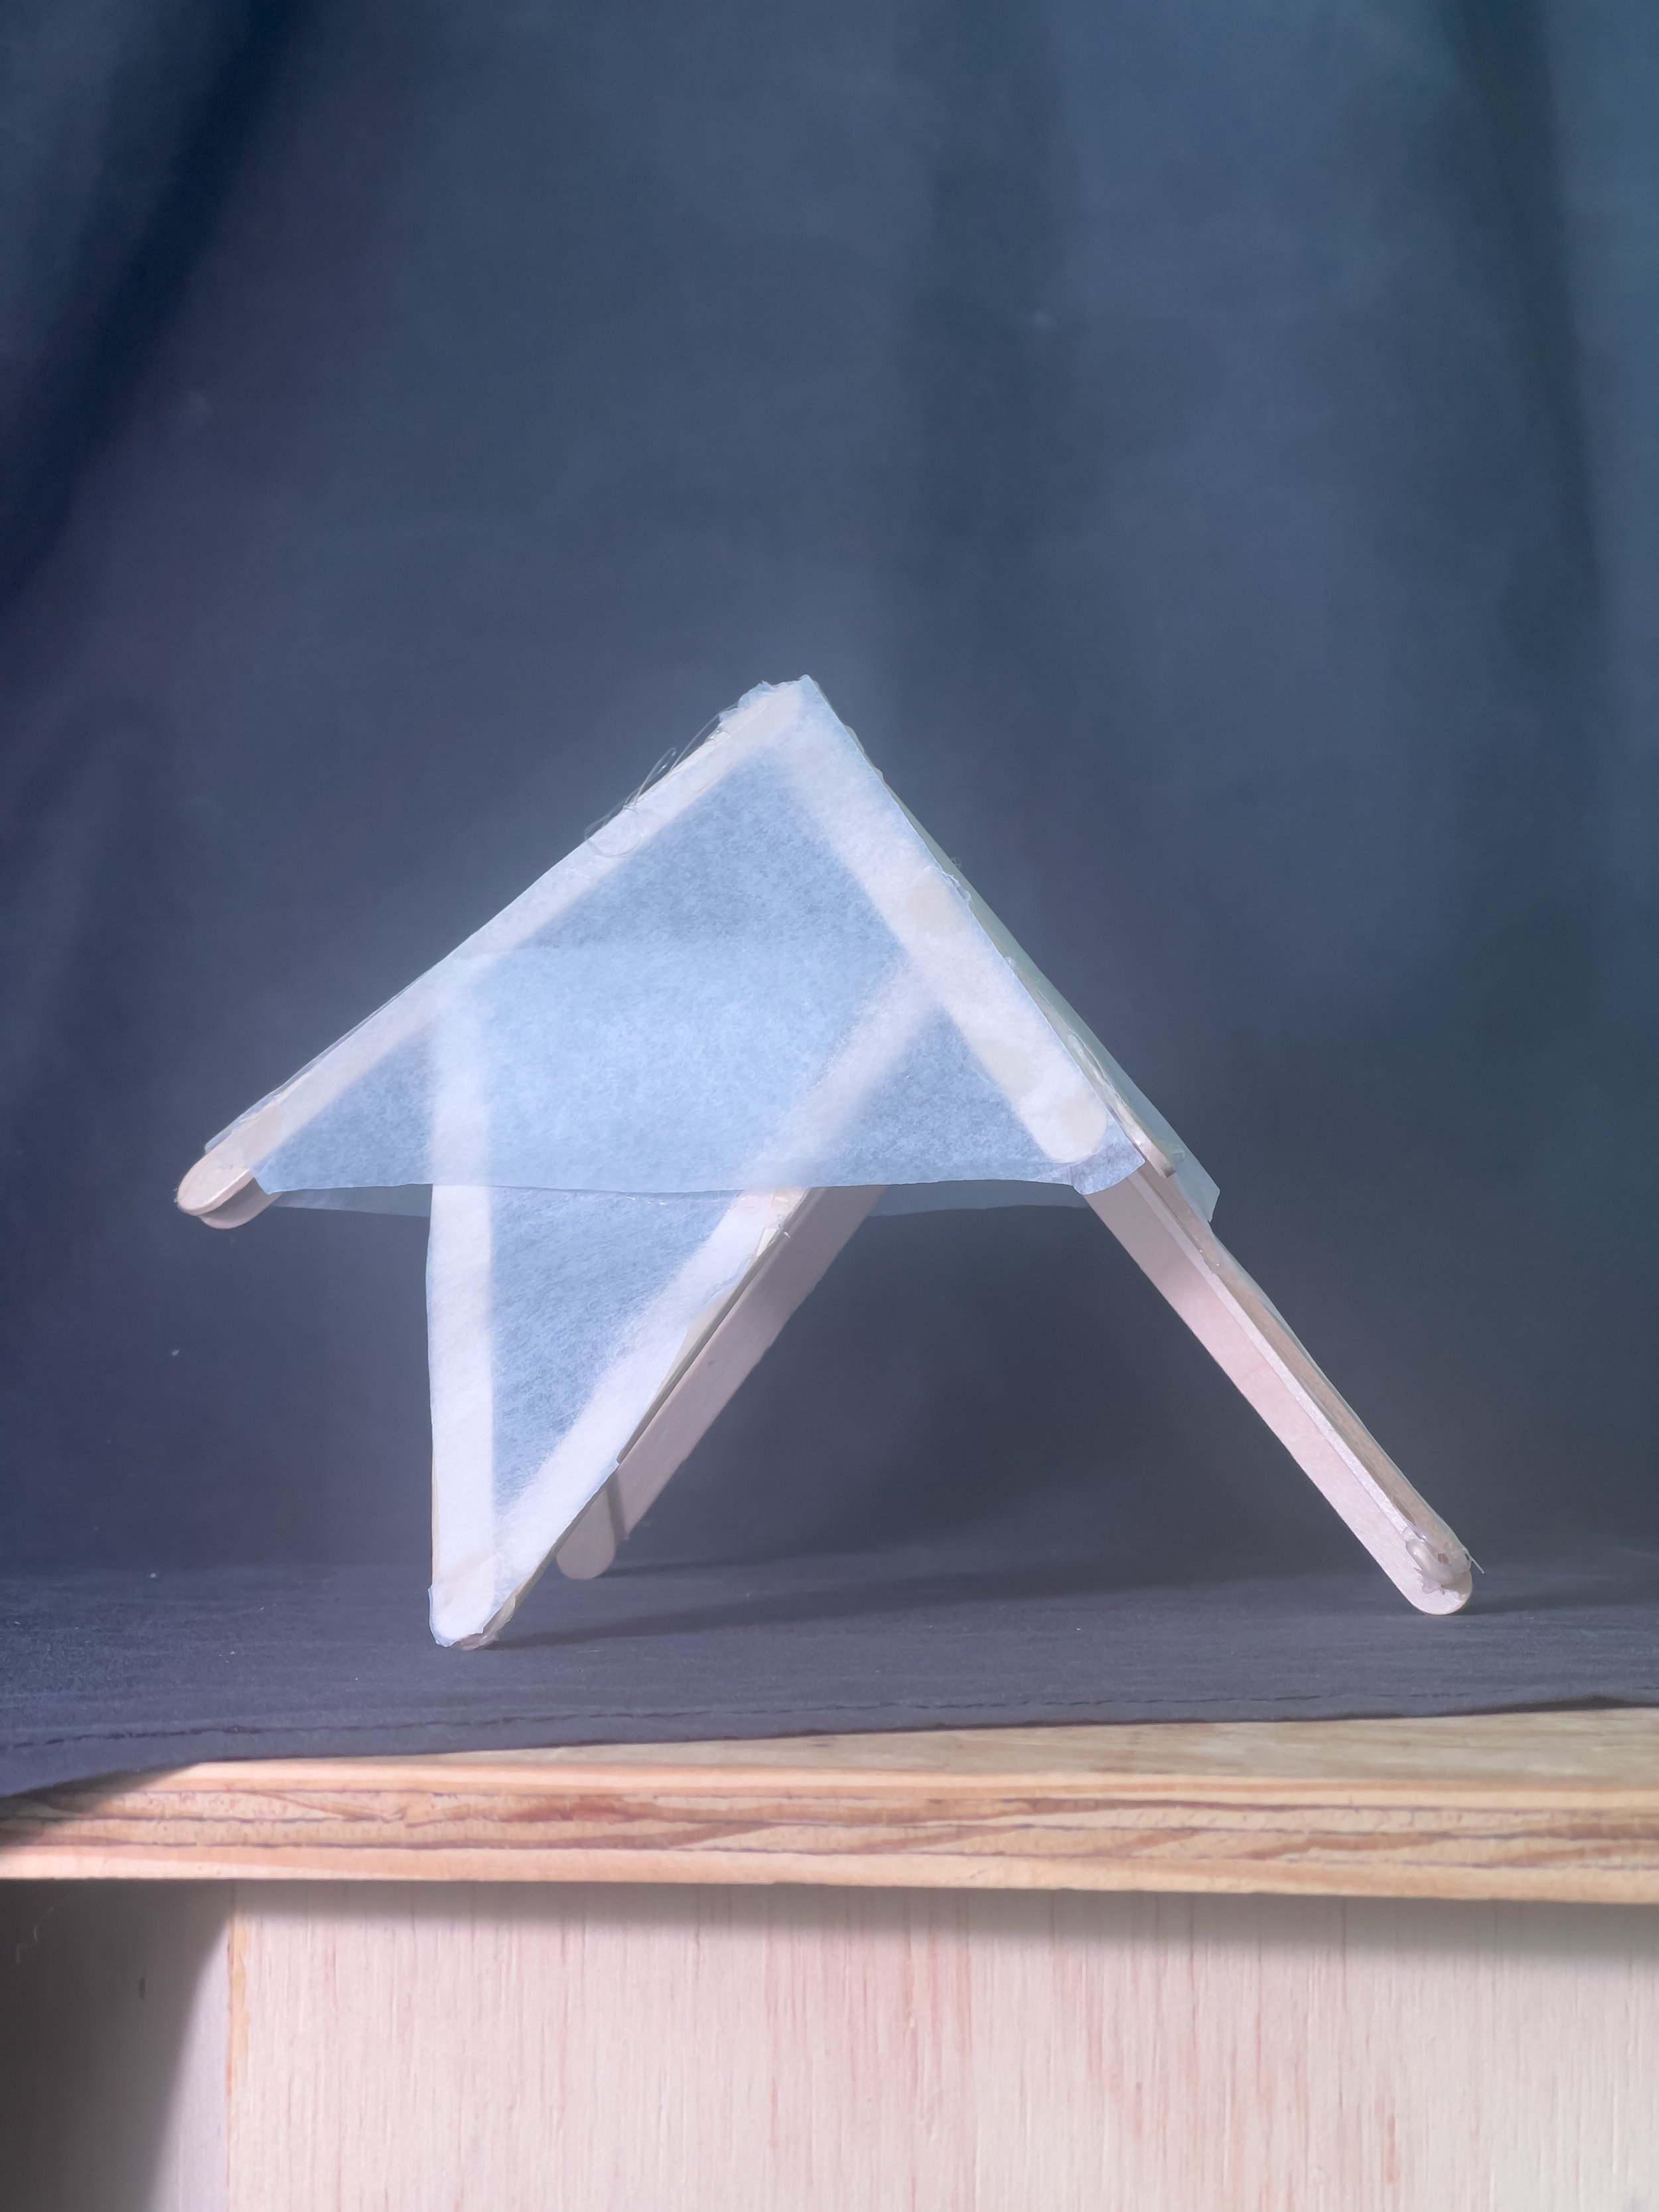
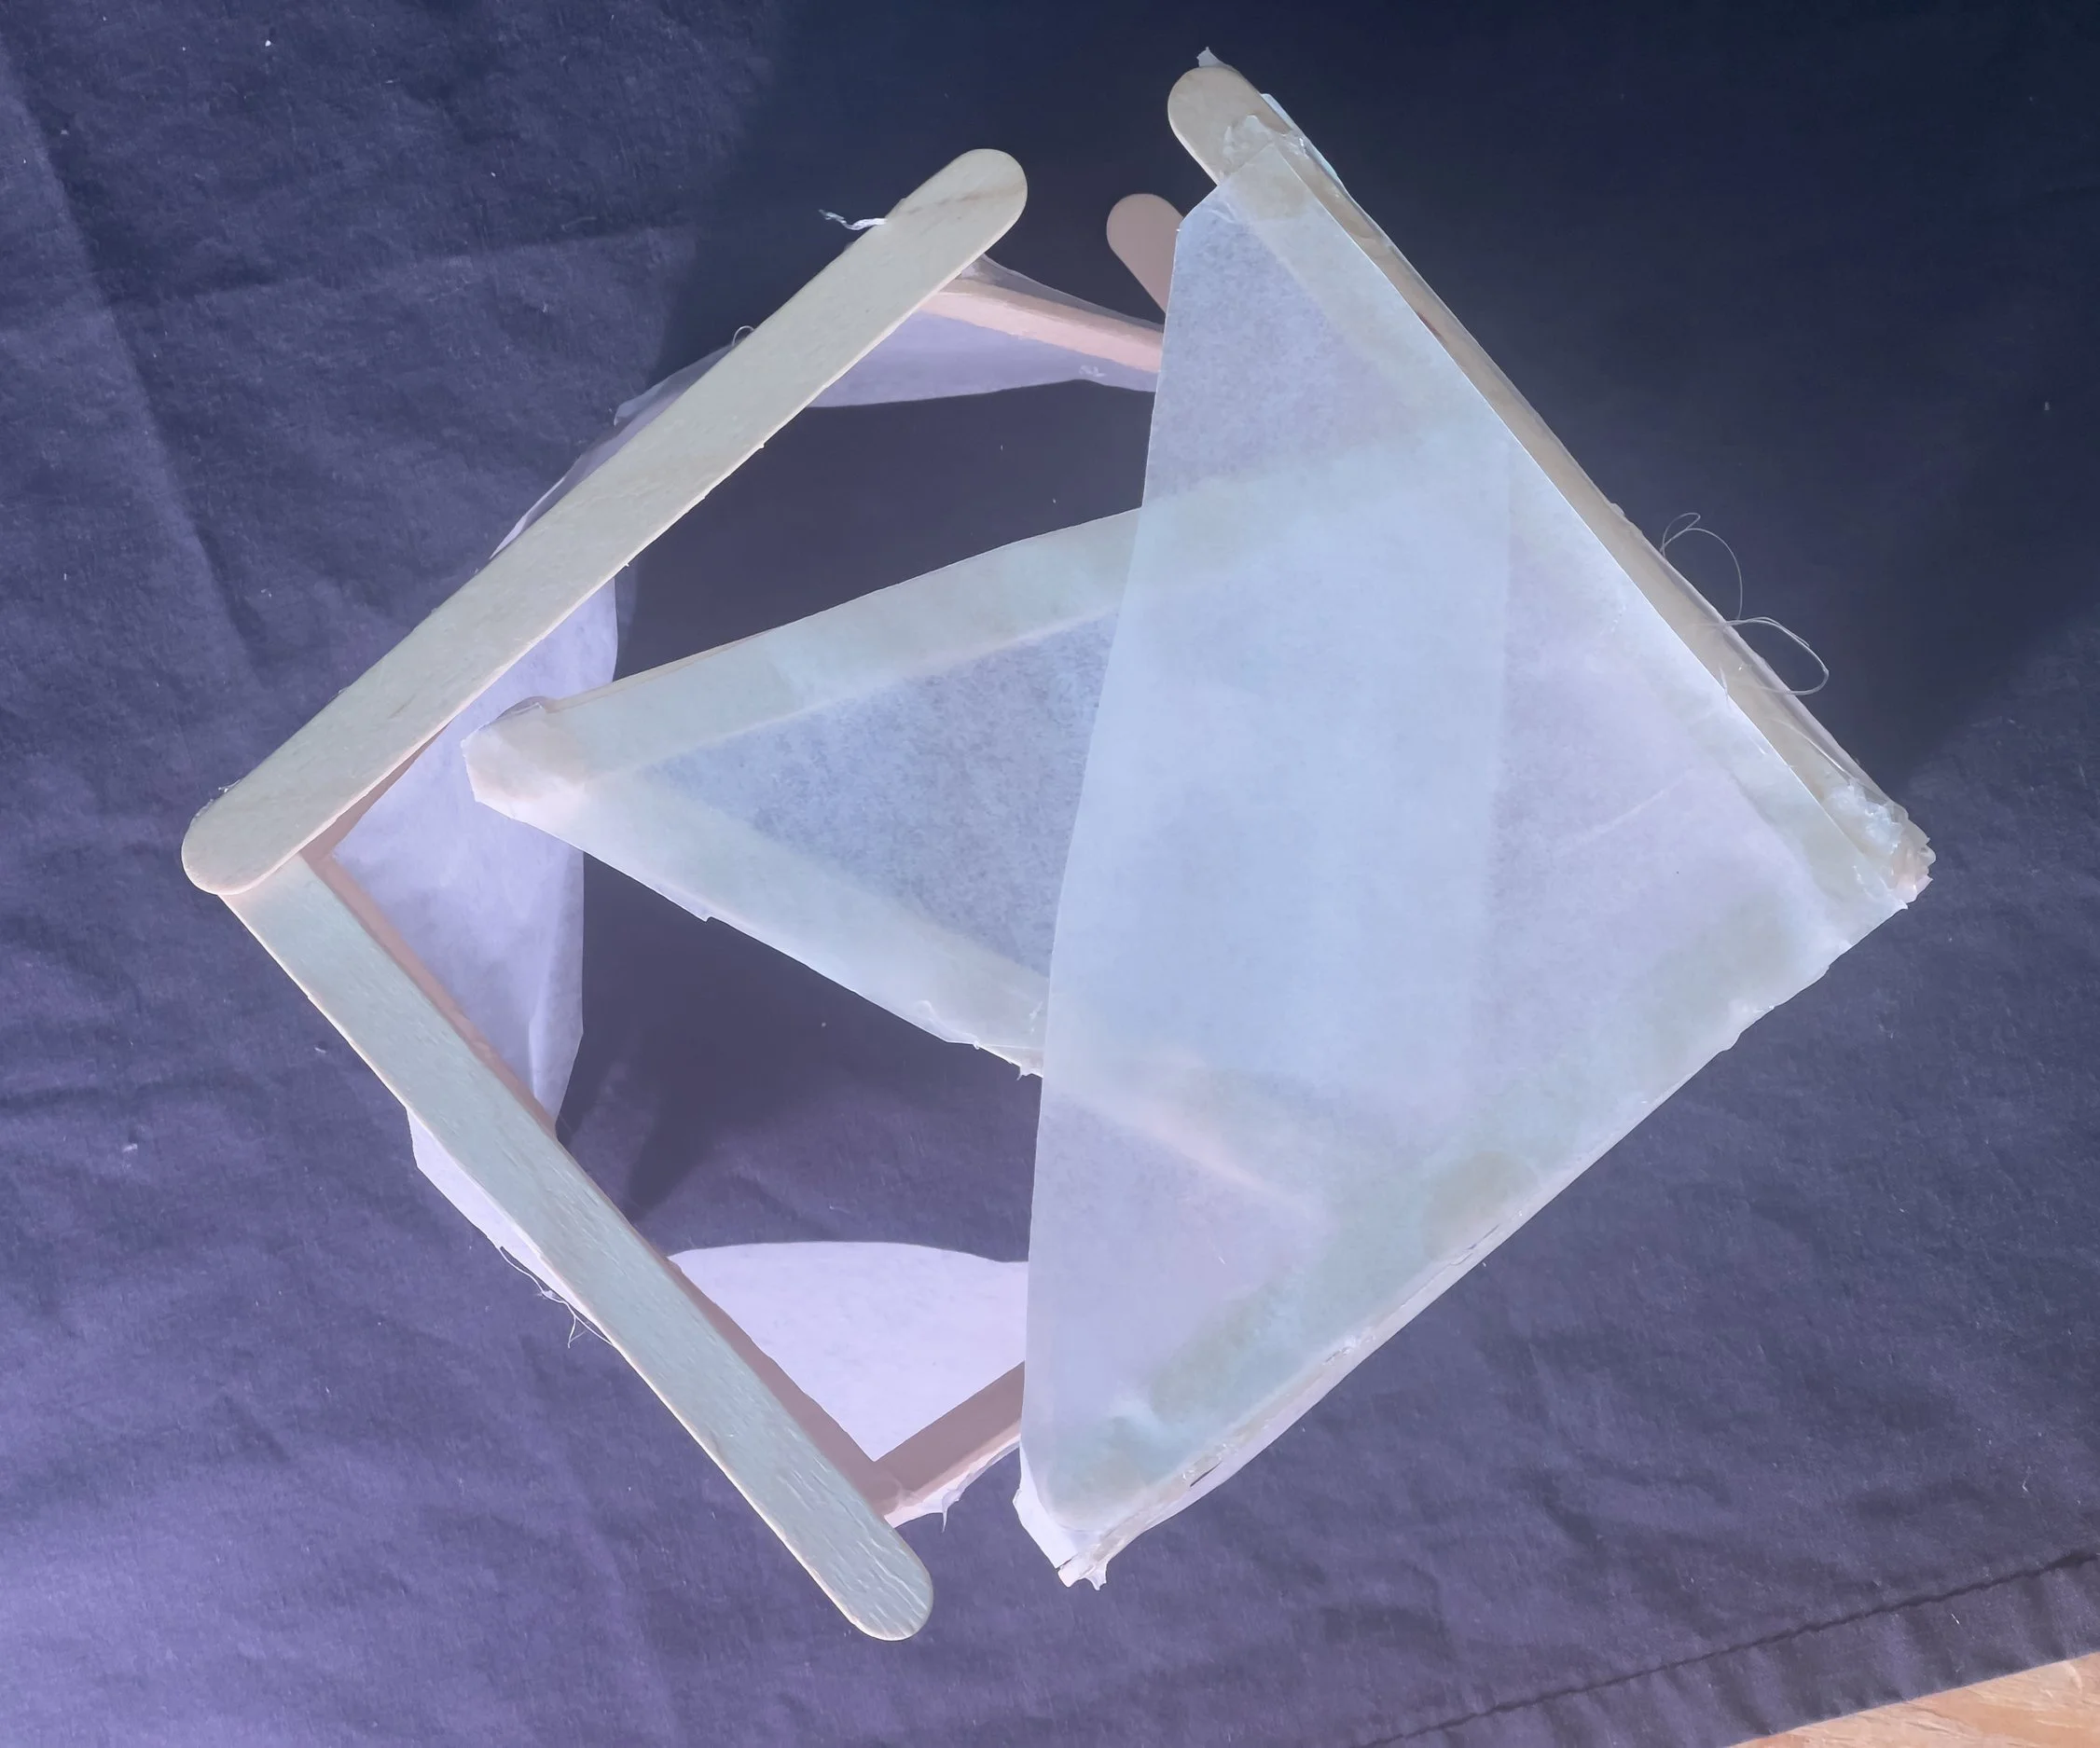
Constructing and photographing physical model
Processing images w/ Lightroom & Photoshop
Generating backgrounds & matching with images for renders using Midjourney+ Photoshop

Lightroom
Photoshop
Midjourney
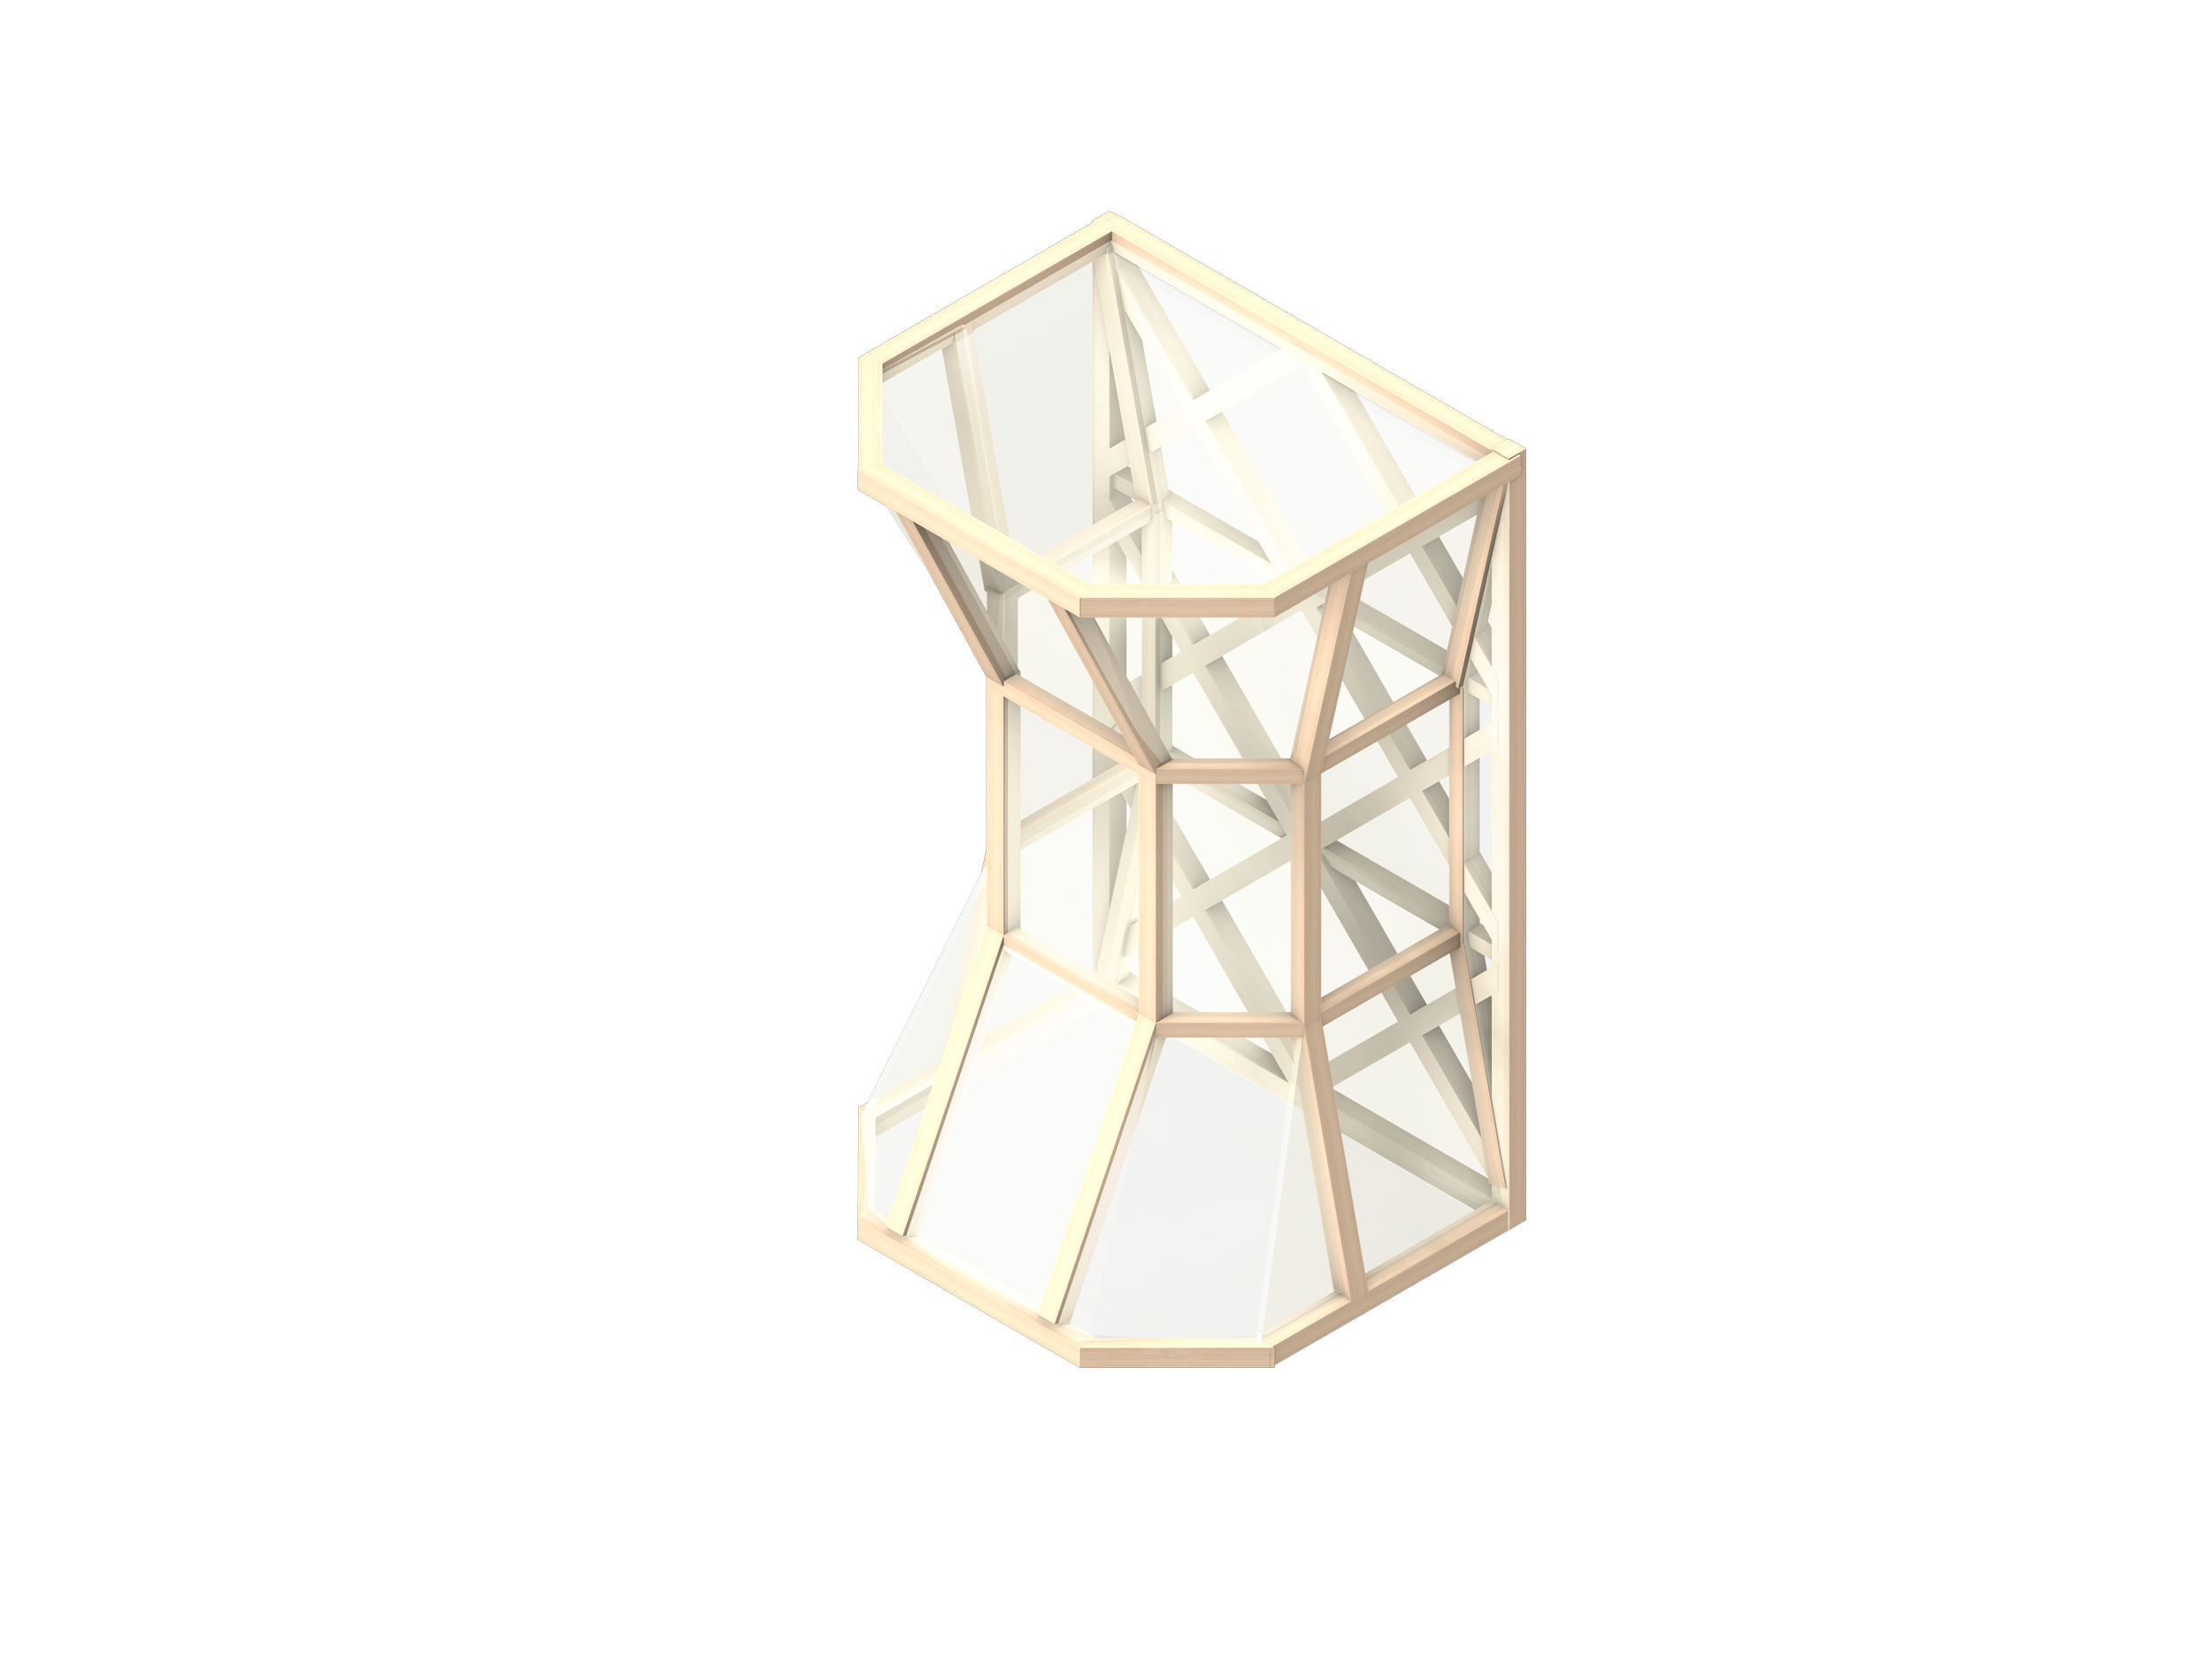
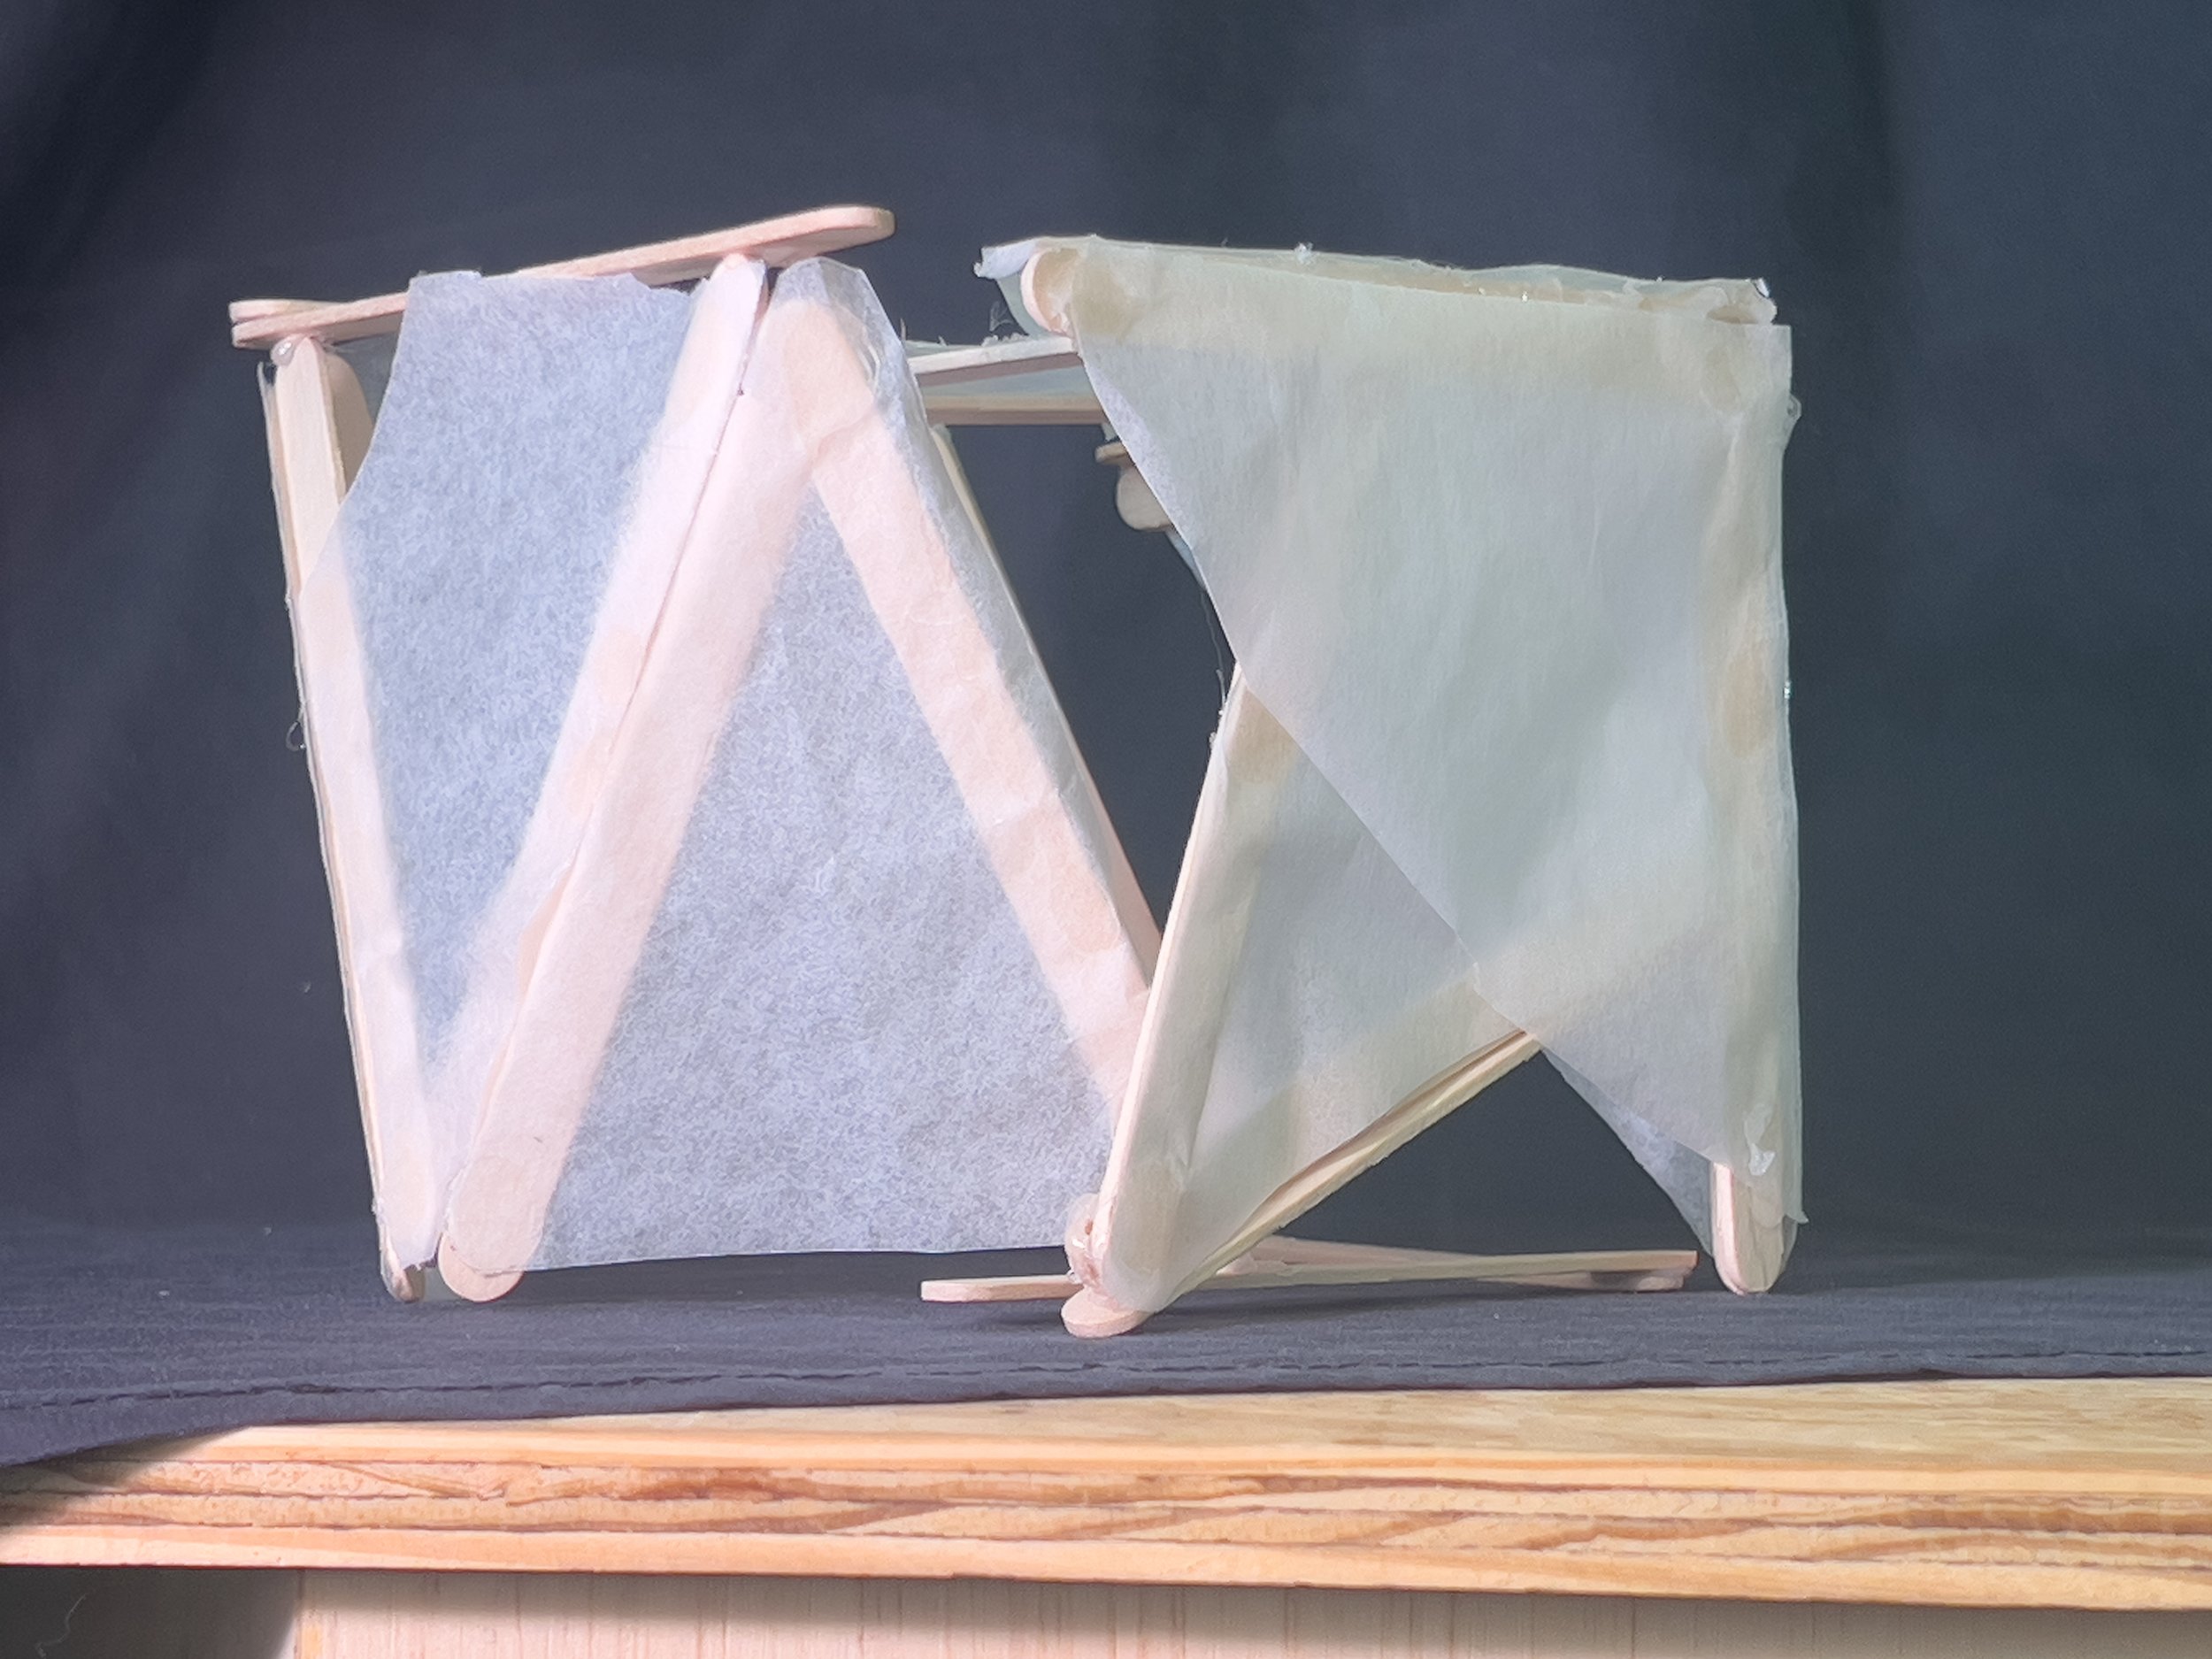
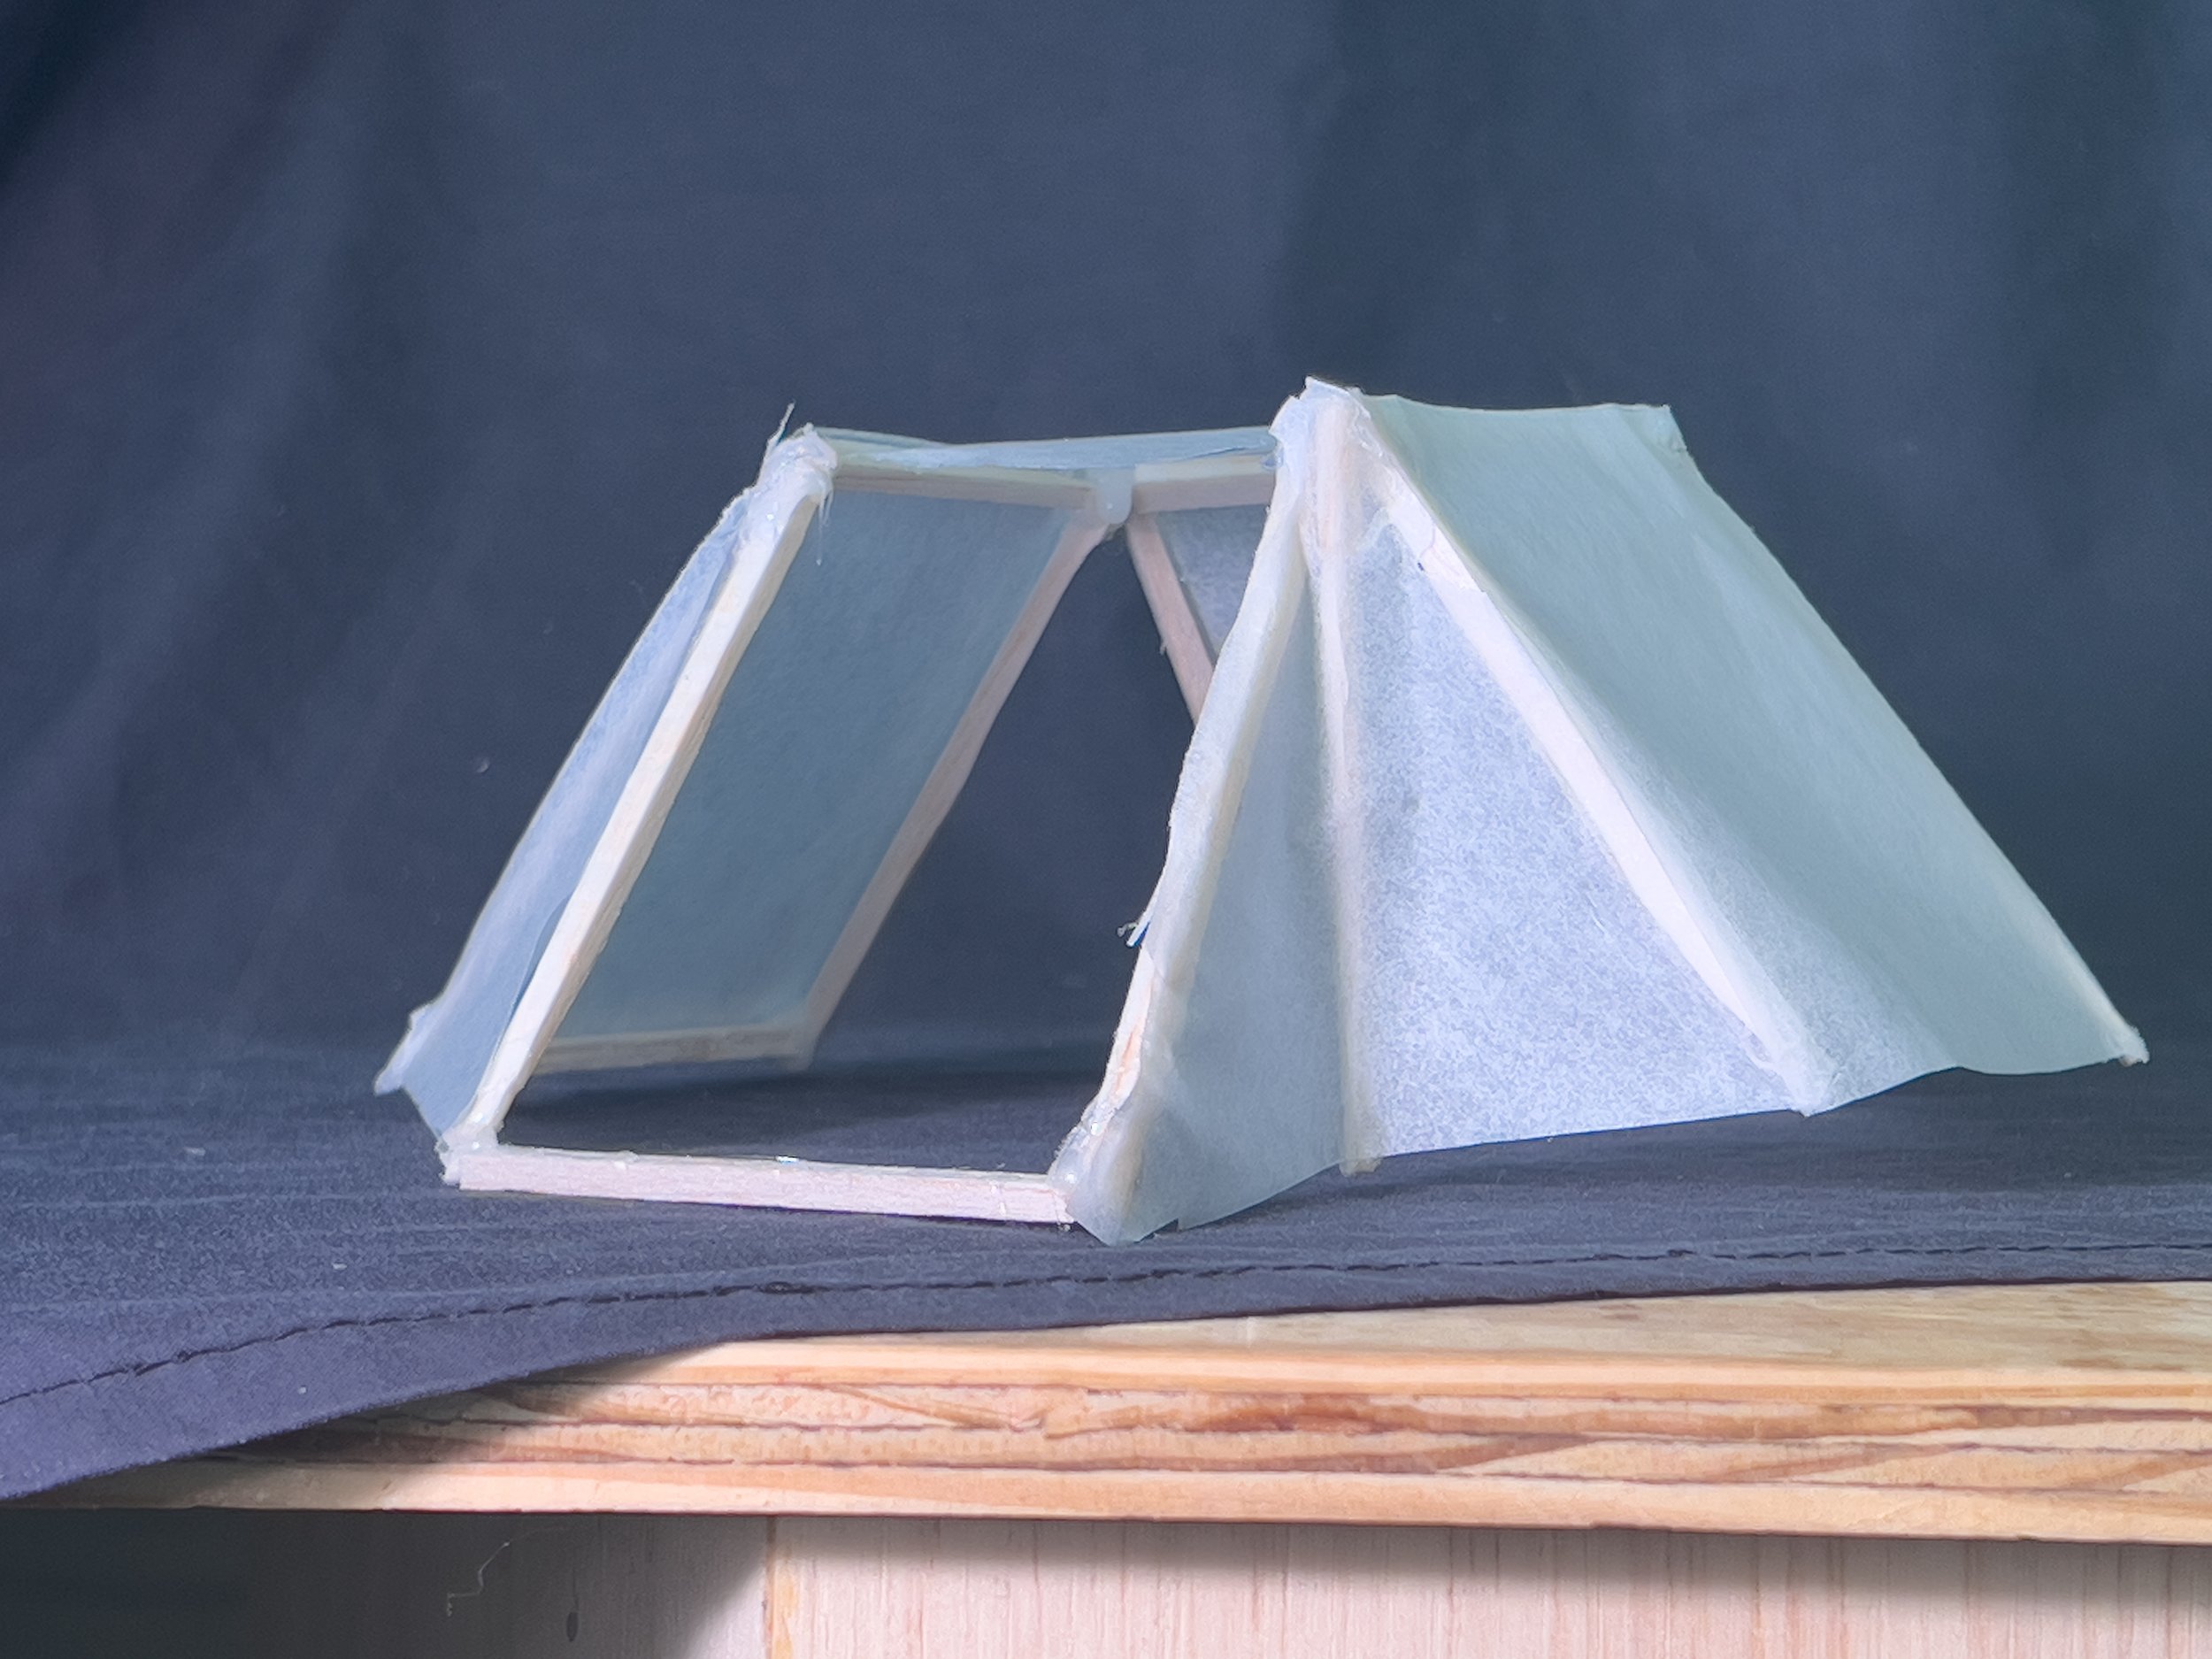
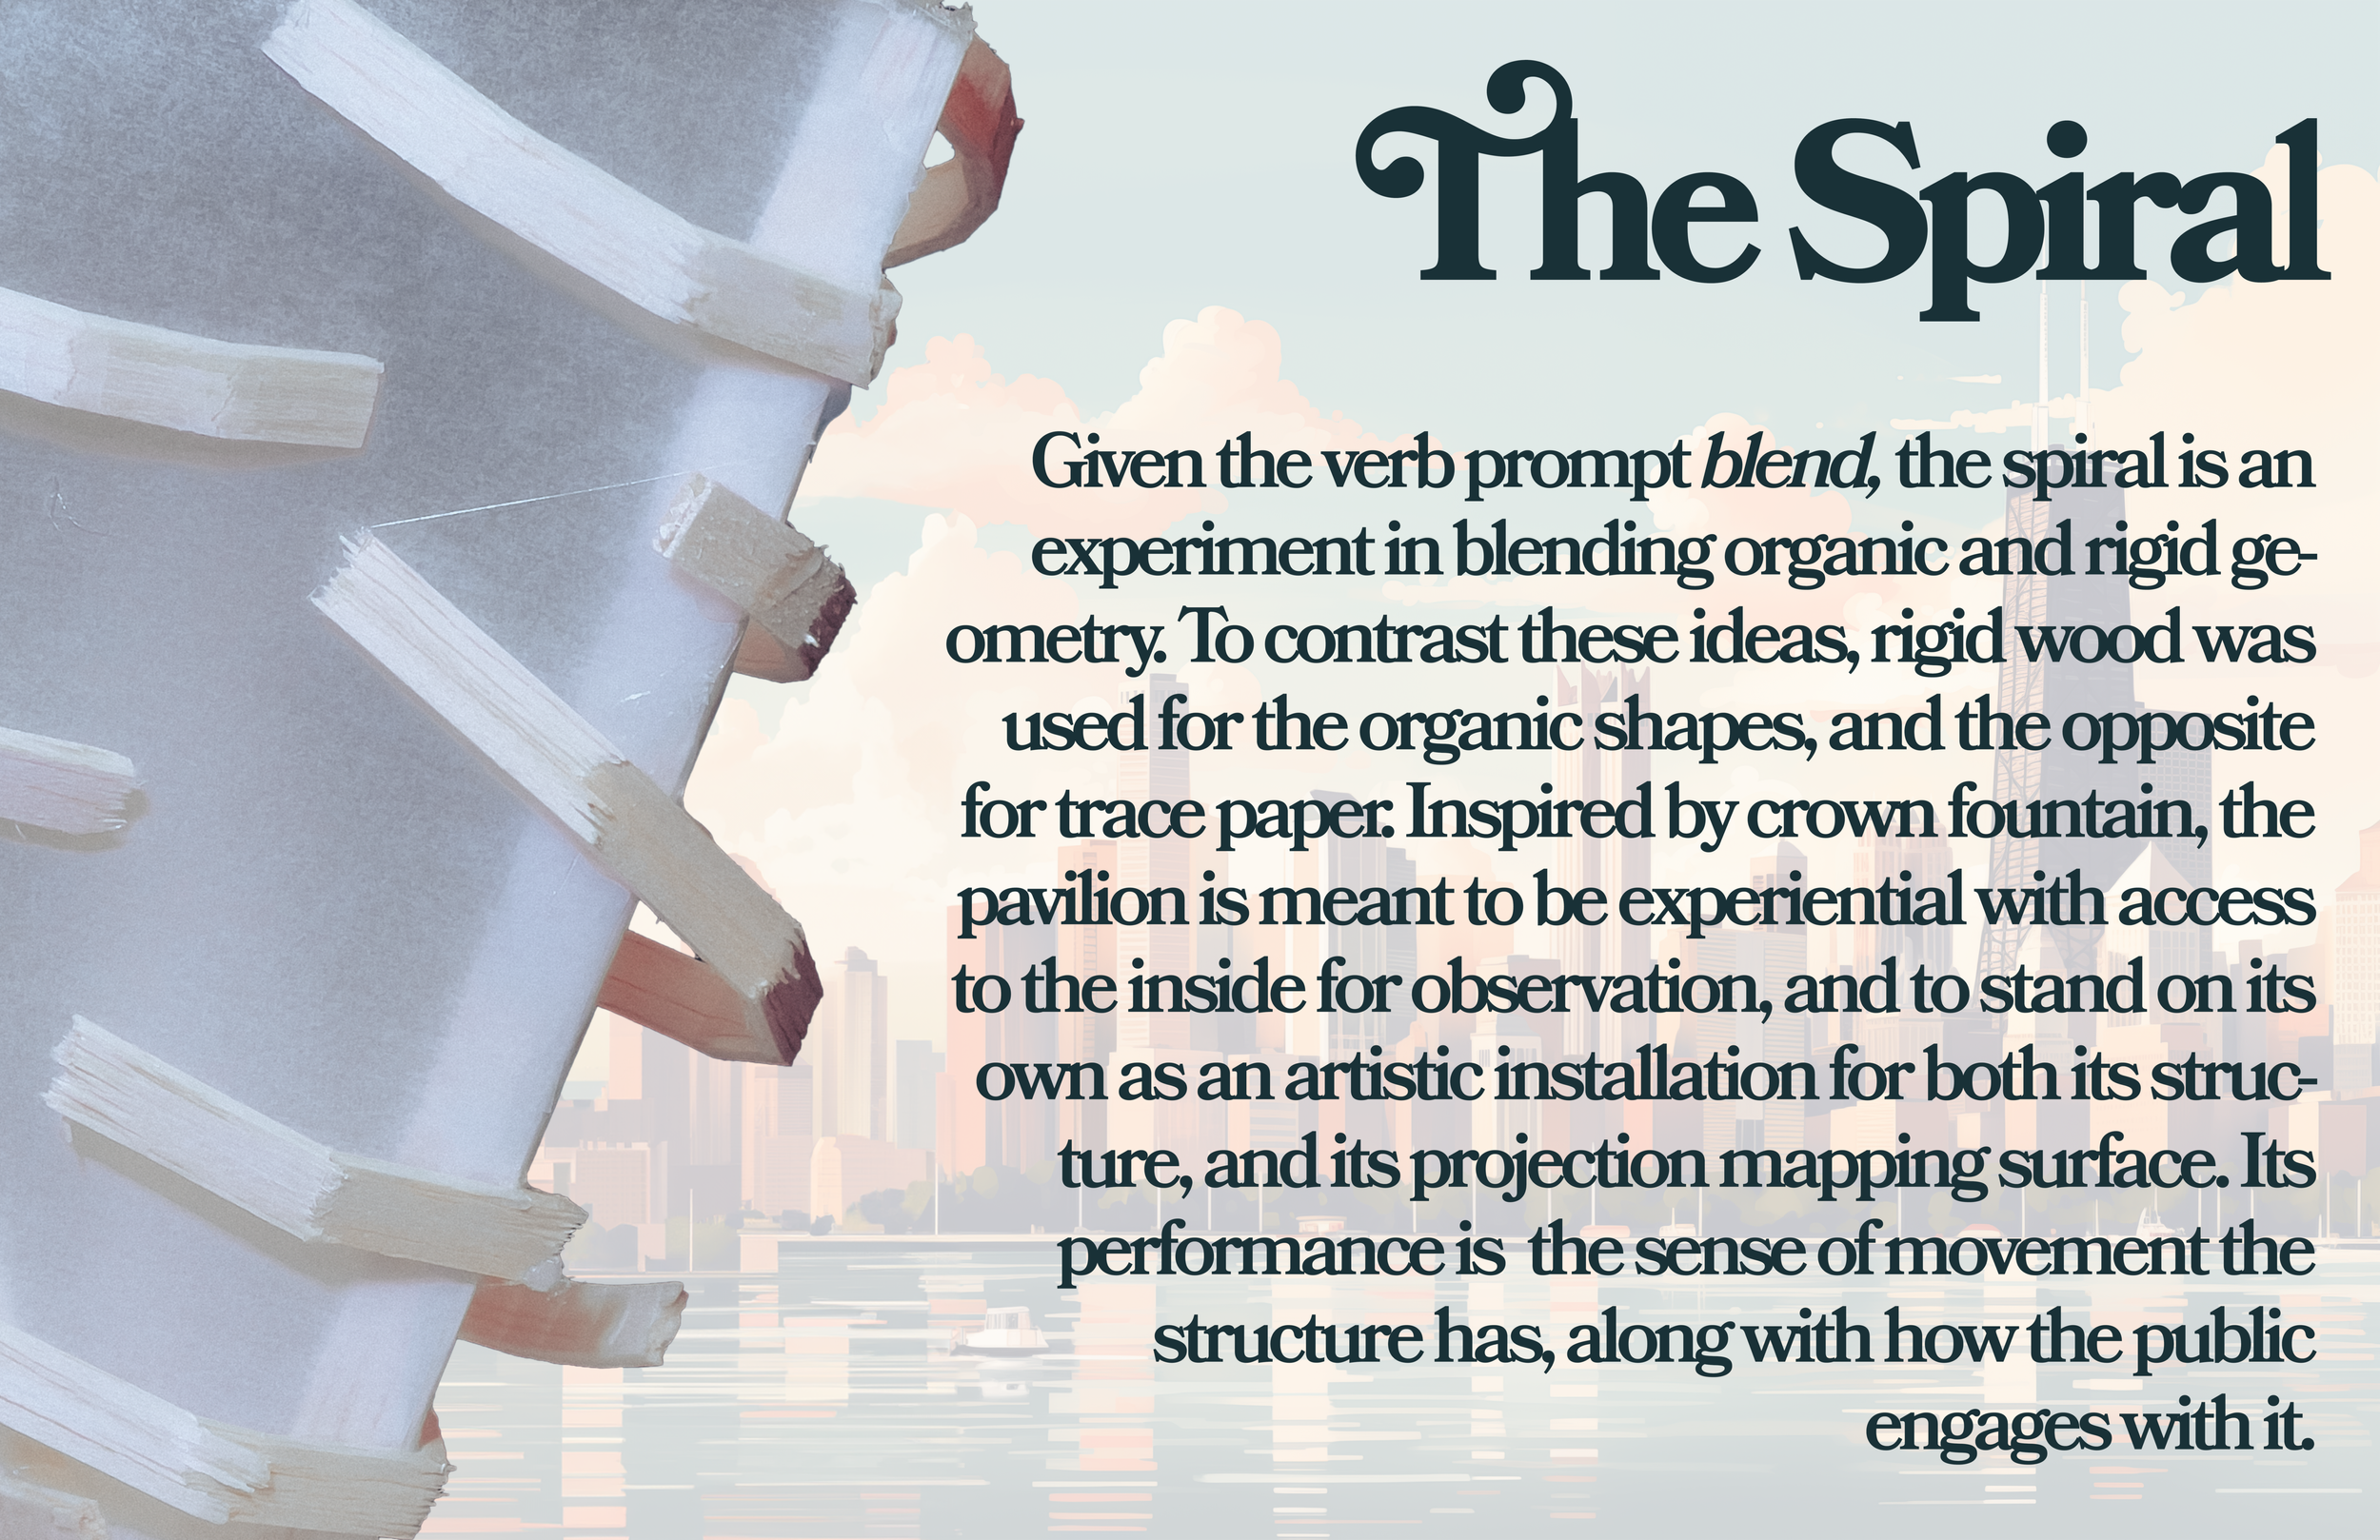
The Spiral
With the verb prompt “blend” I decided to blend elements of rigidity and fluidity, with spiraling curves contrasting strong geometry with defined edges. To add another layer of engagement with the prompt, I decided to make the curved shapes from wood, and the rigid geometry from the trace paper, reversing the typical use cases of the materials, further blending the constraints.
This led to more experiments…
As the semester progressed…
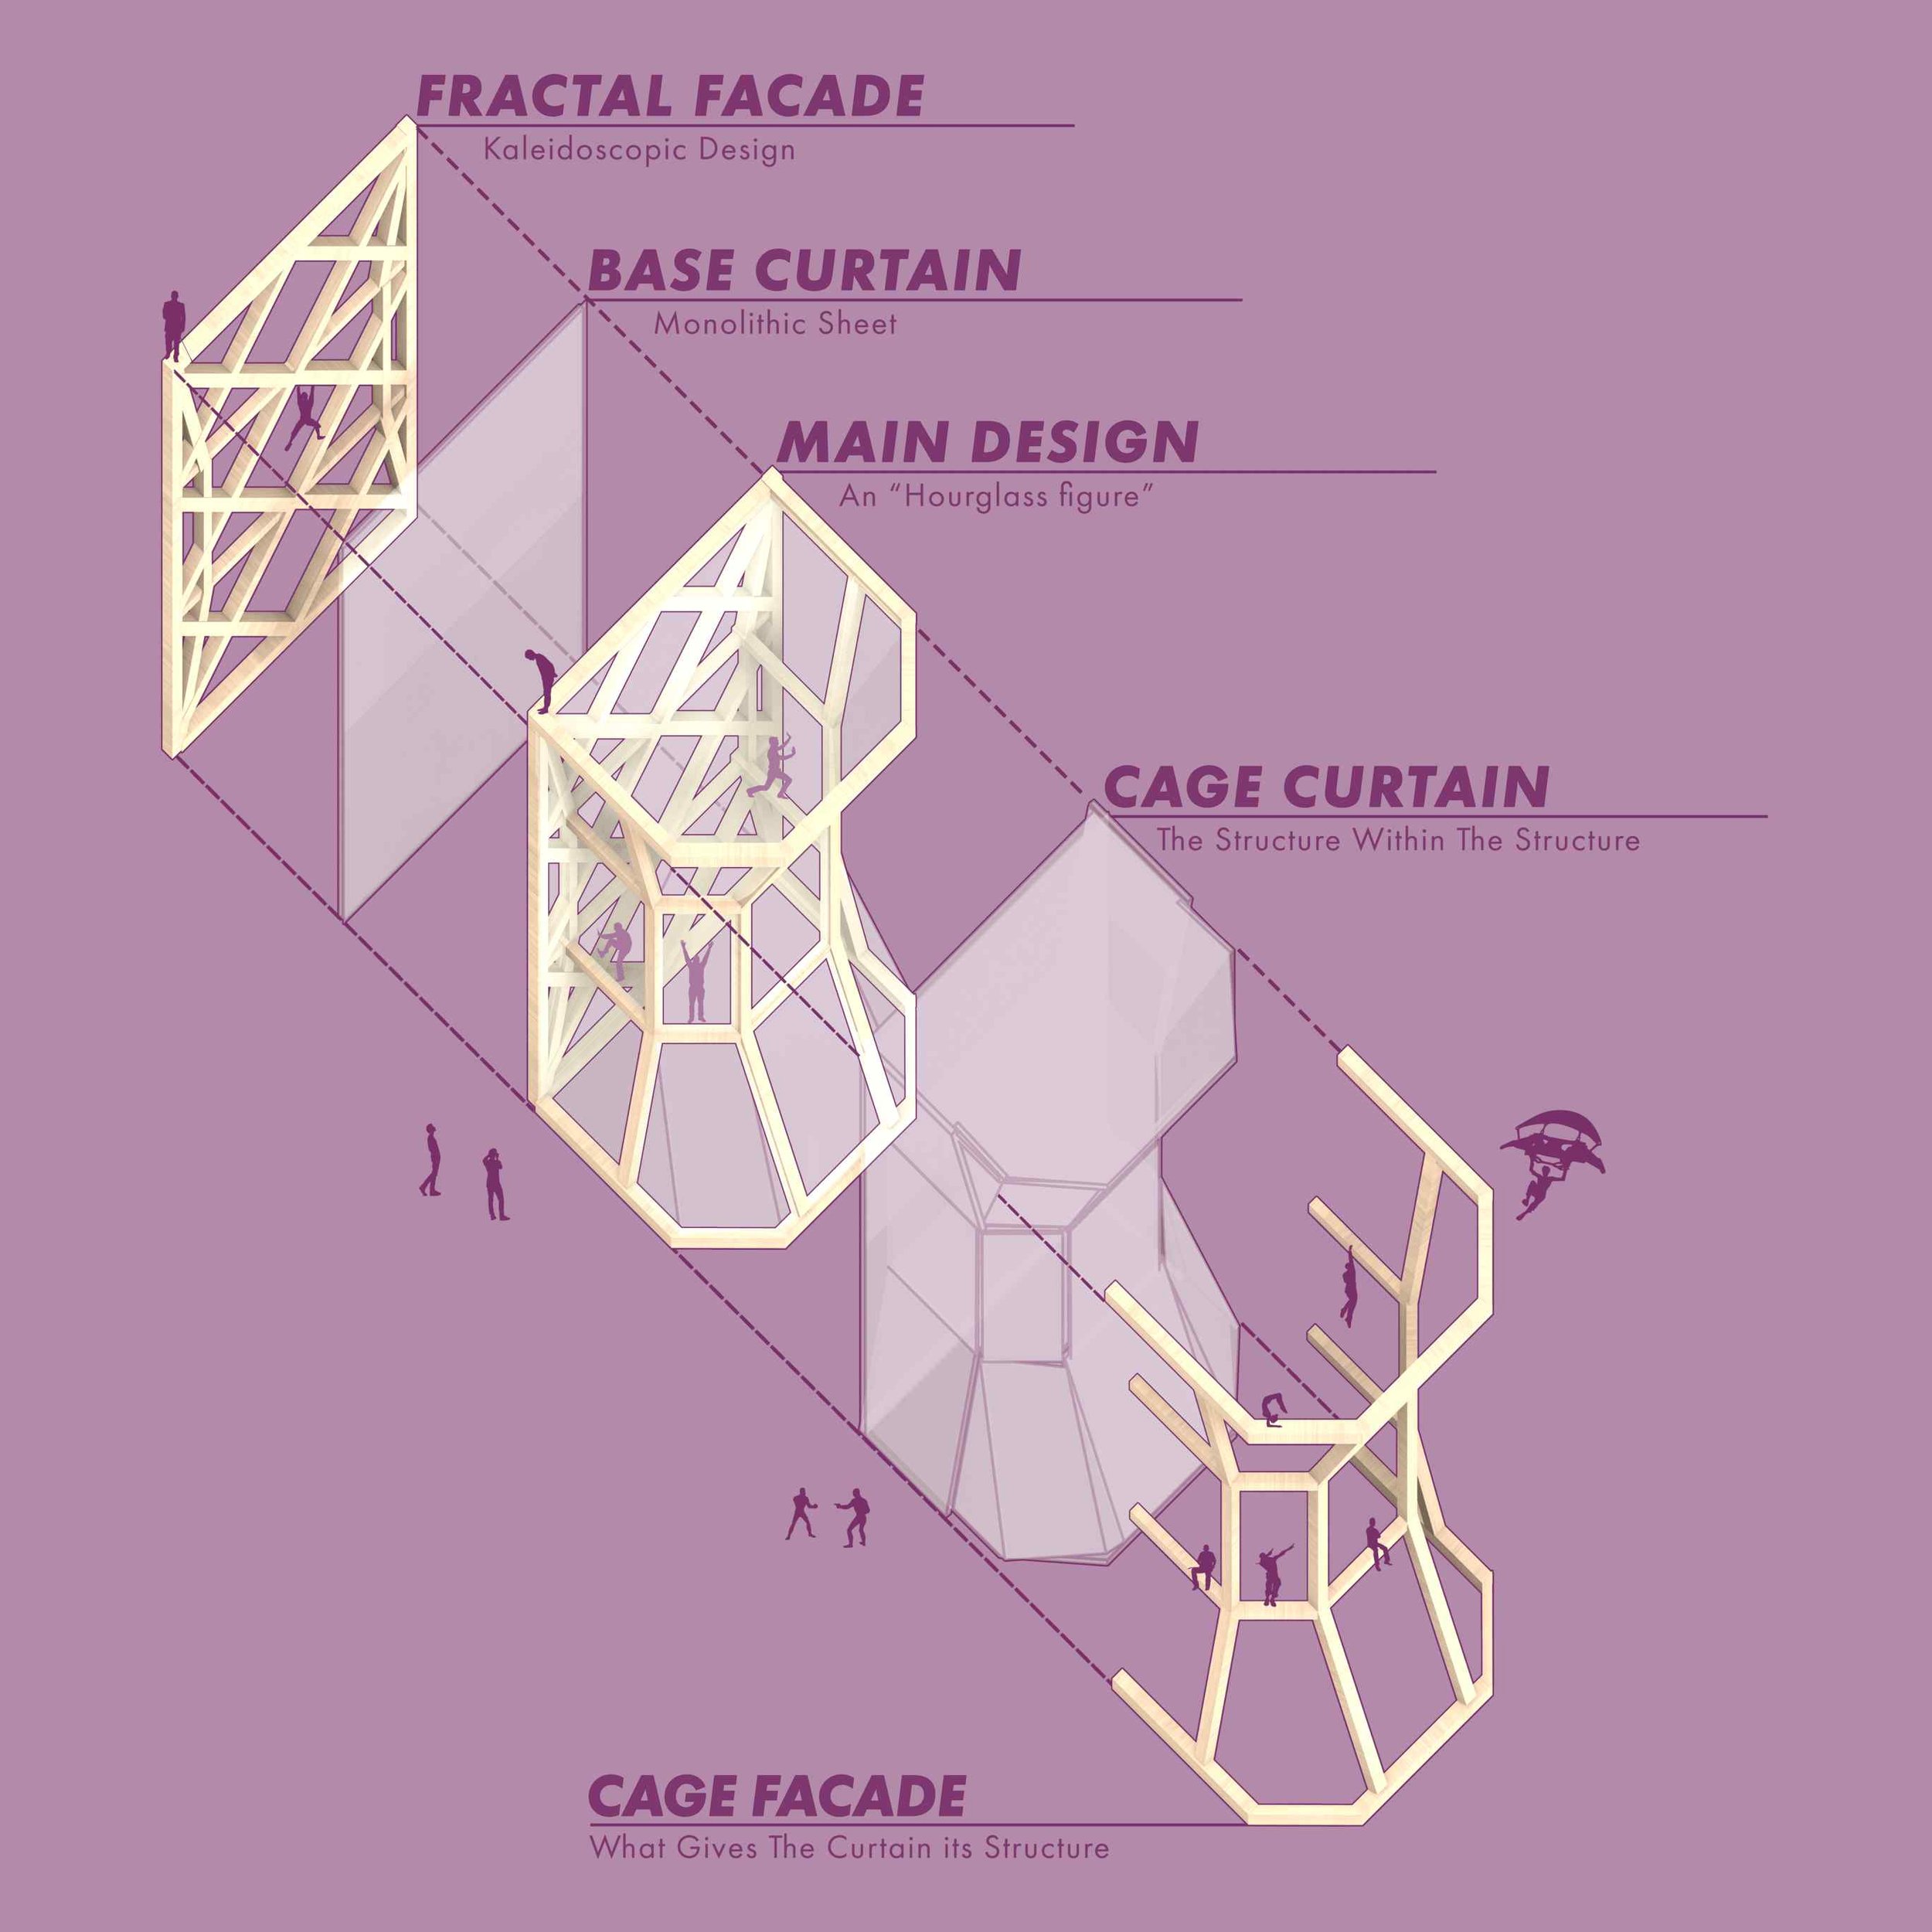
Our professor directed our experiments toward our midterm project, which was the culmination of our experiences in learning to work with material and form constraints. With my own testing of geometry and playing with this studio’s concept of Pillars & Curtains, I landed on my midterm project concept…
Photoshop
Rhino
Illustrator
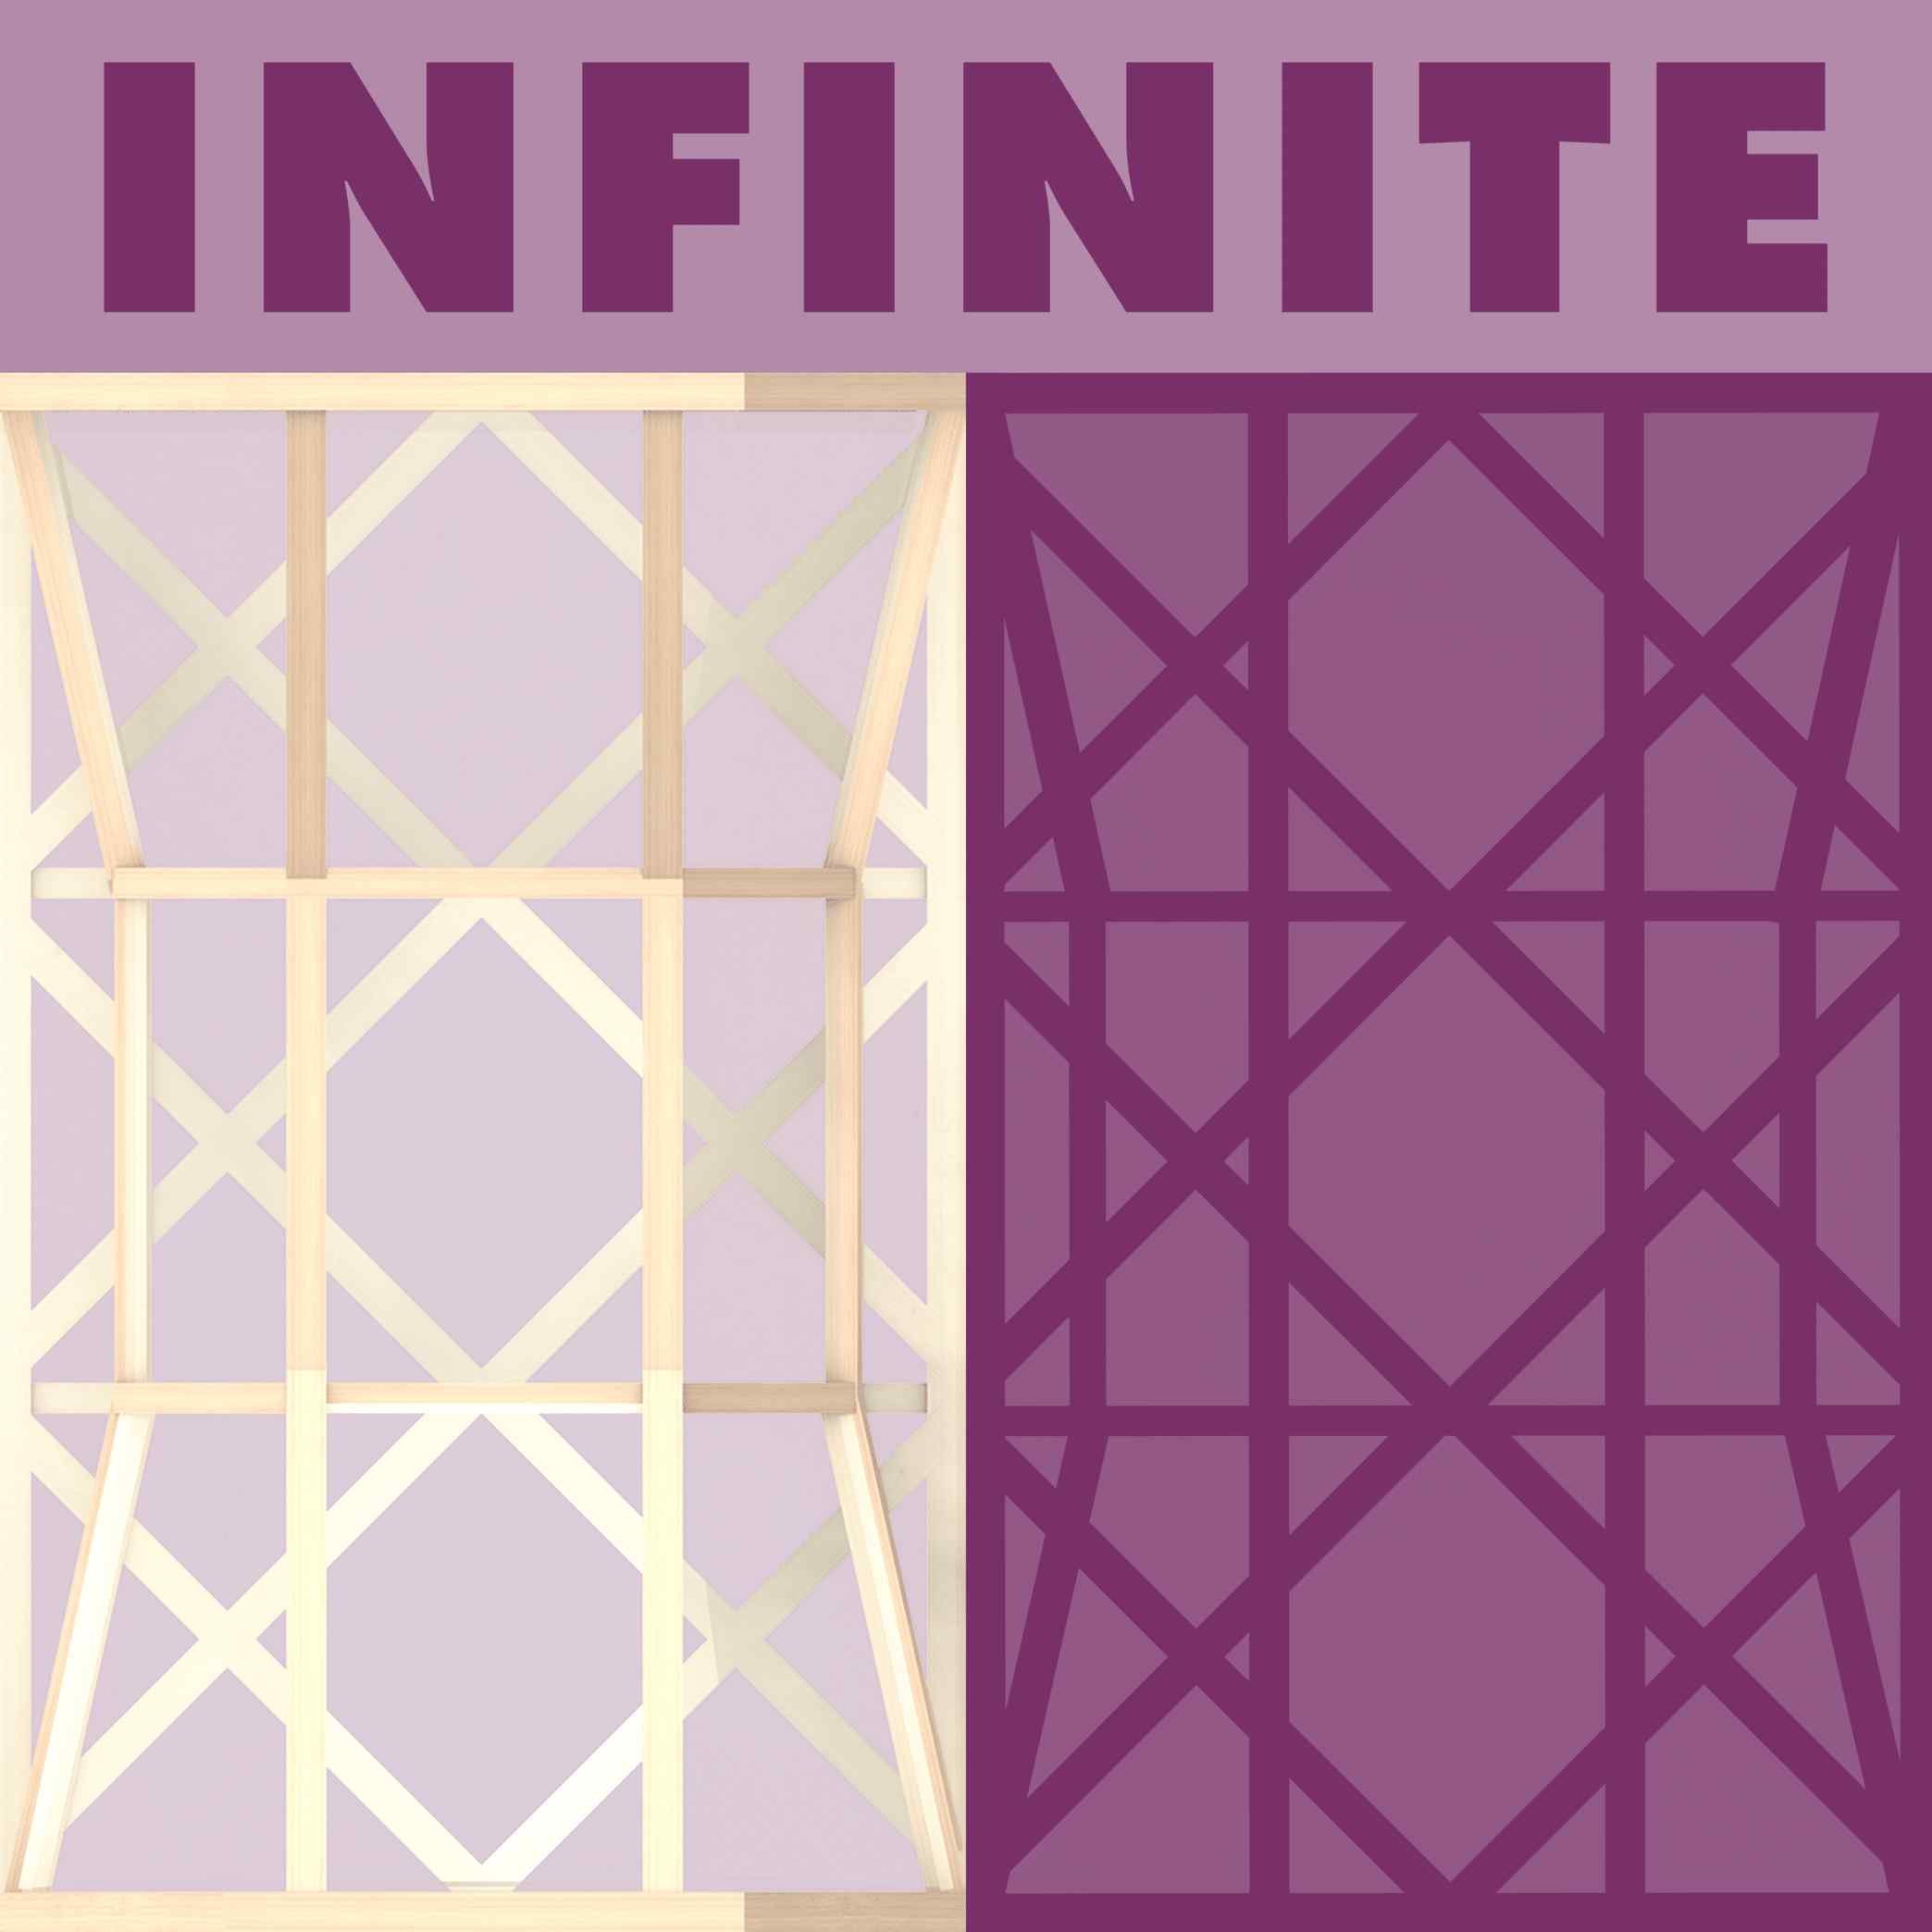
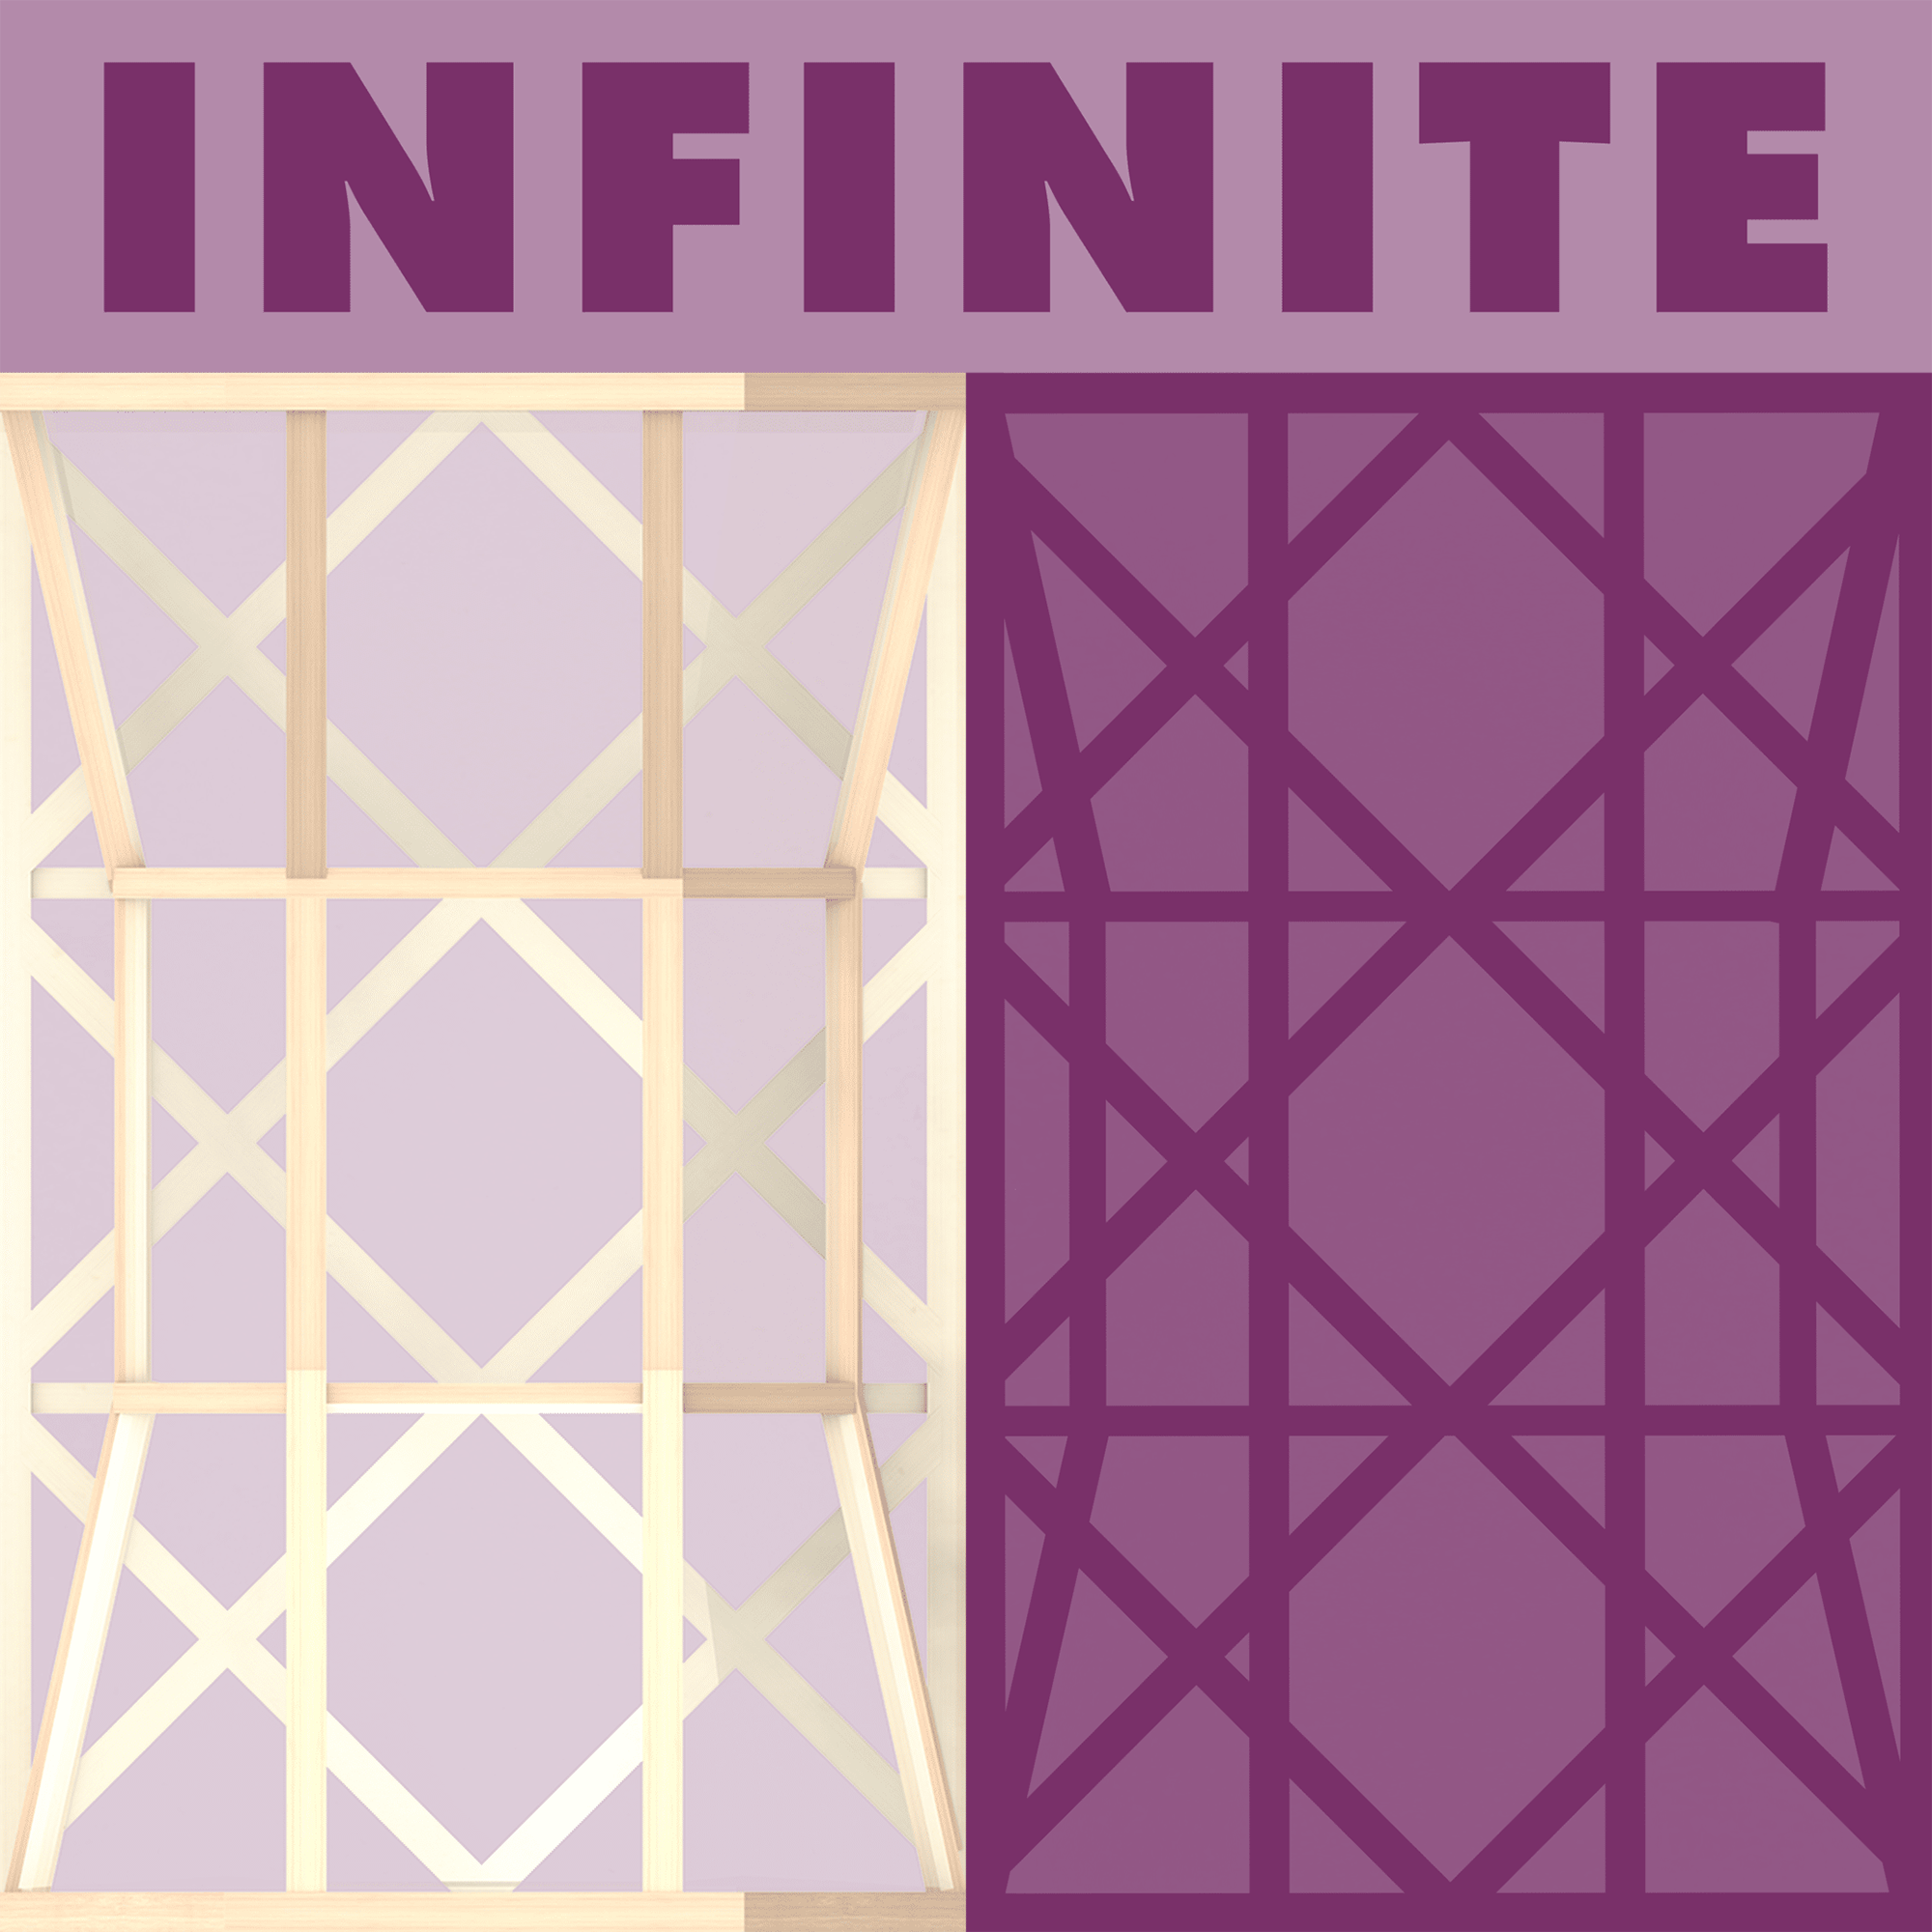
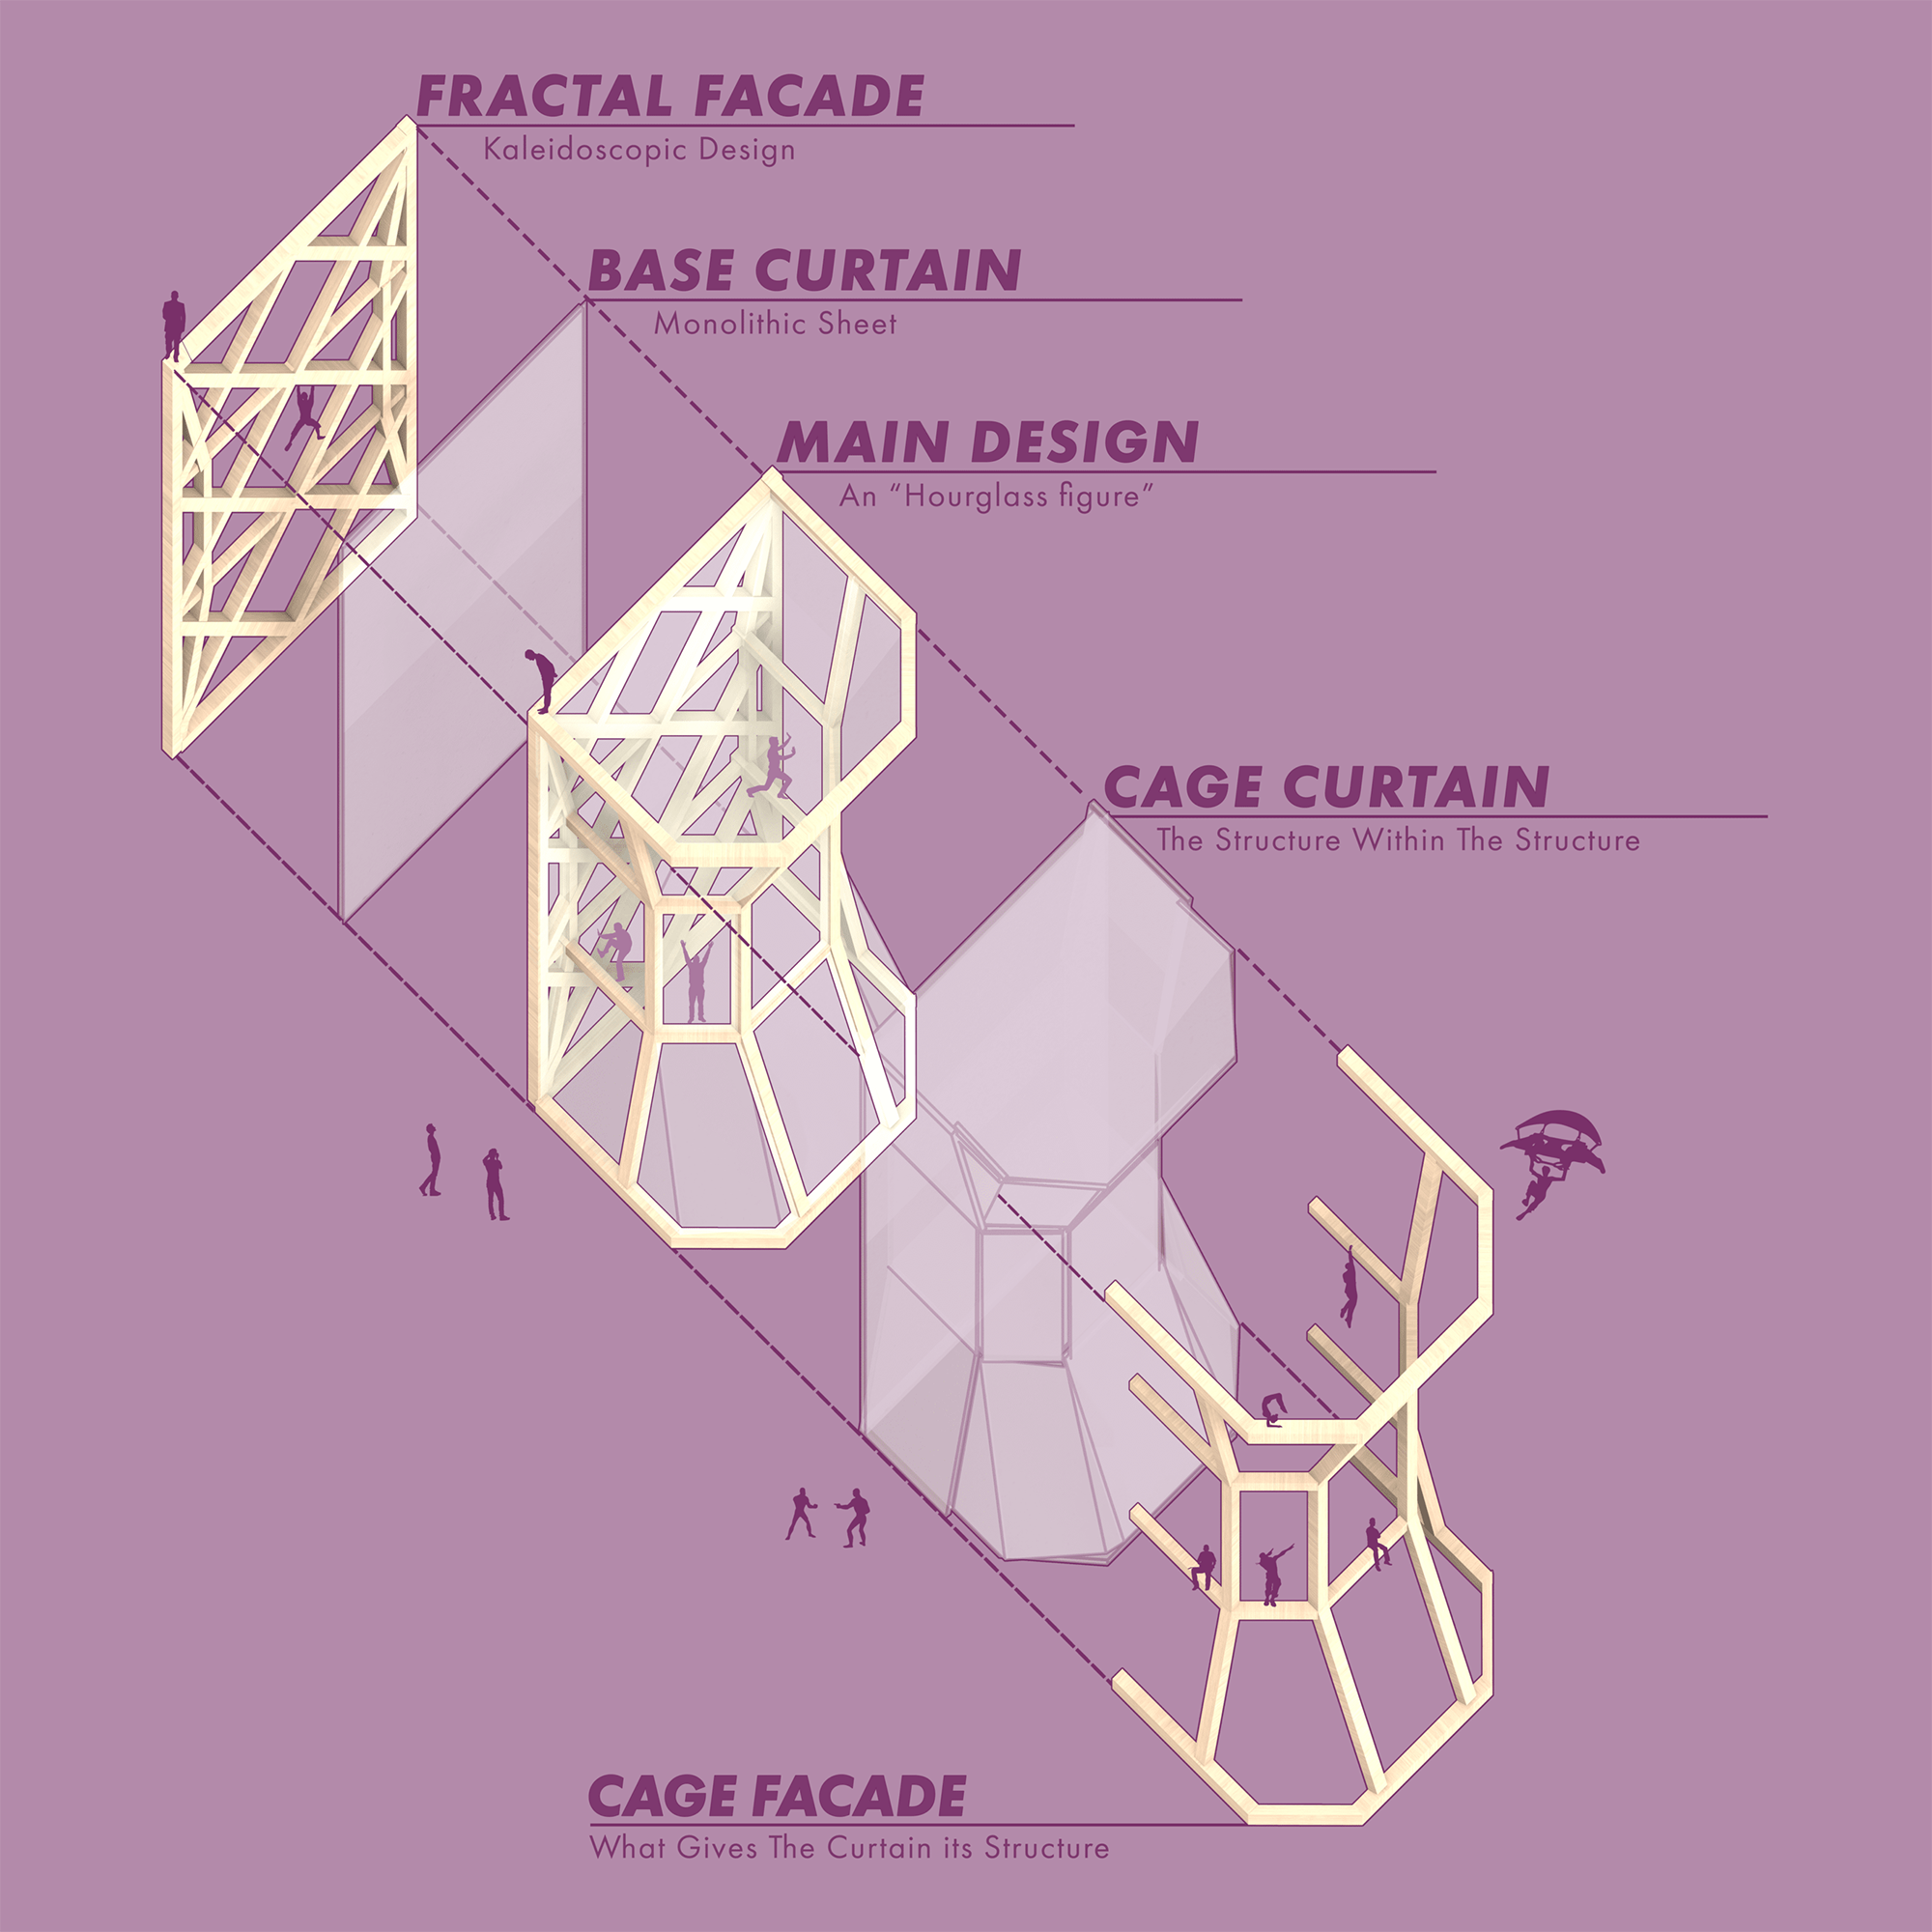
The design became titled “infinite” for its kaleidoscope-like façade. Using my playful approach to geometry, I found that by repeating shapes for the façade, then extruding portions of it, created an interesting opportunity to further explore the minimalism imposed by the constraints of the project prompt (see the gallery below for more render images).
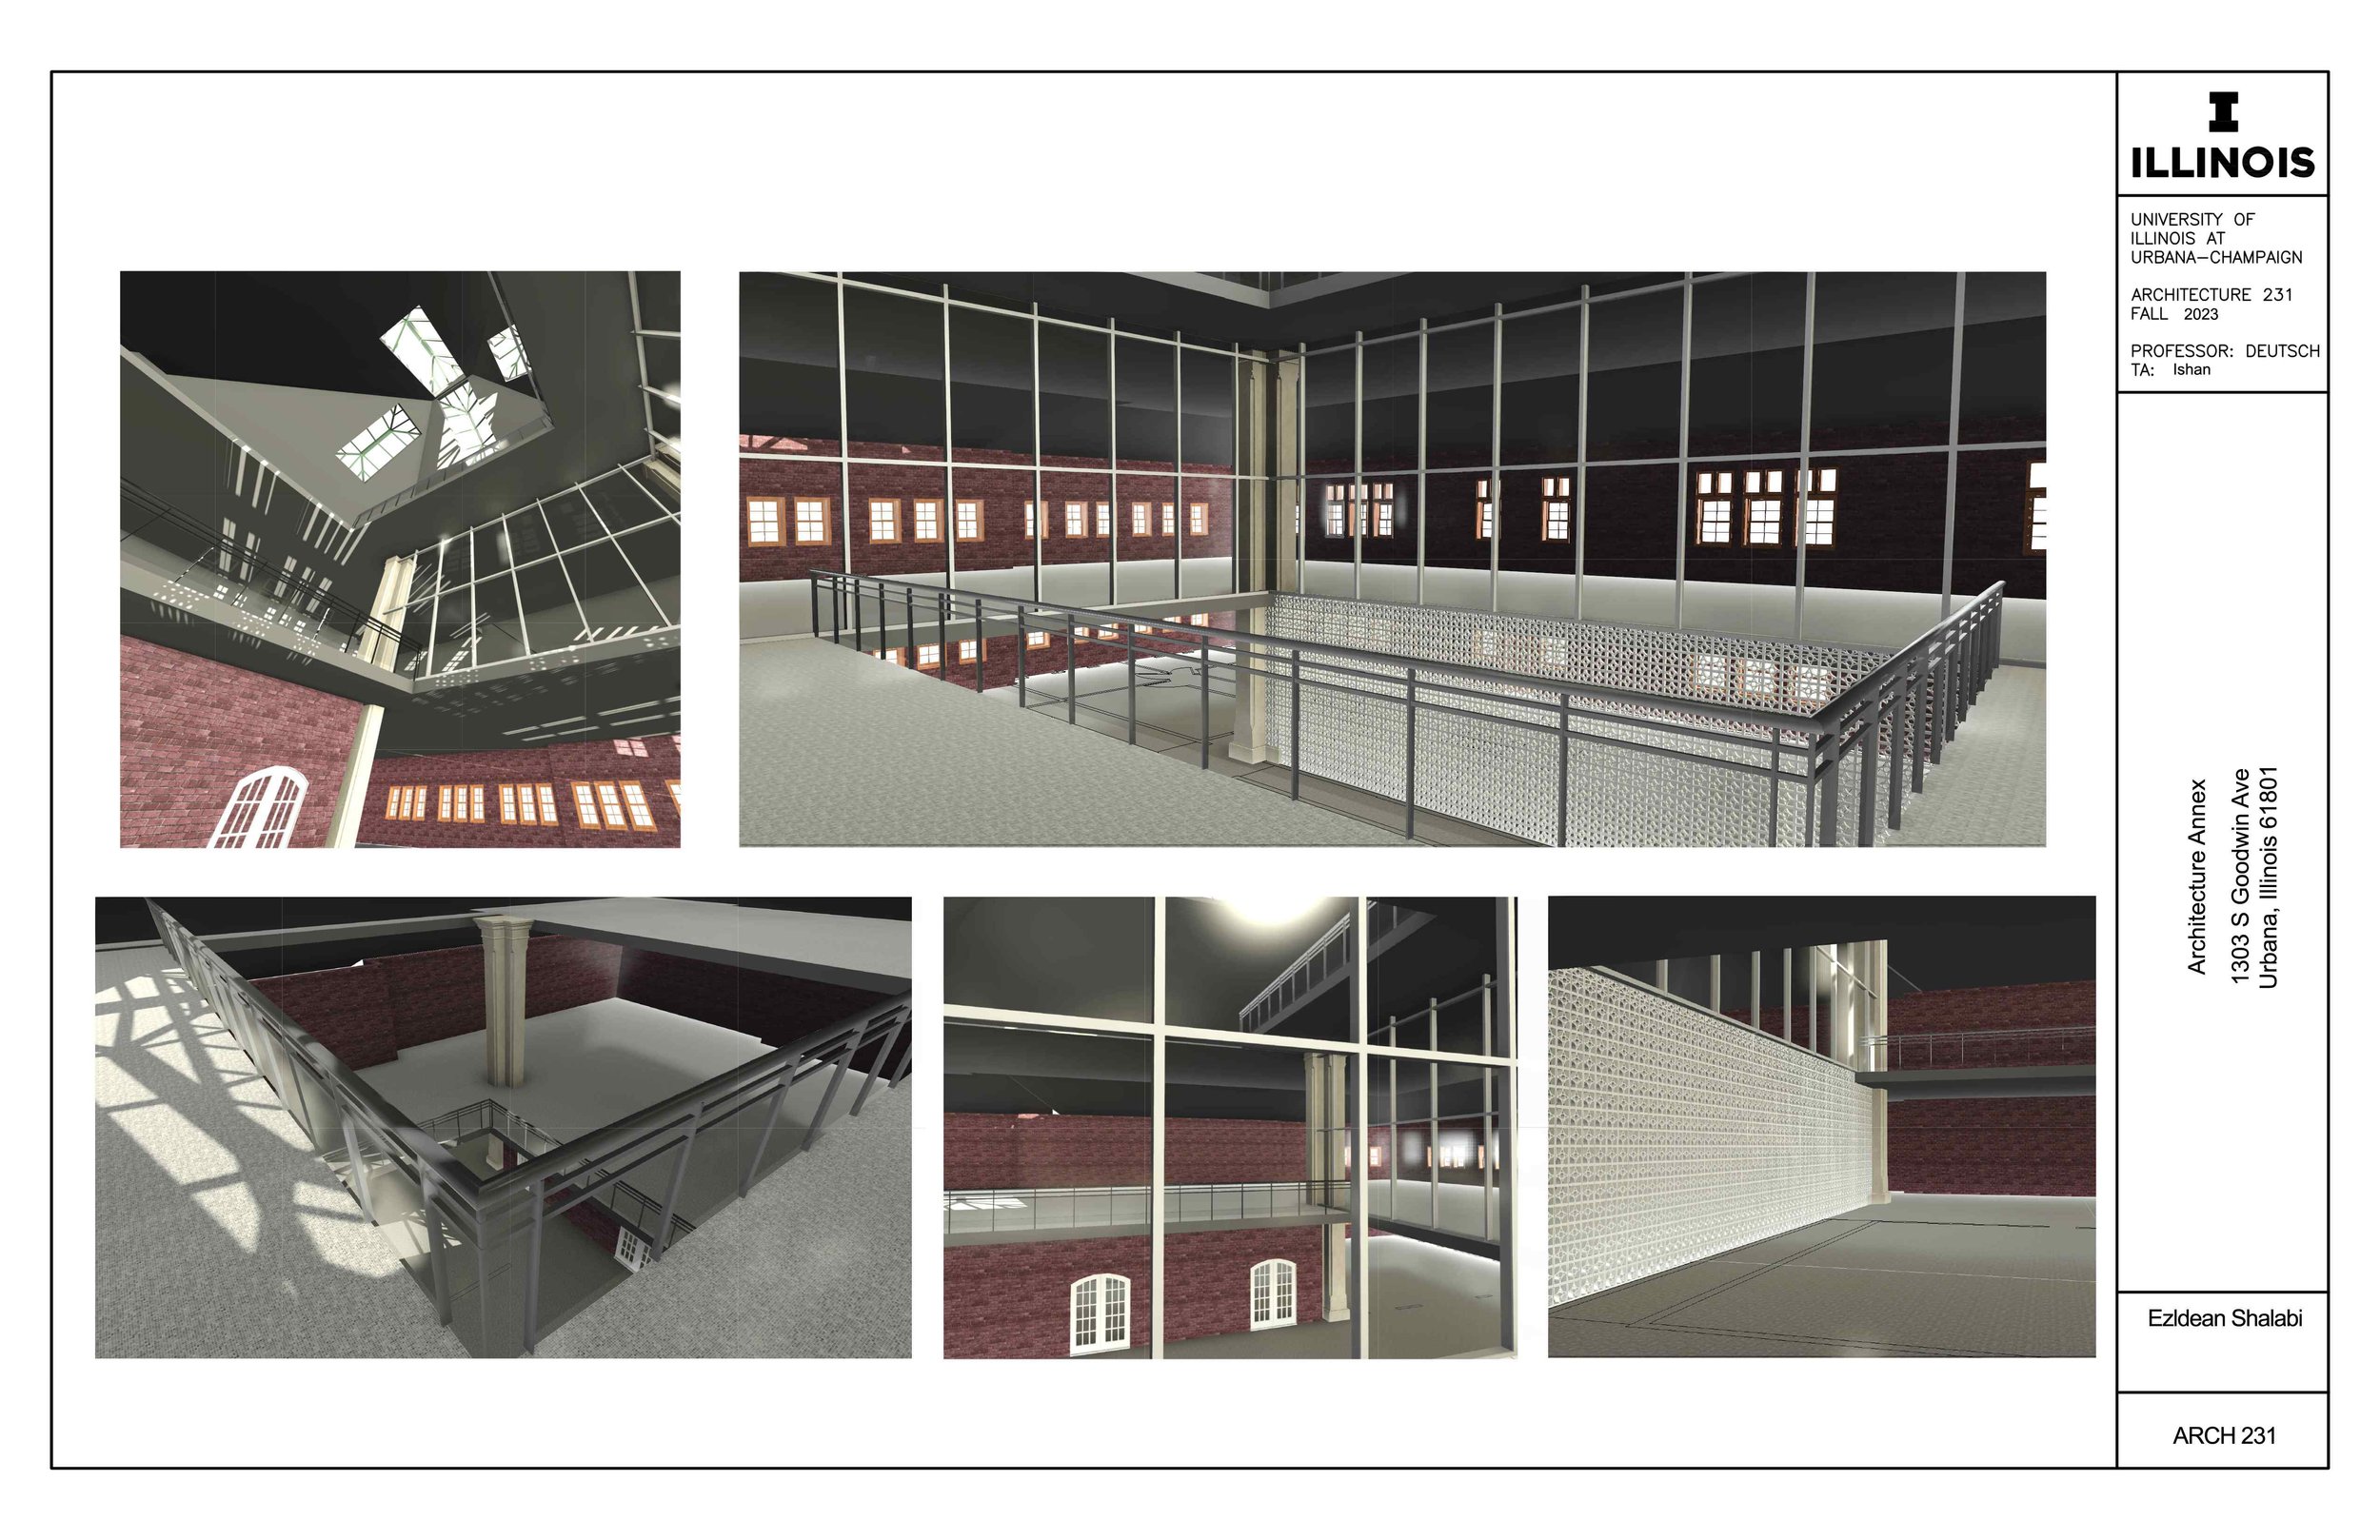
Before the final project…
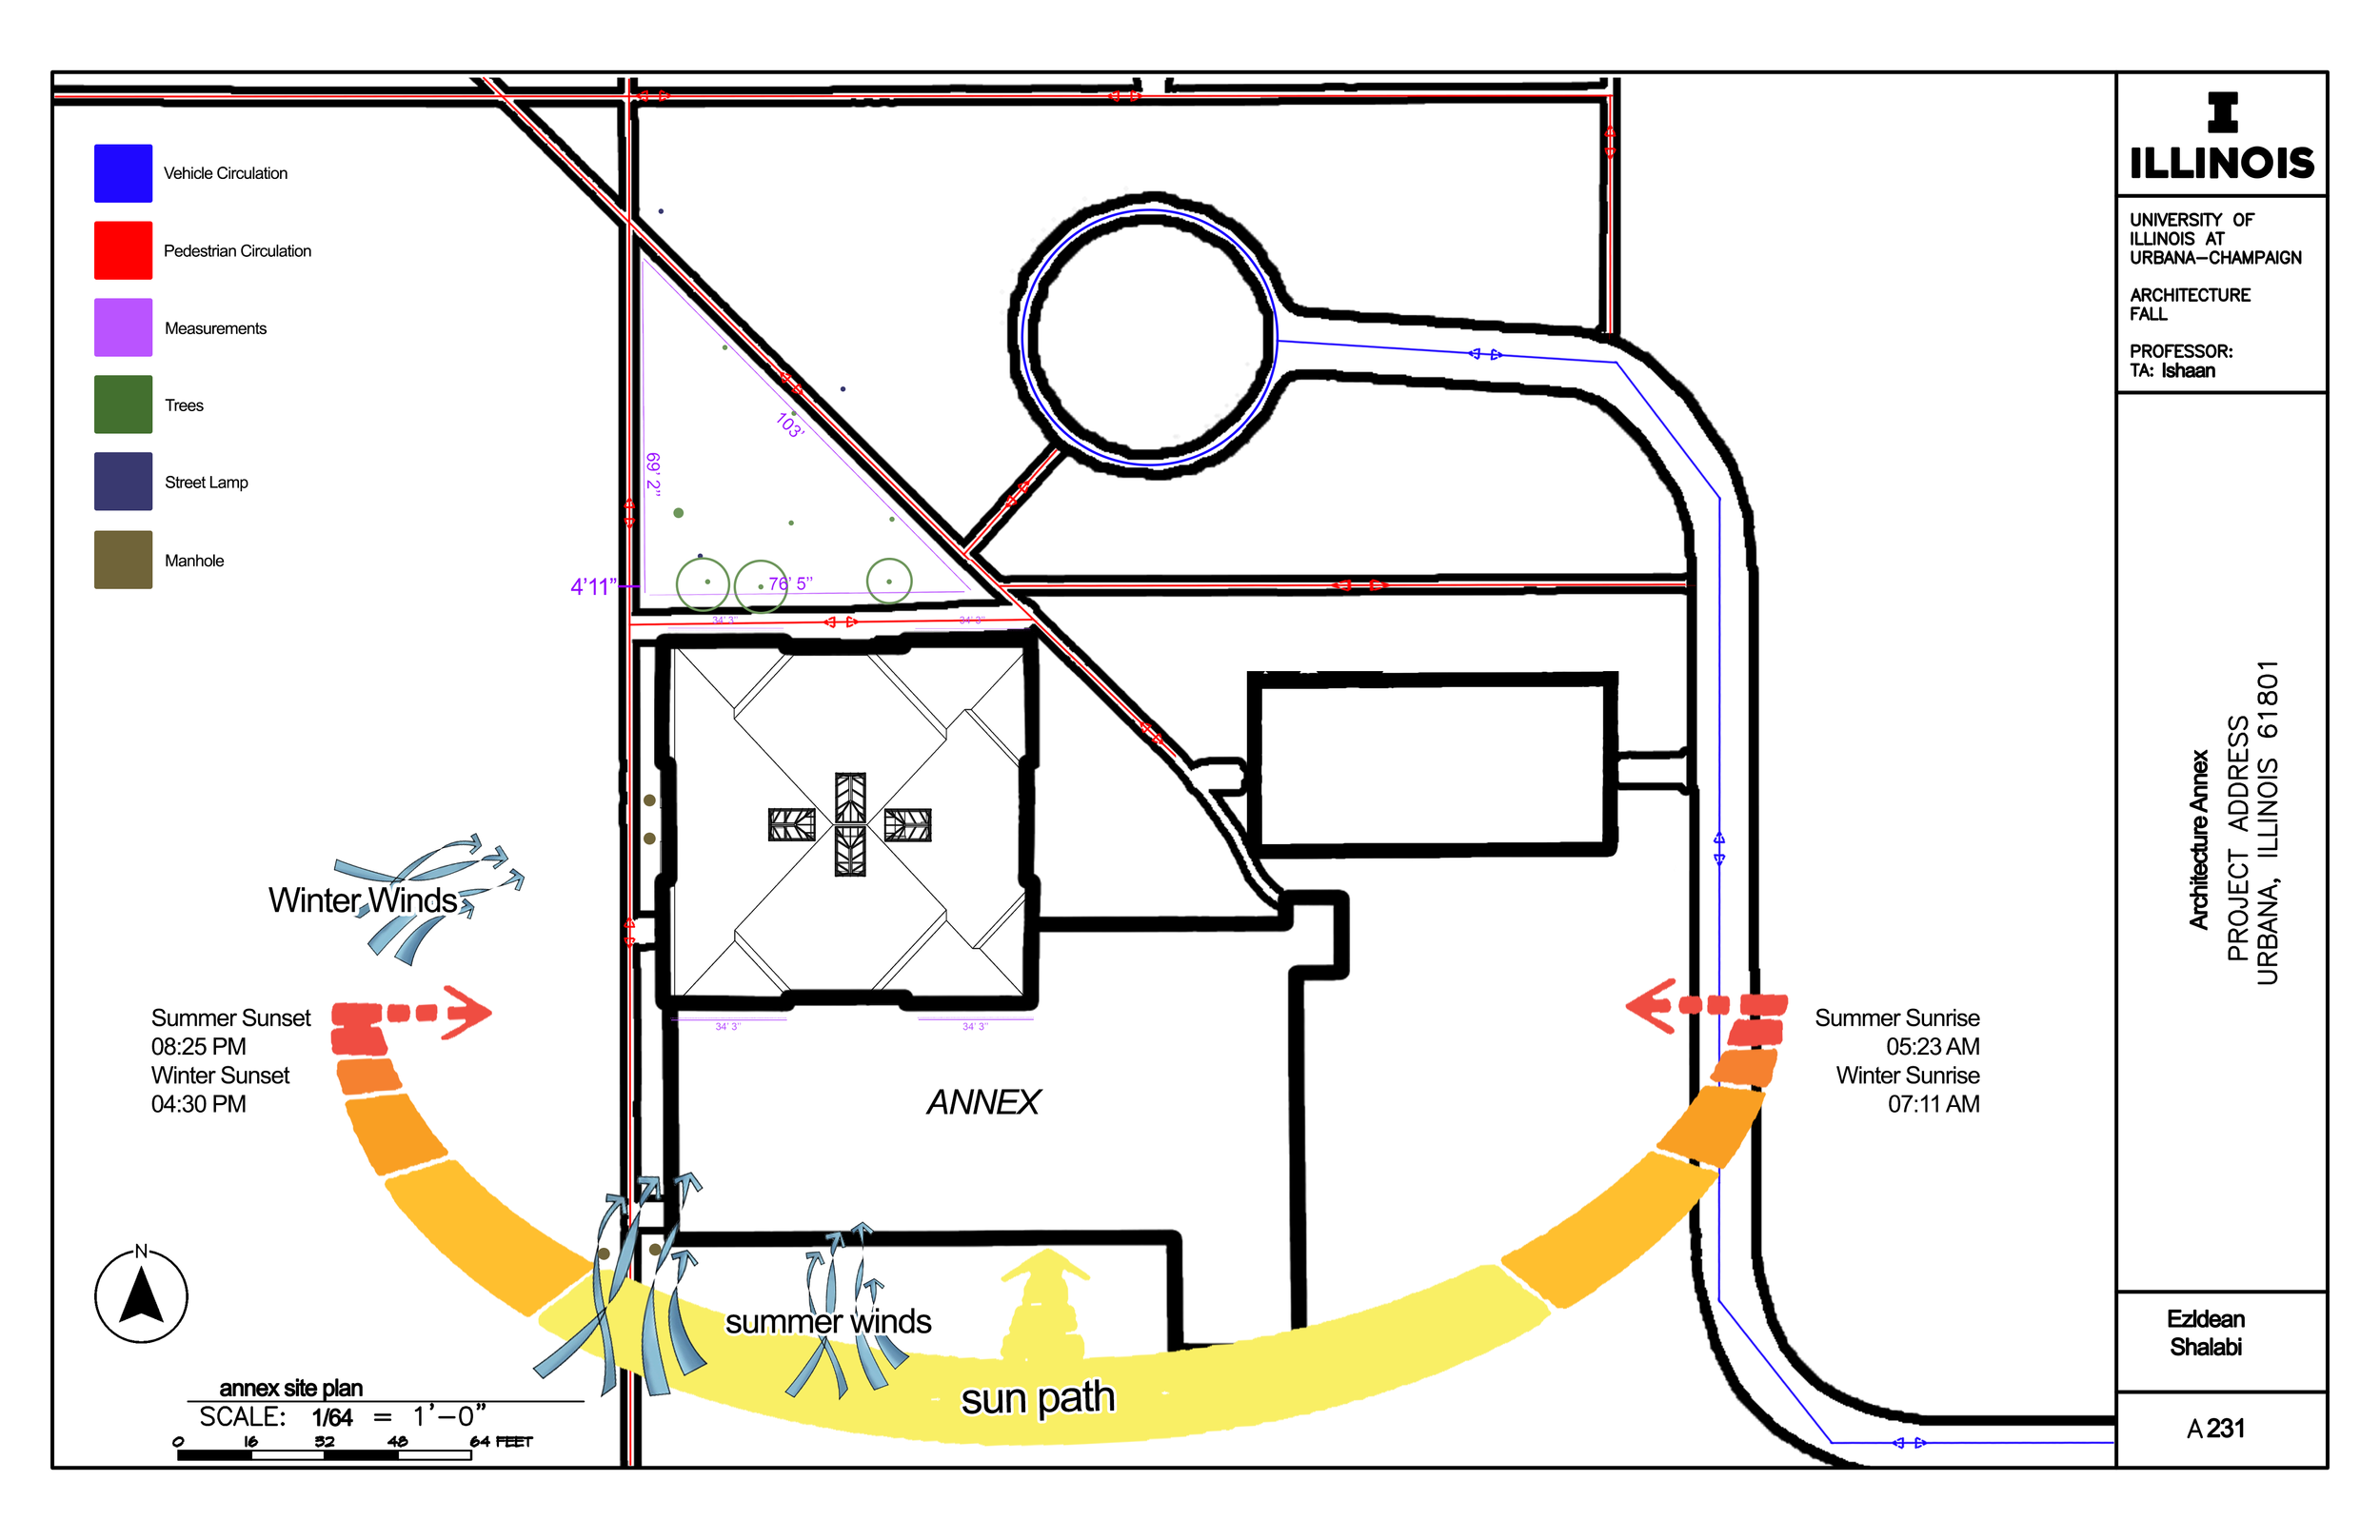
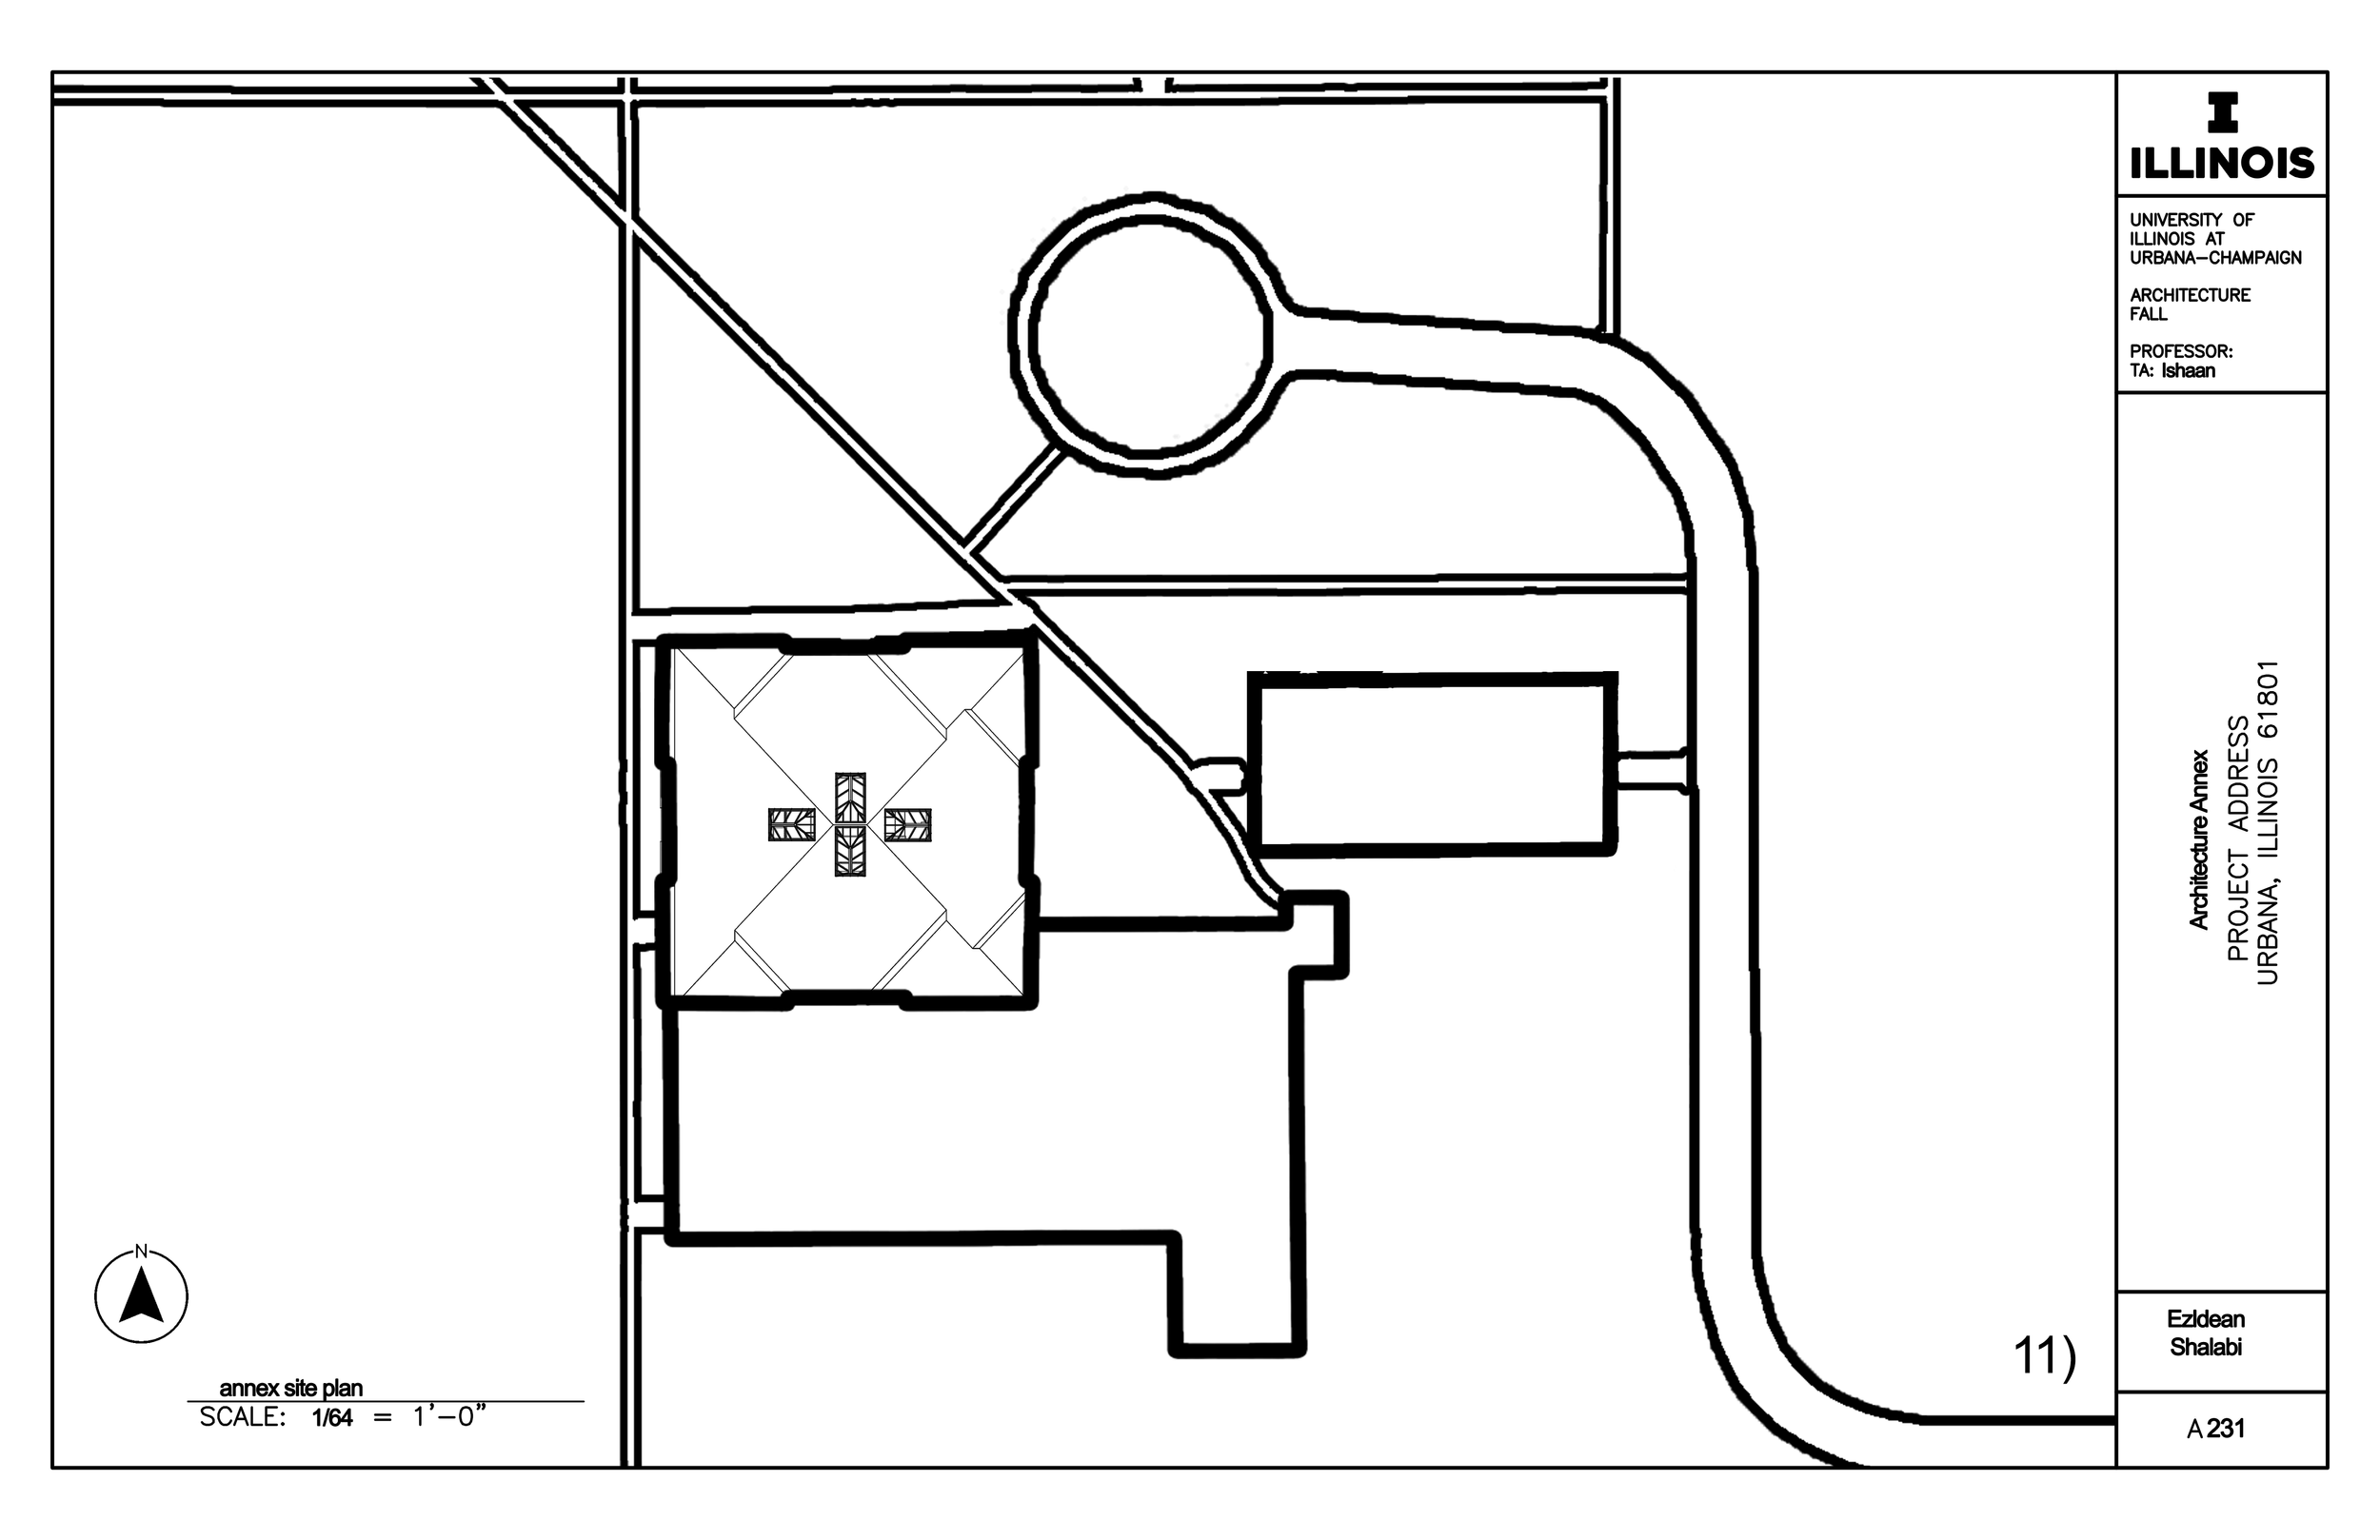
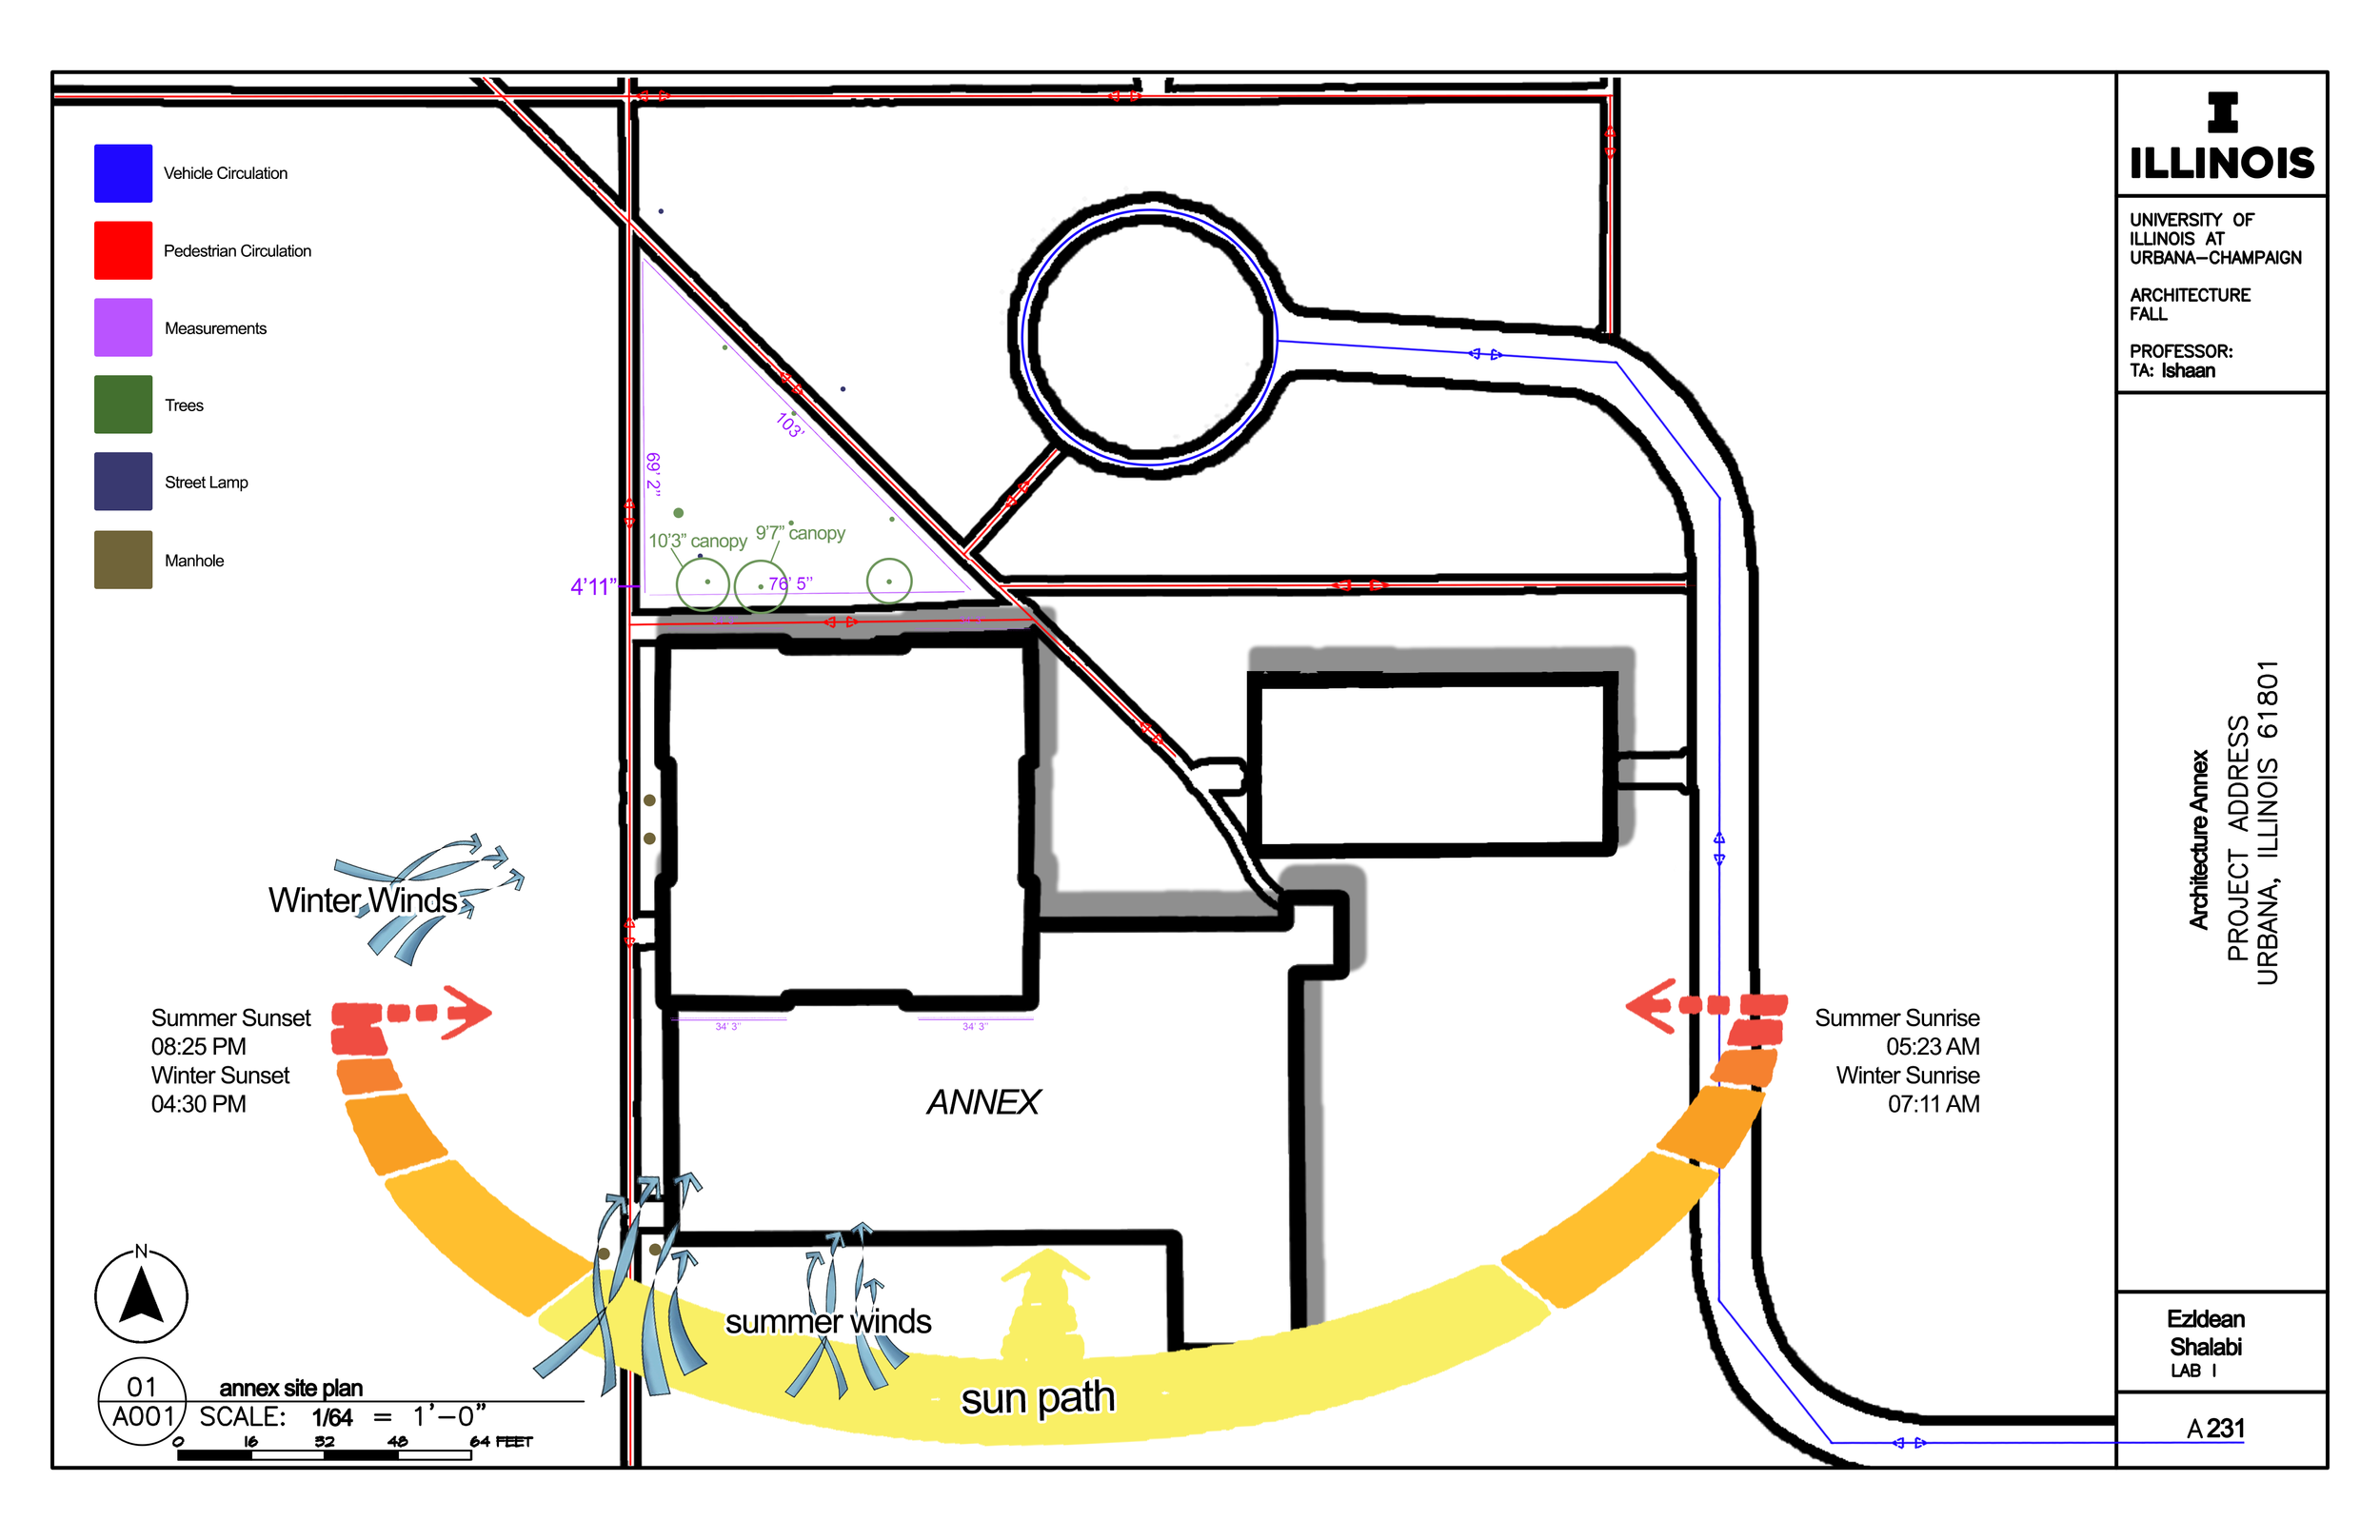
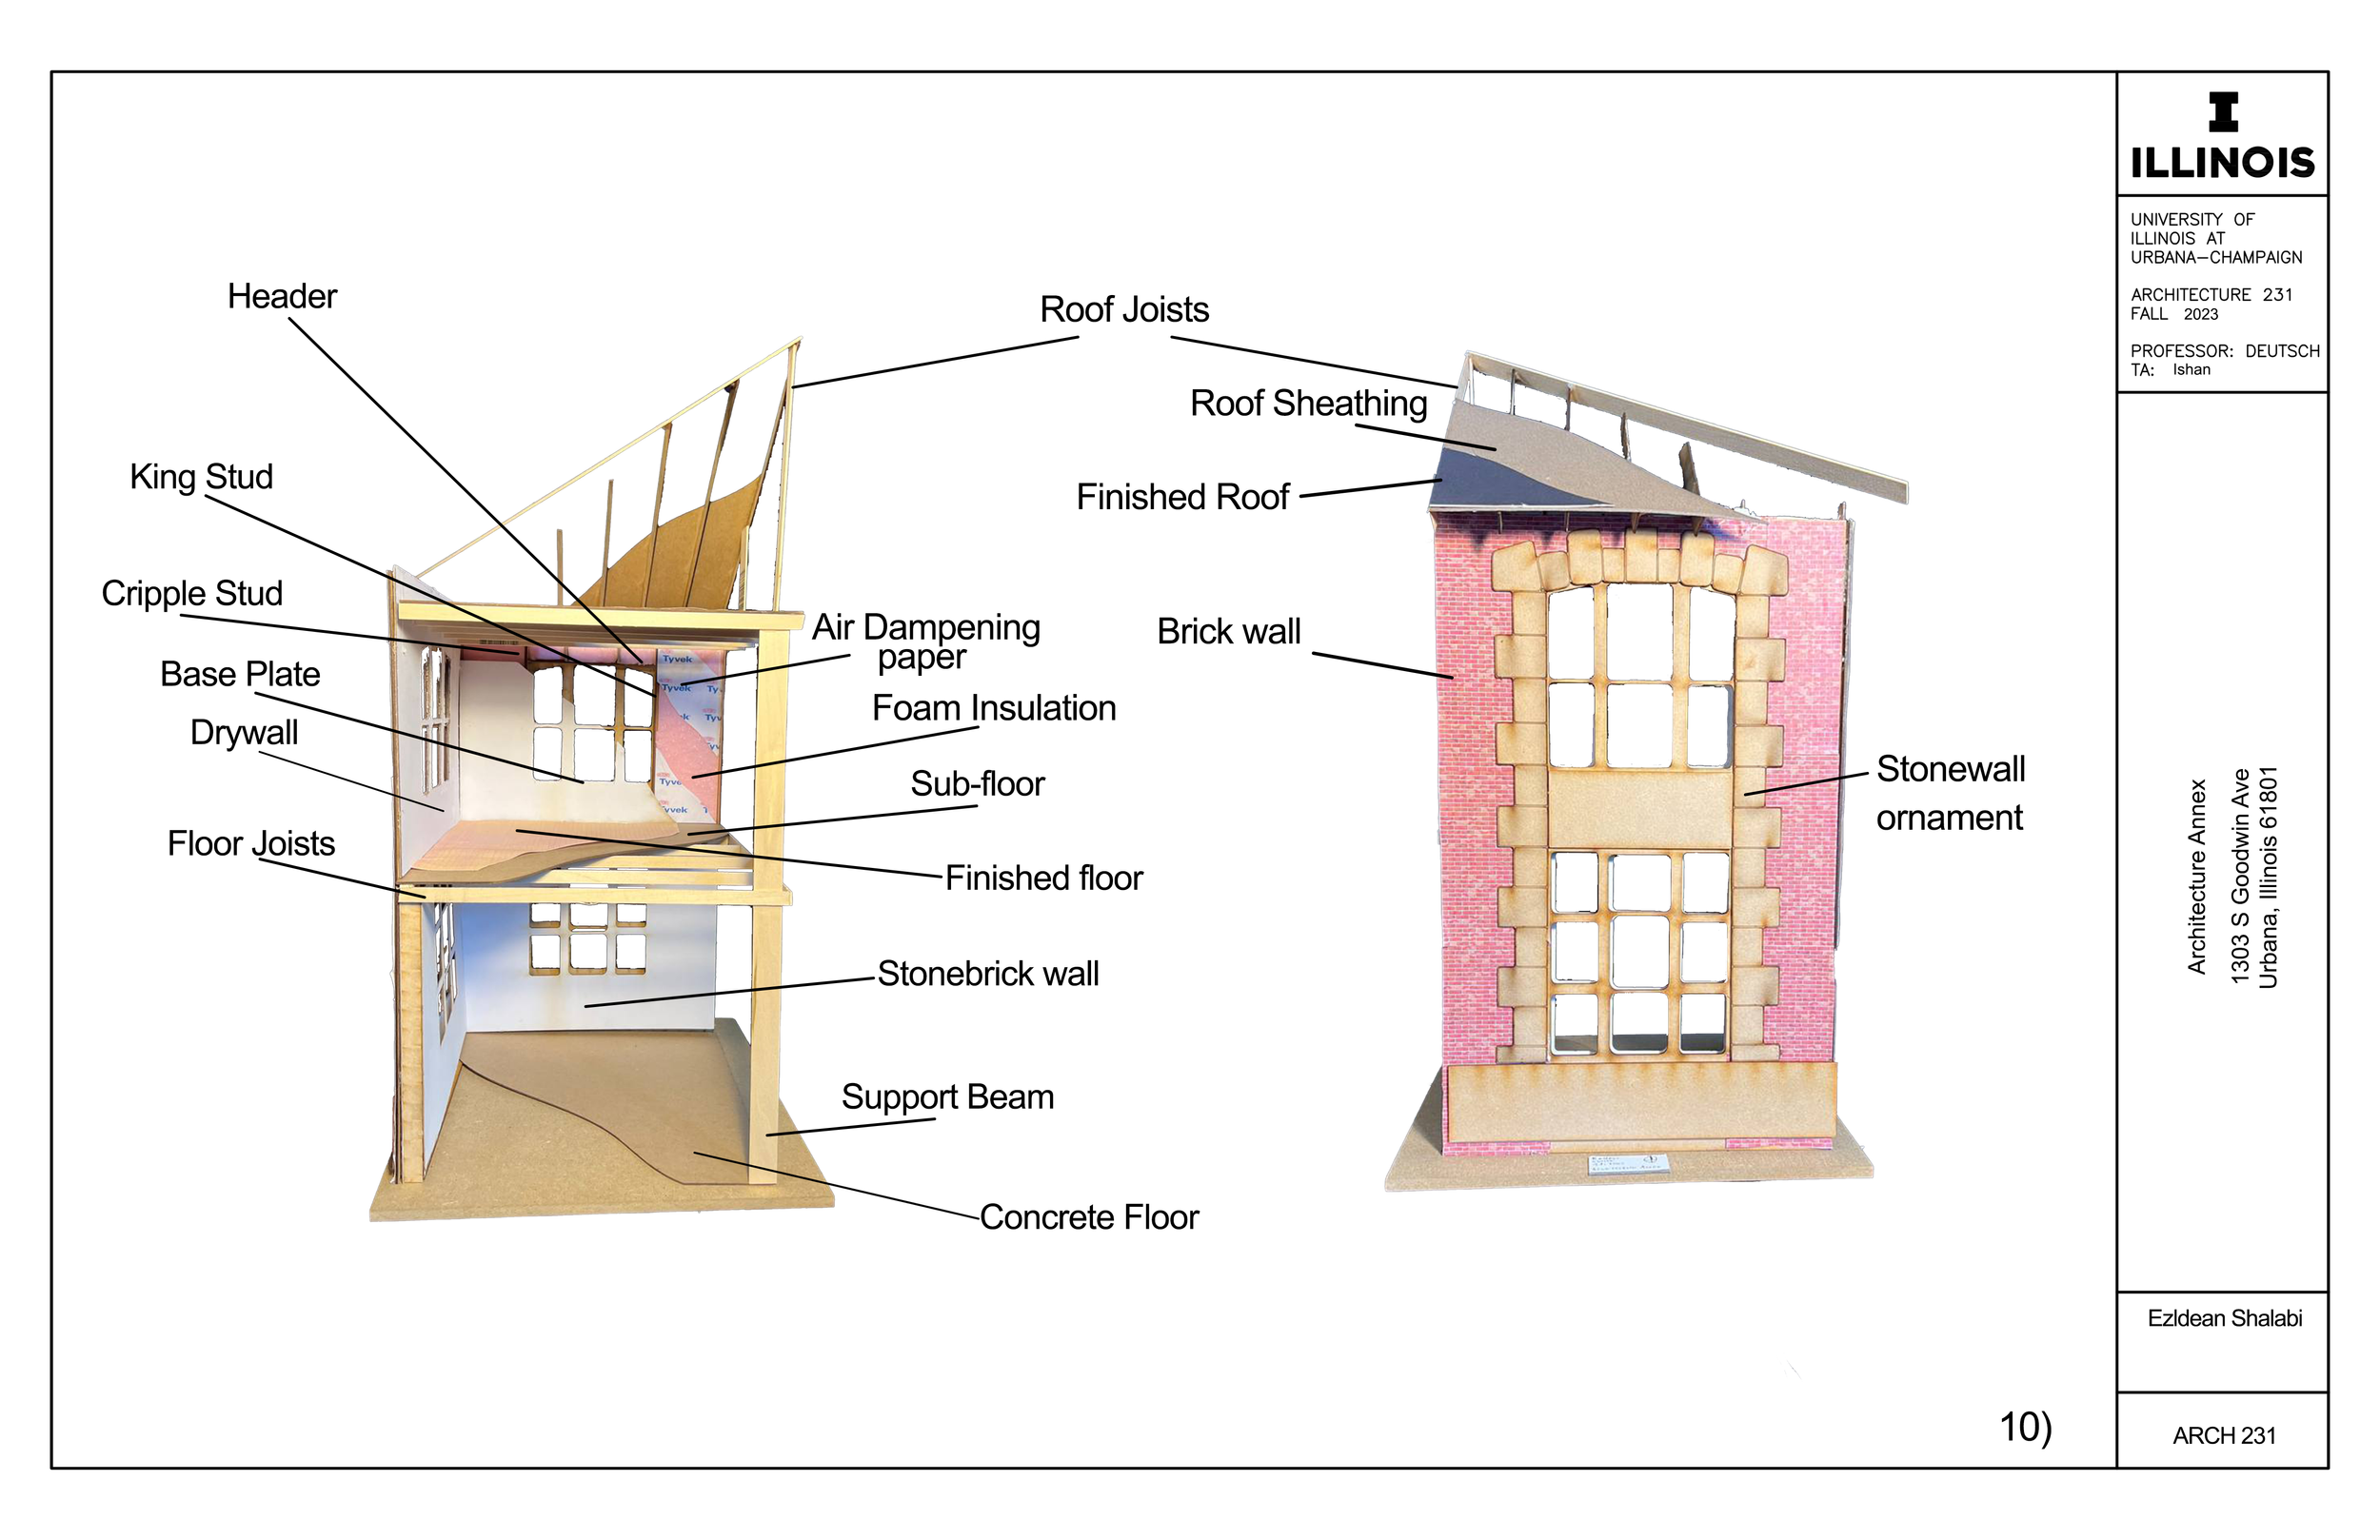
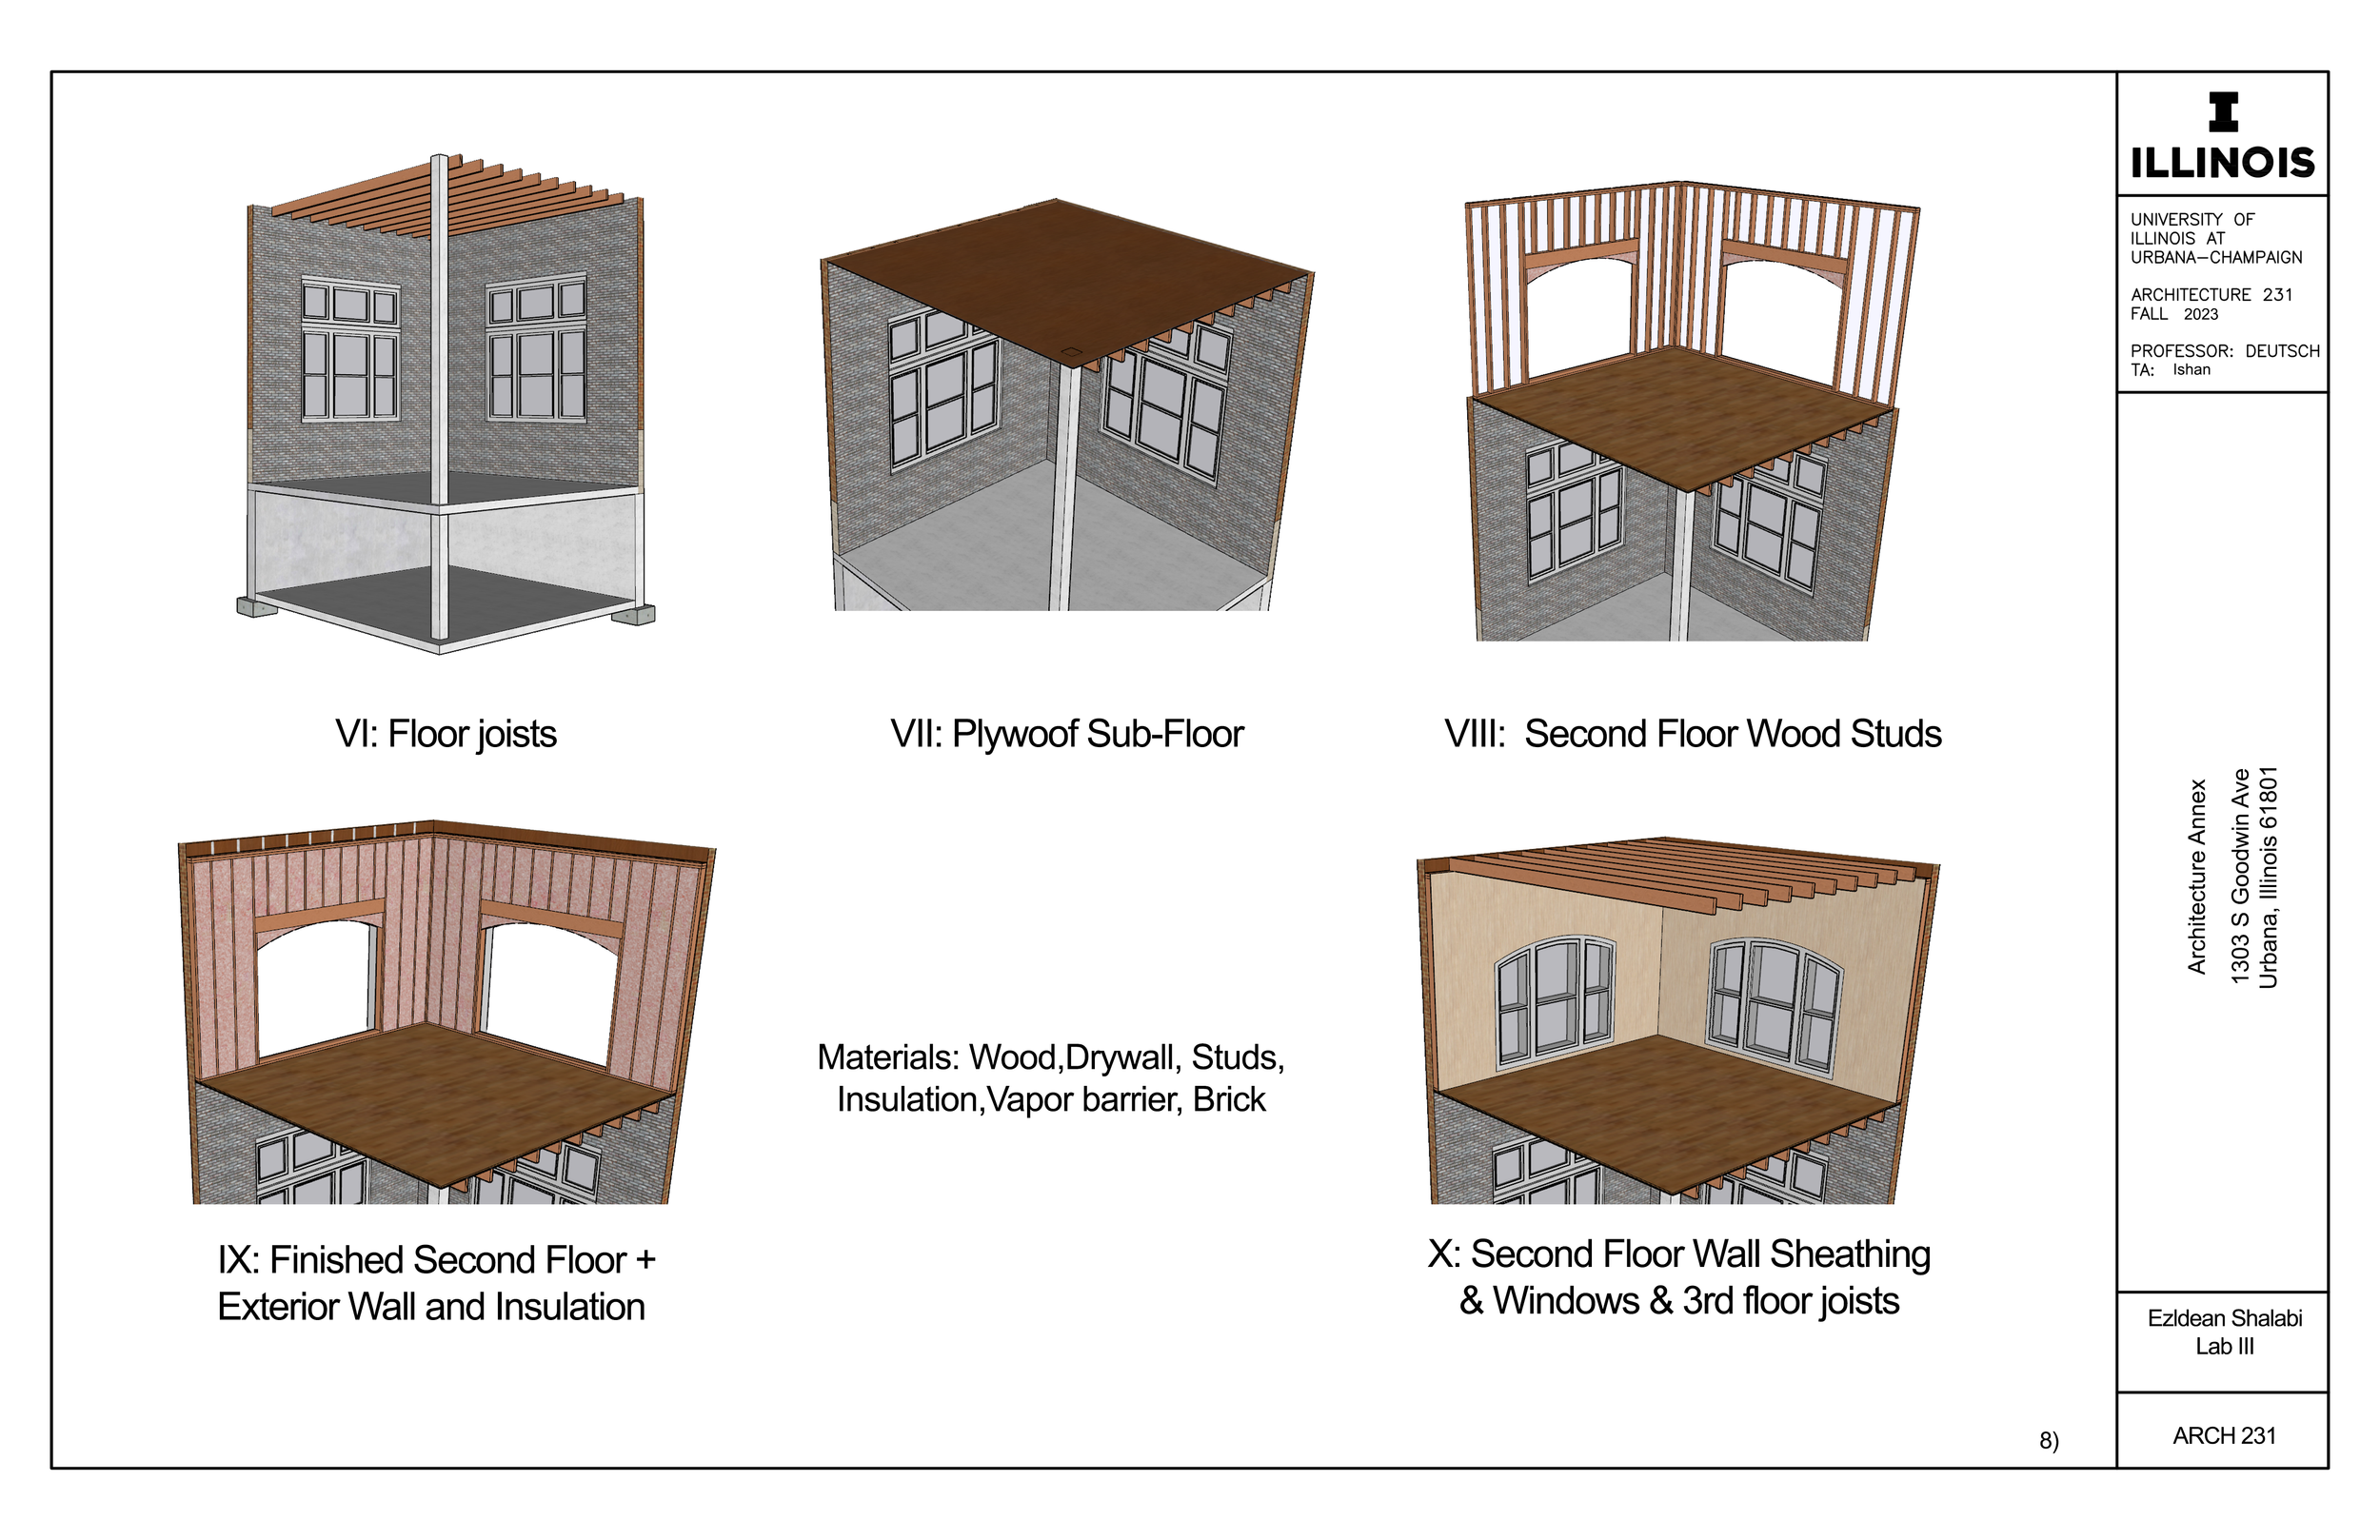
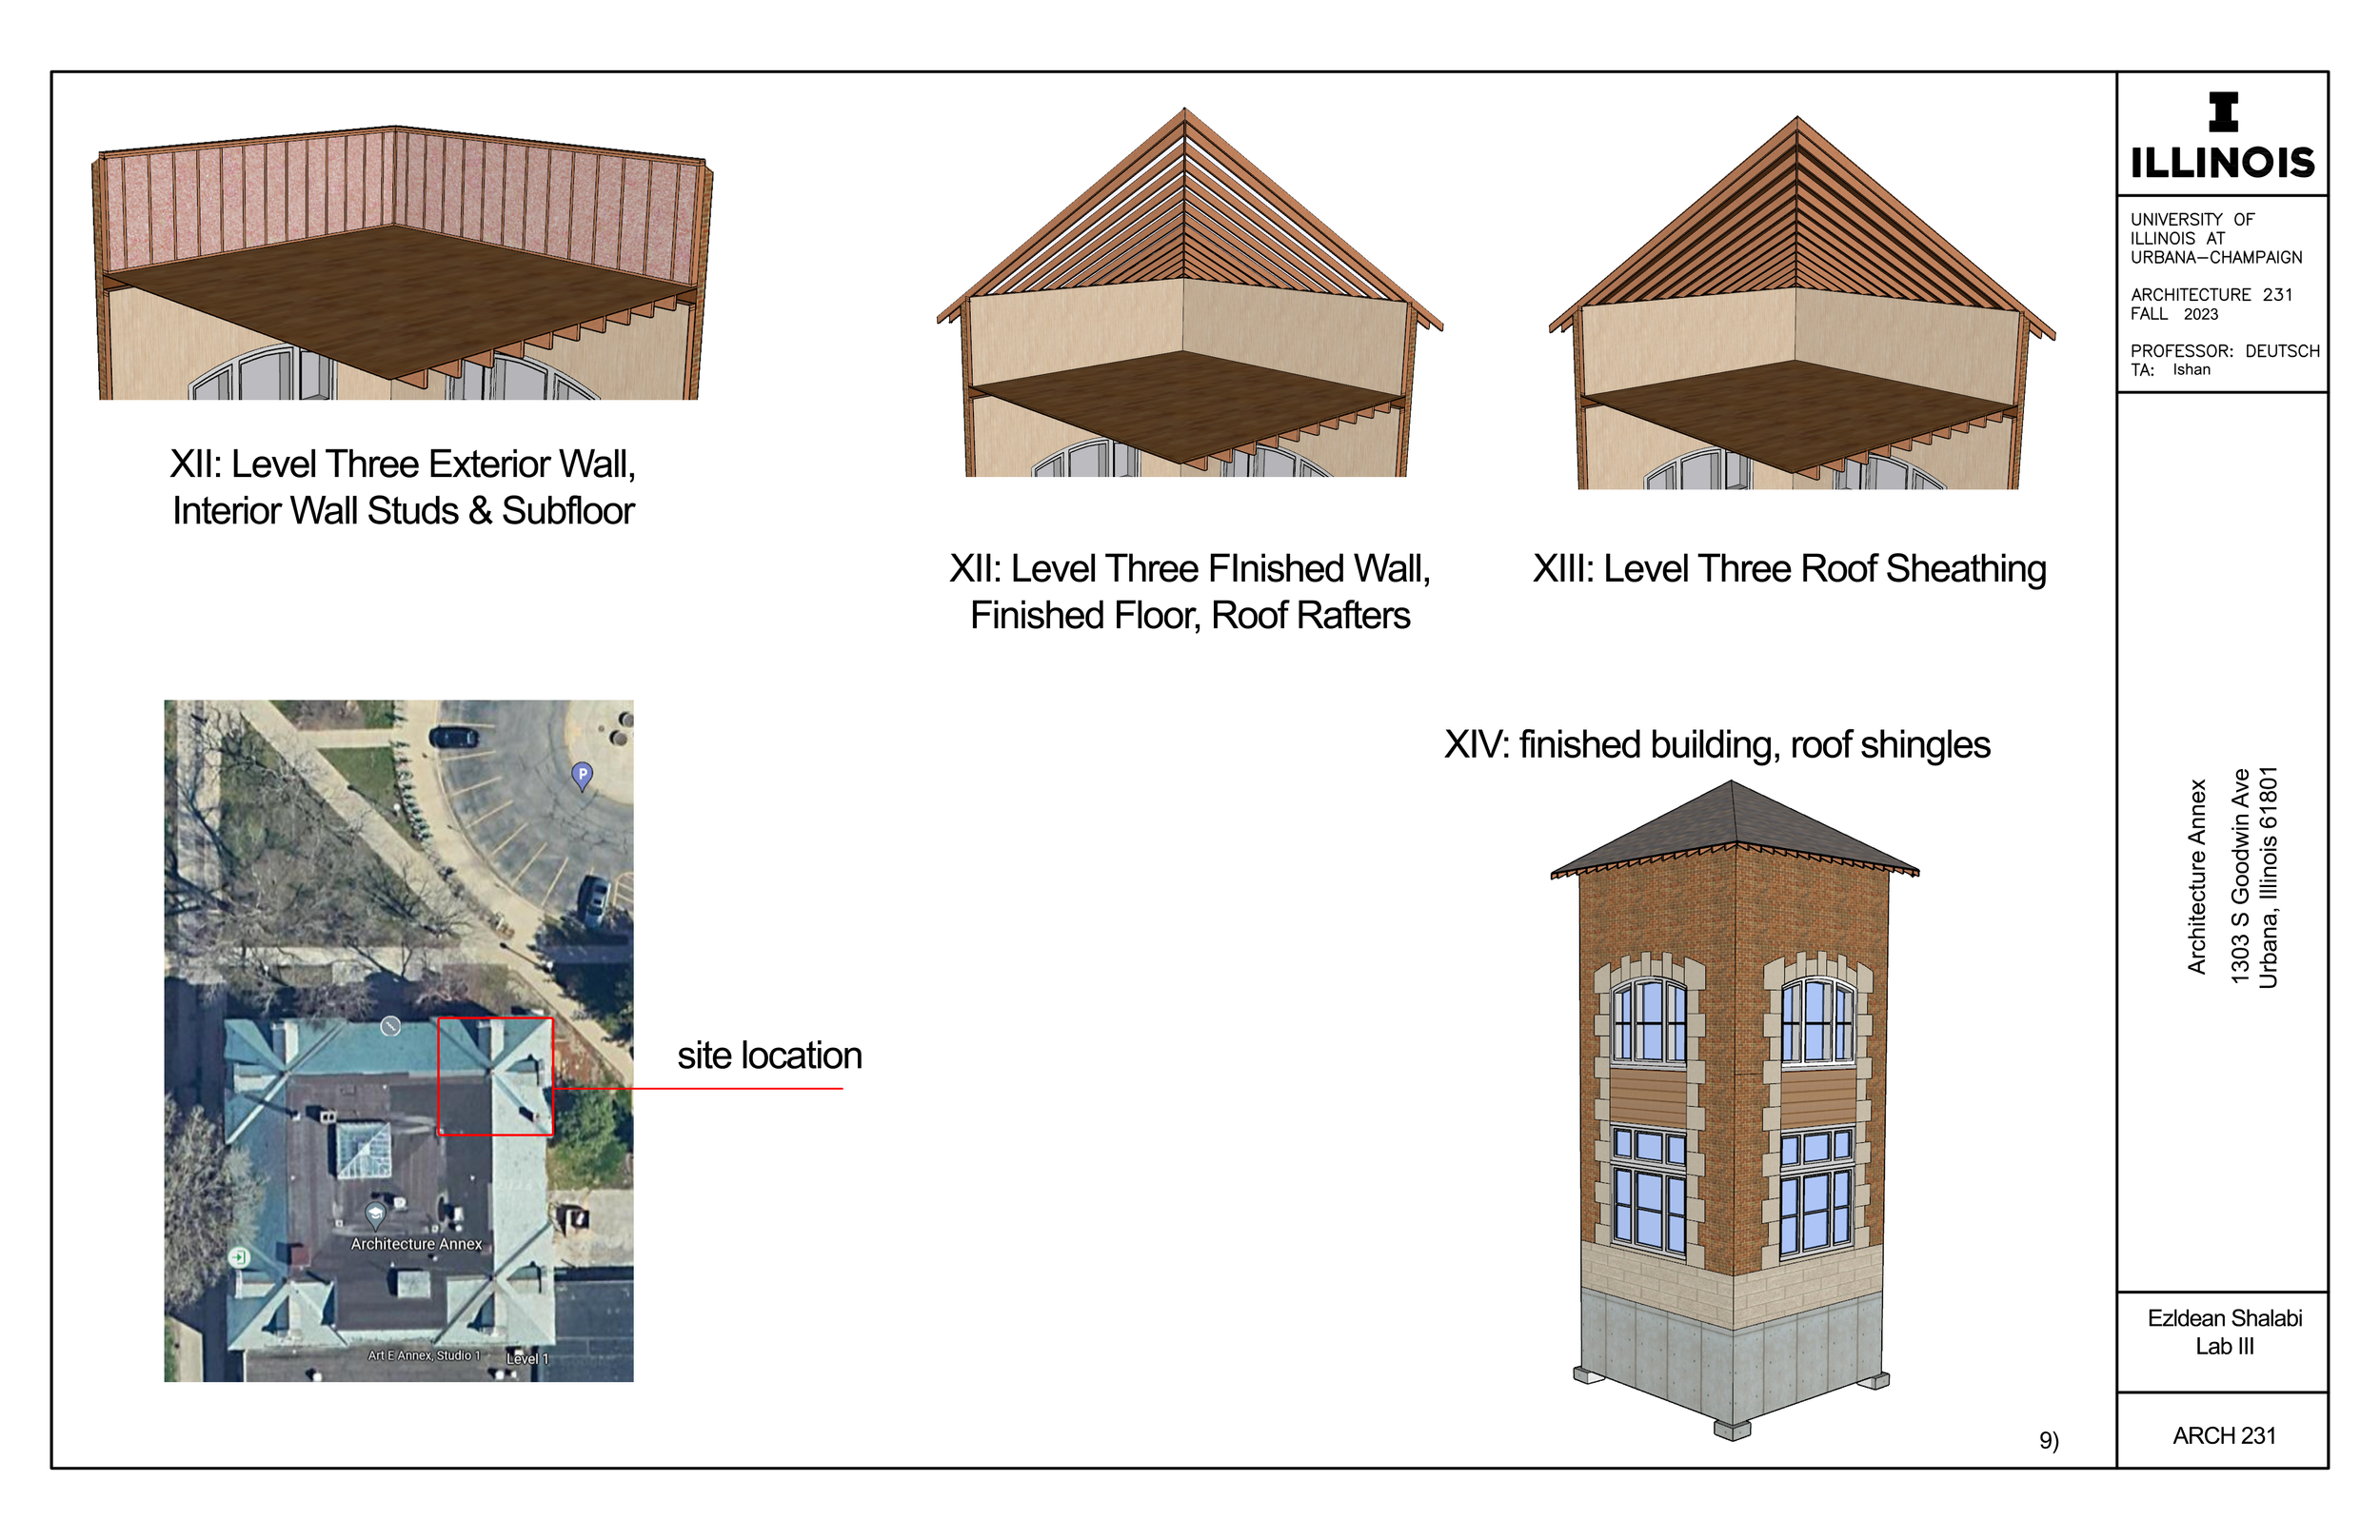
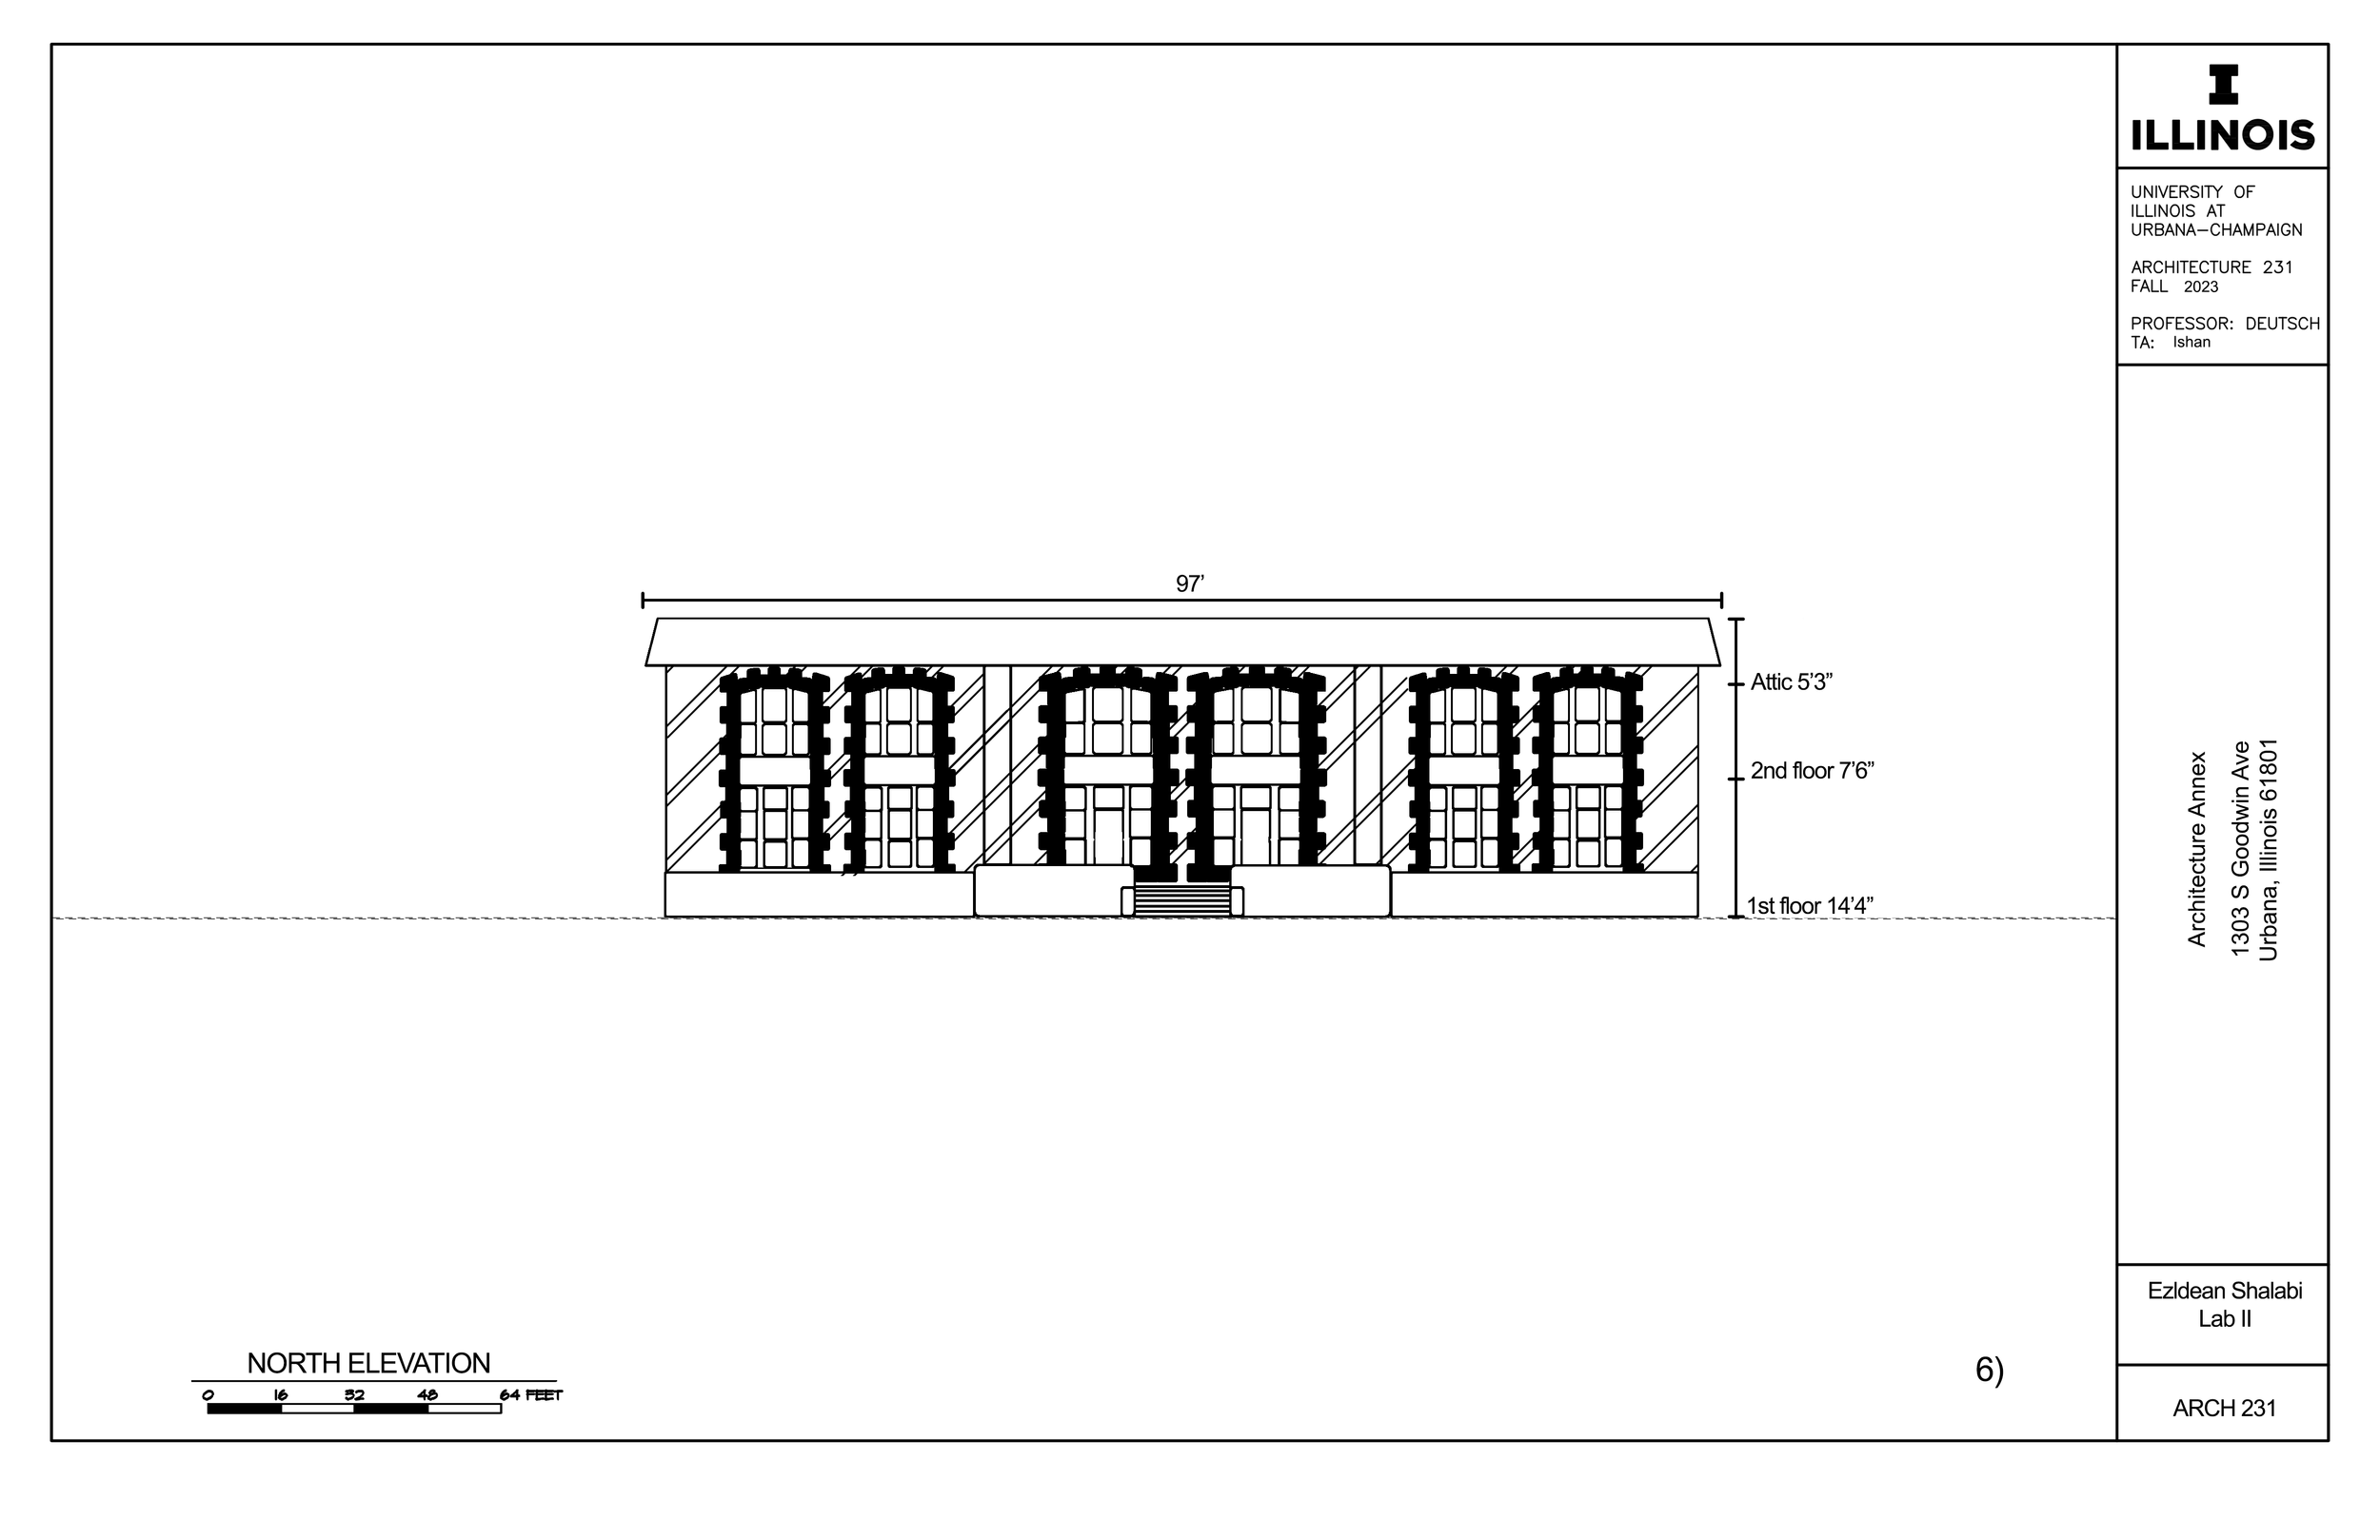
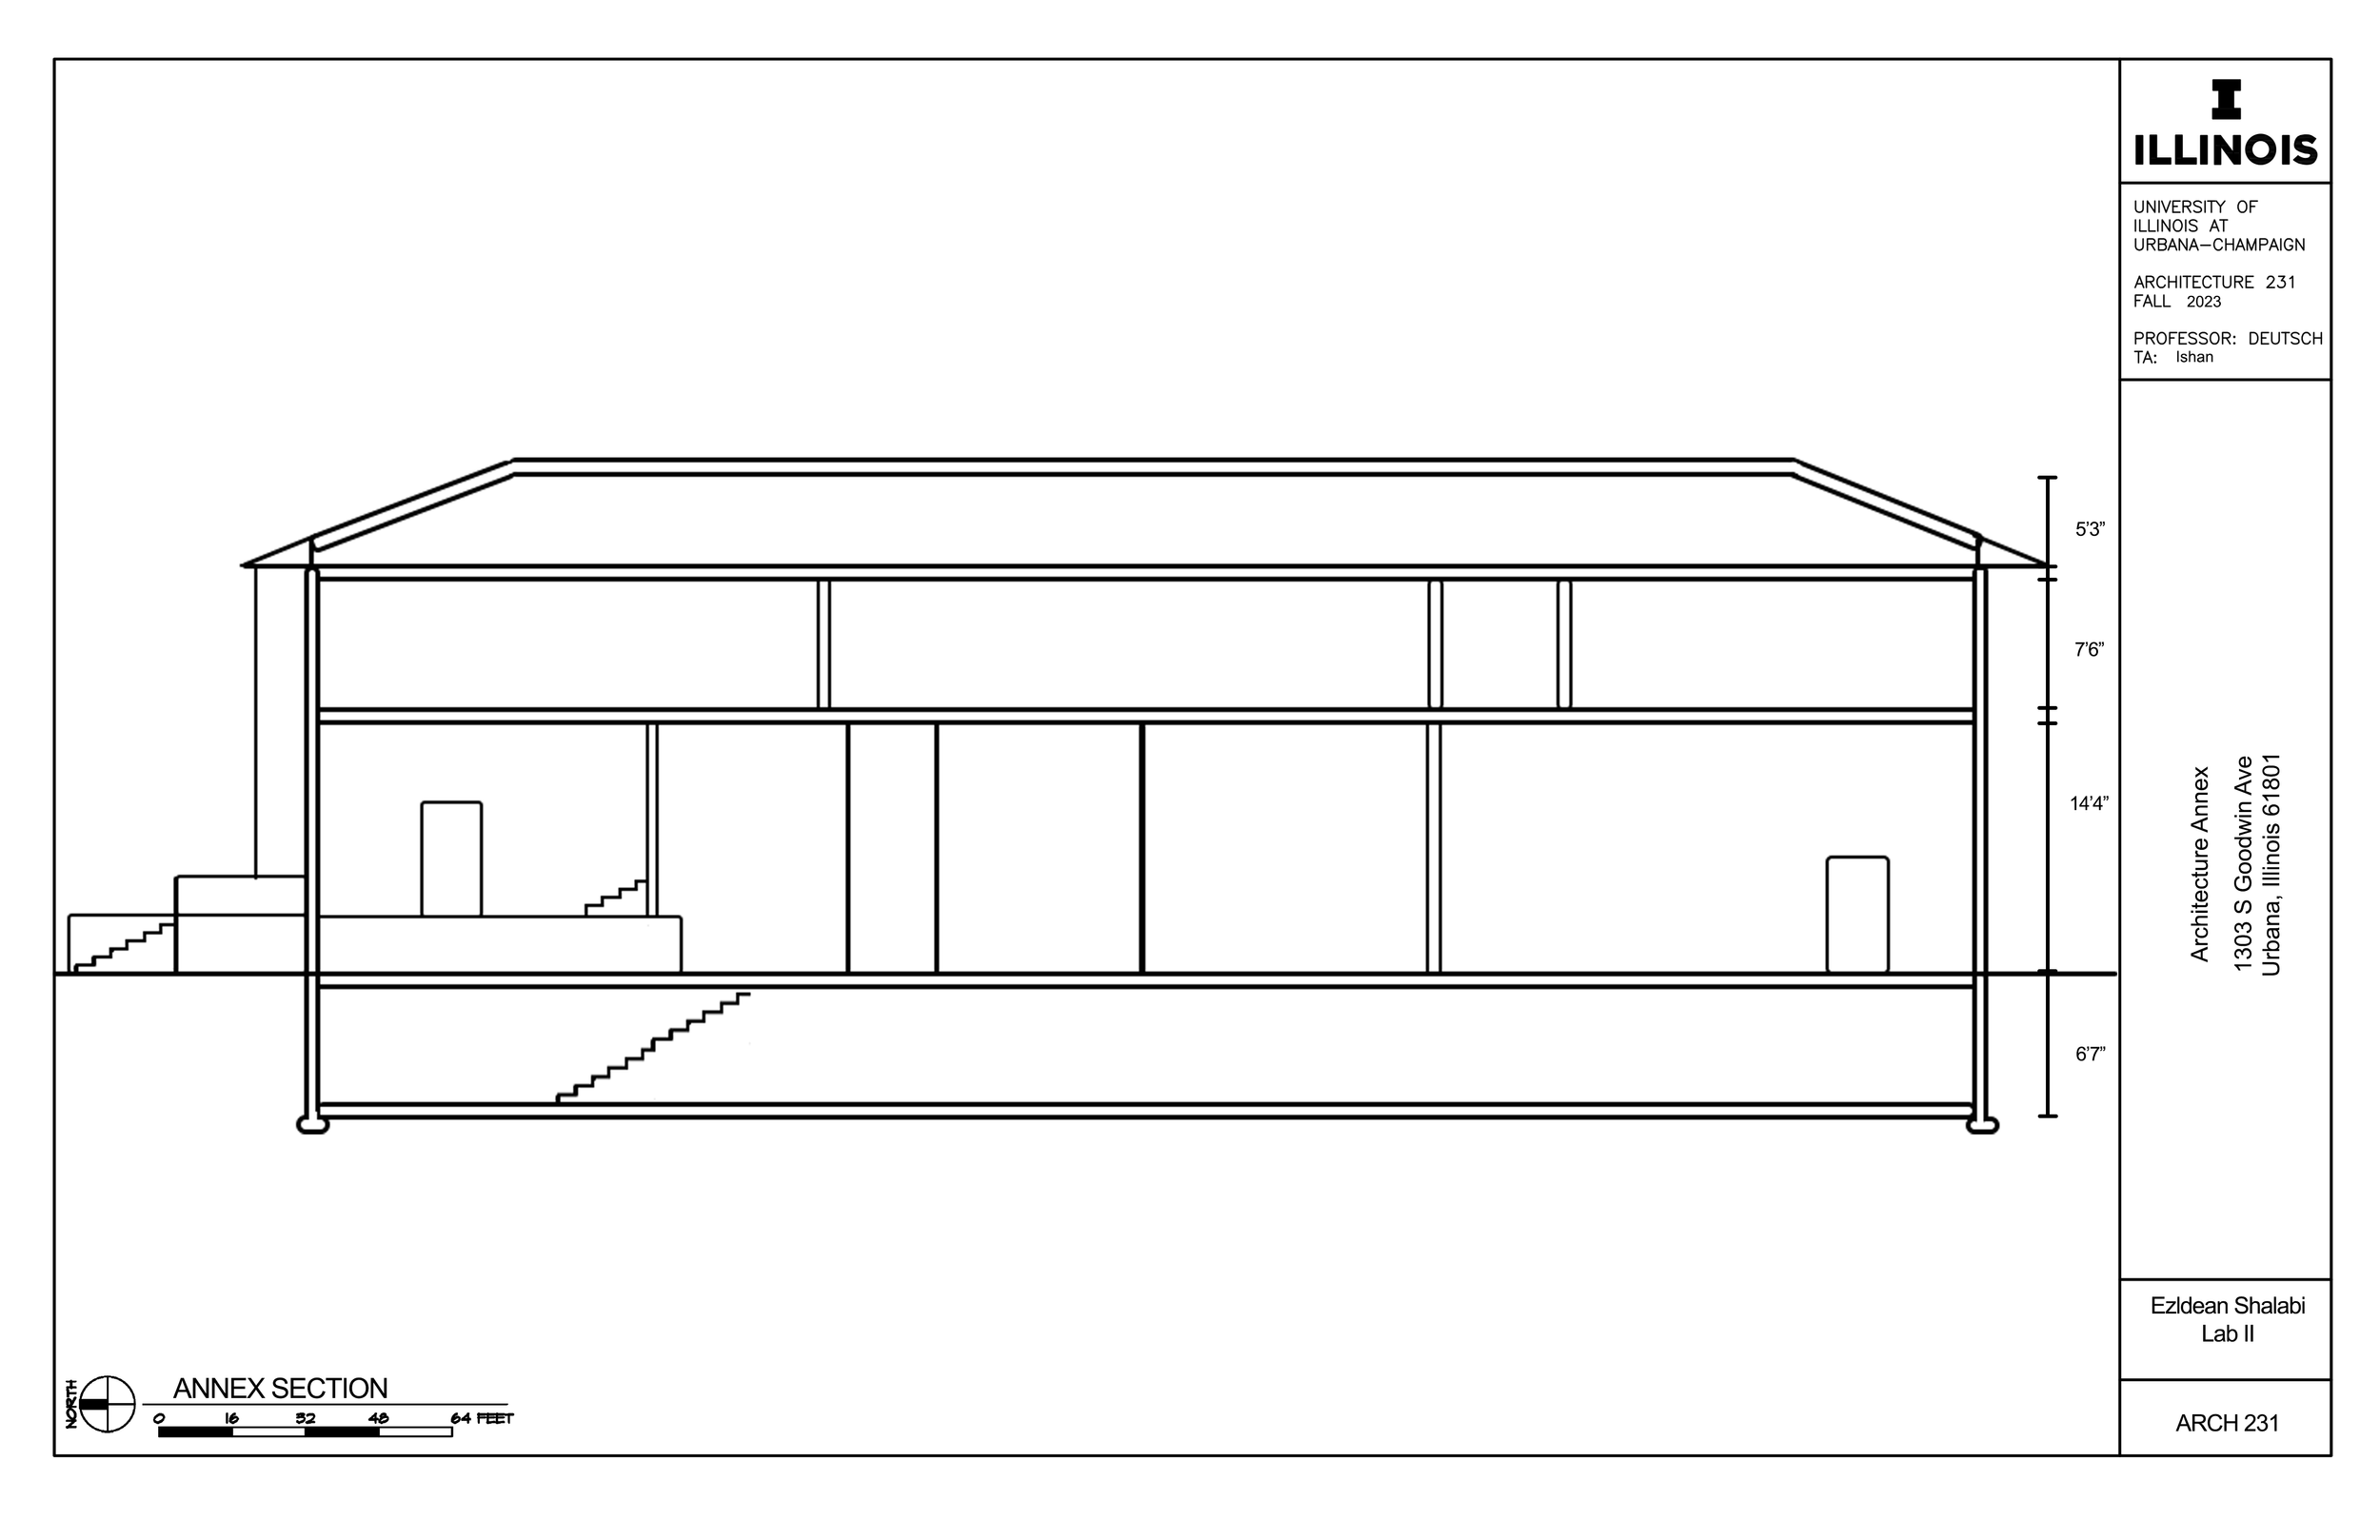
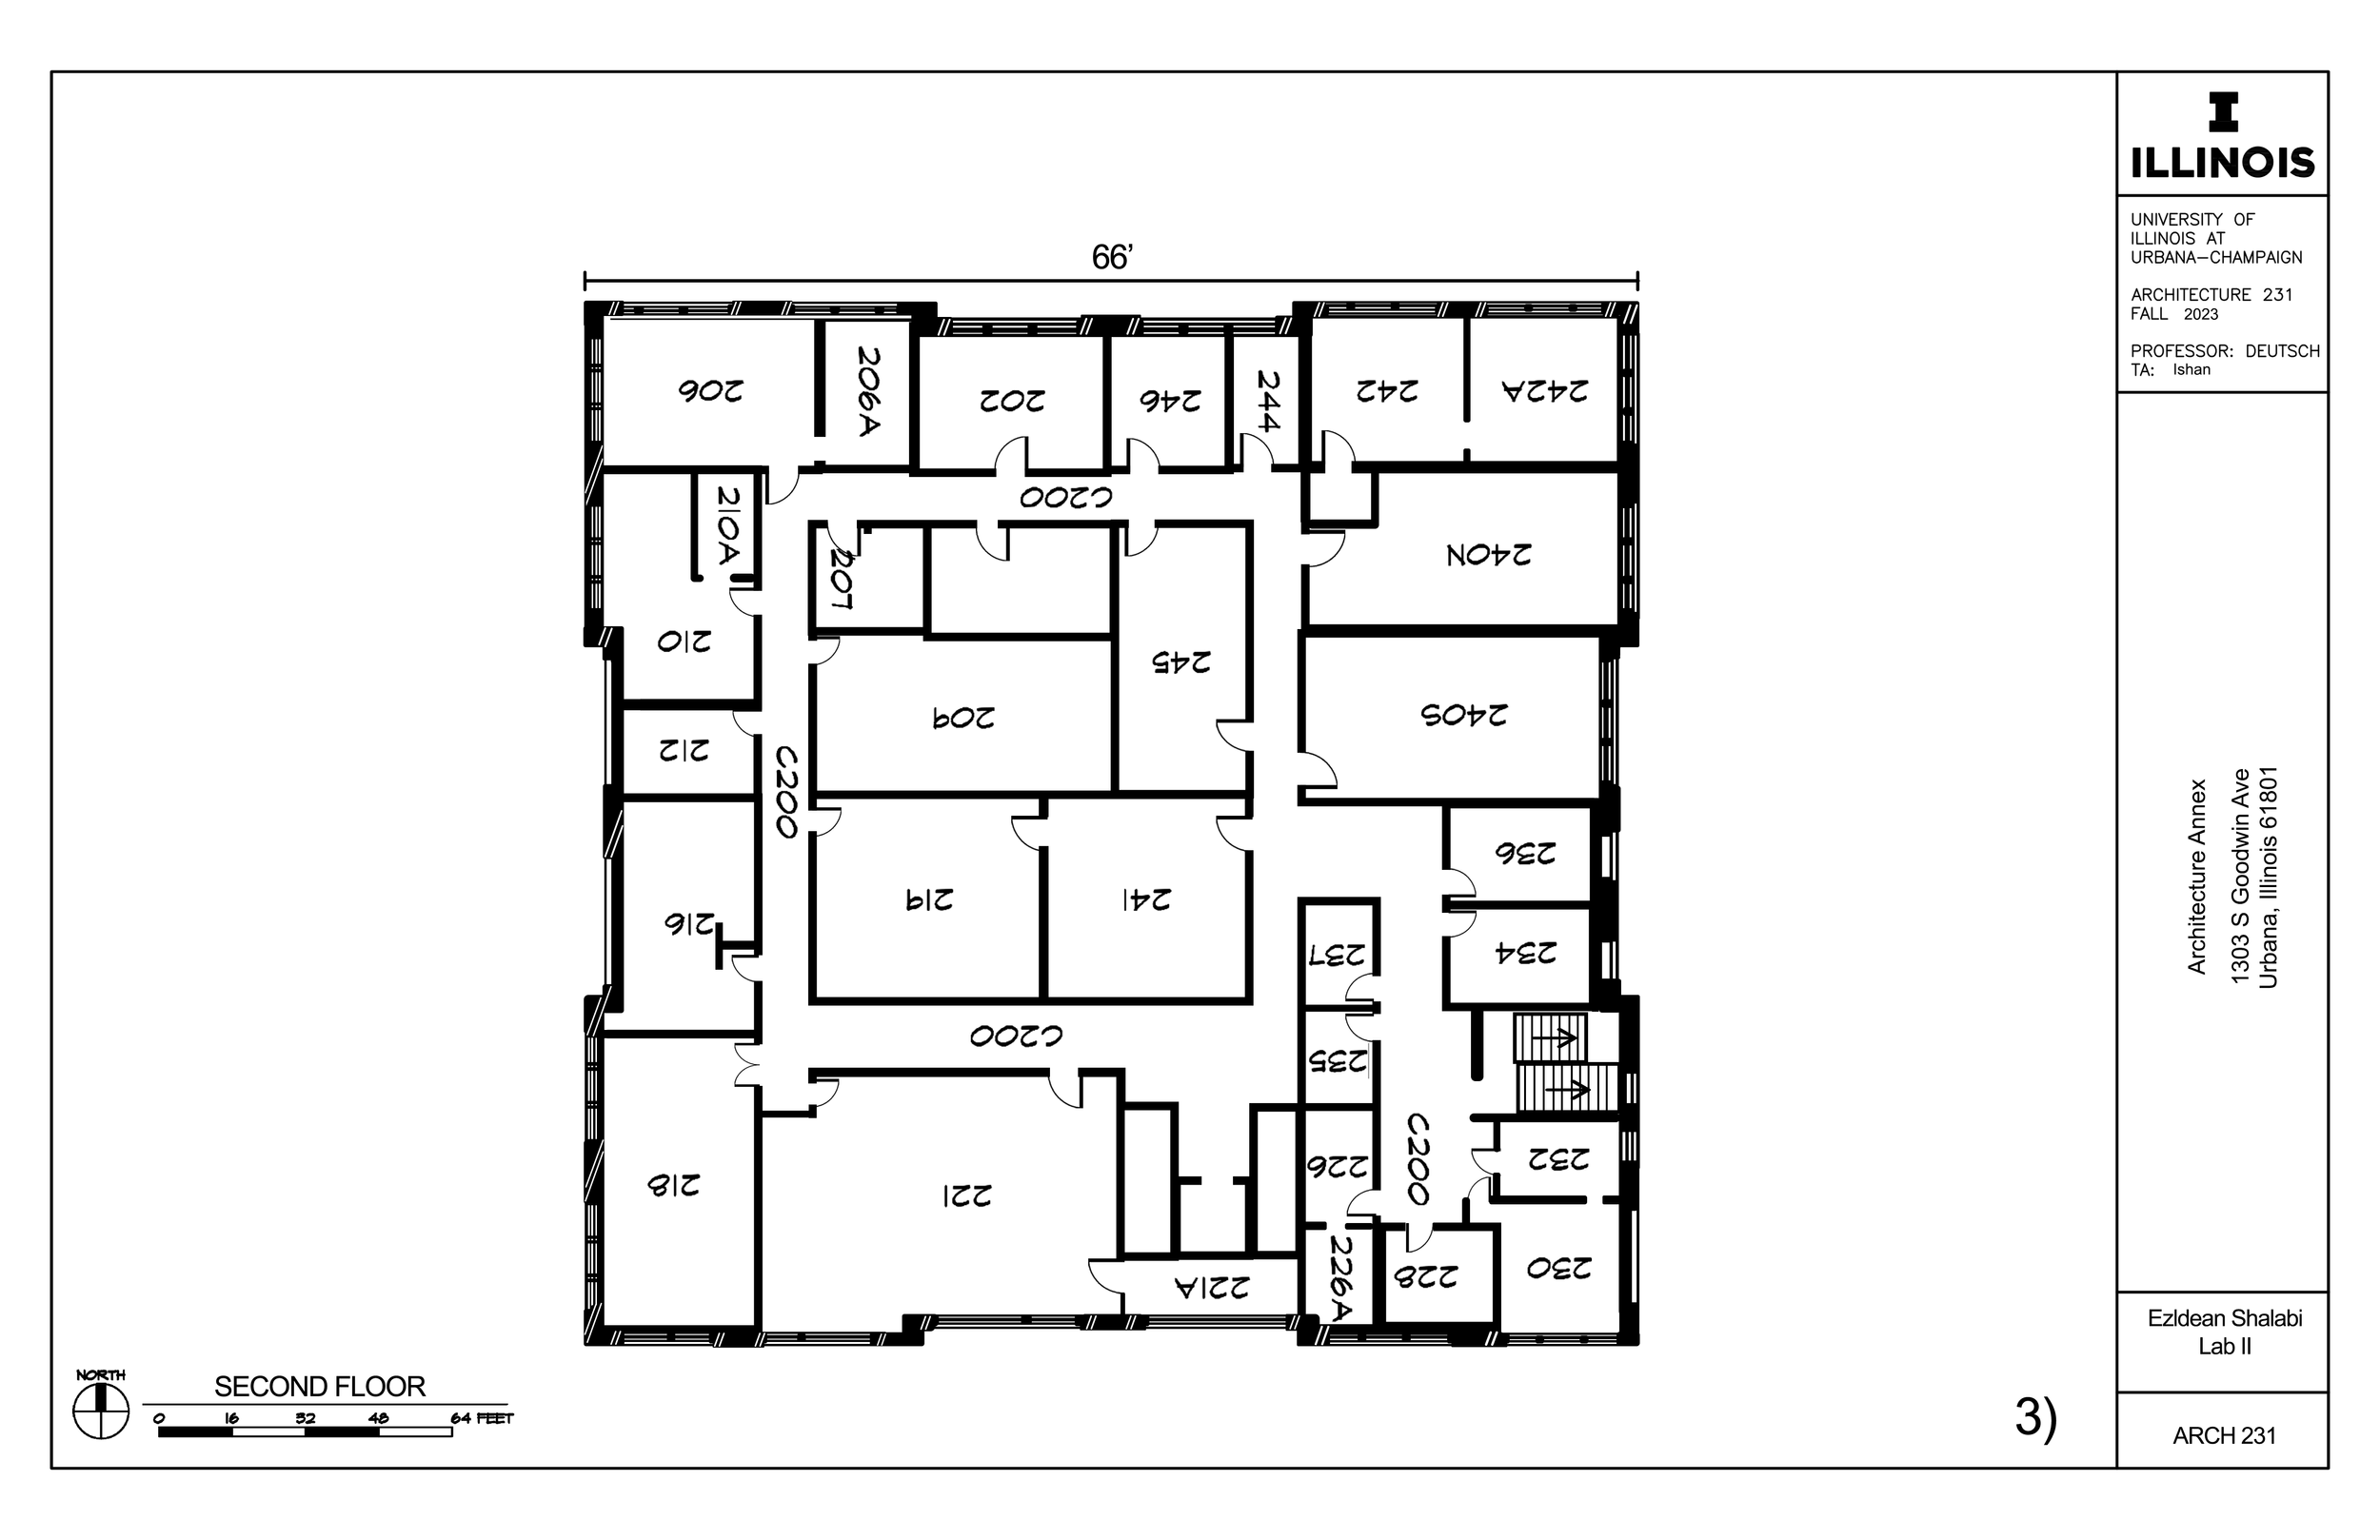
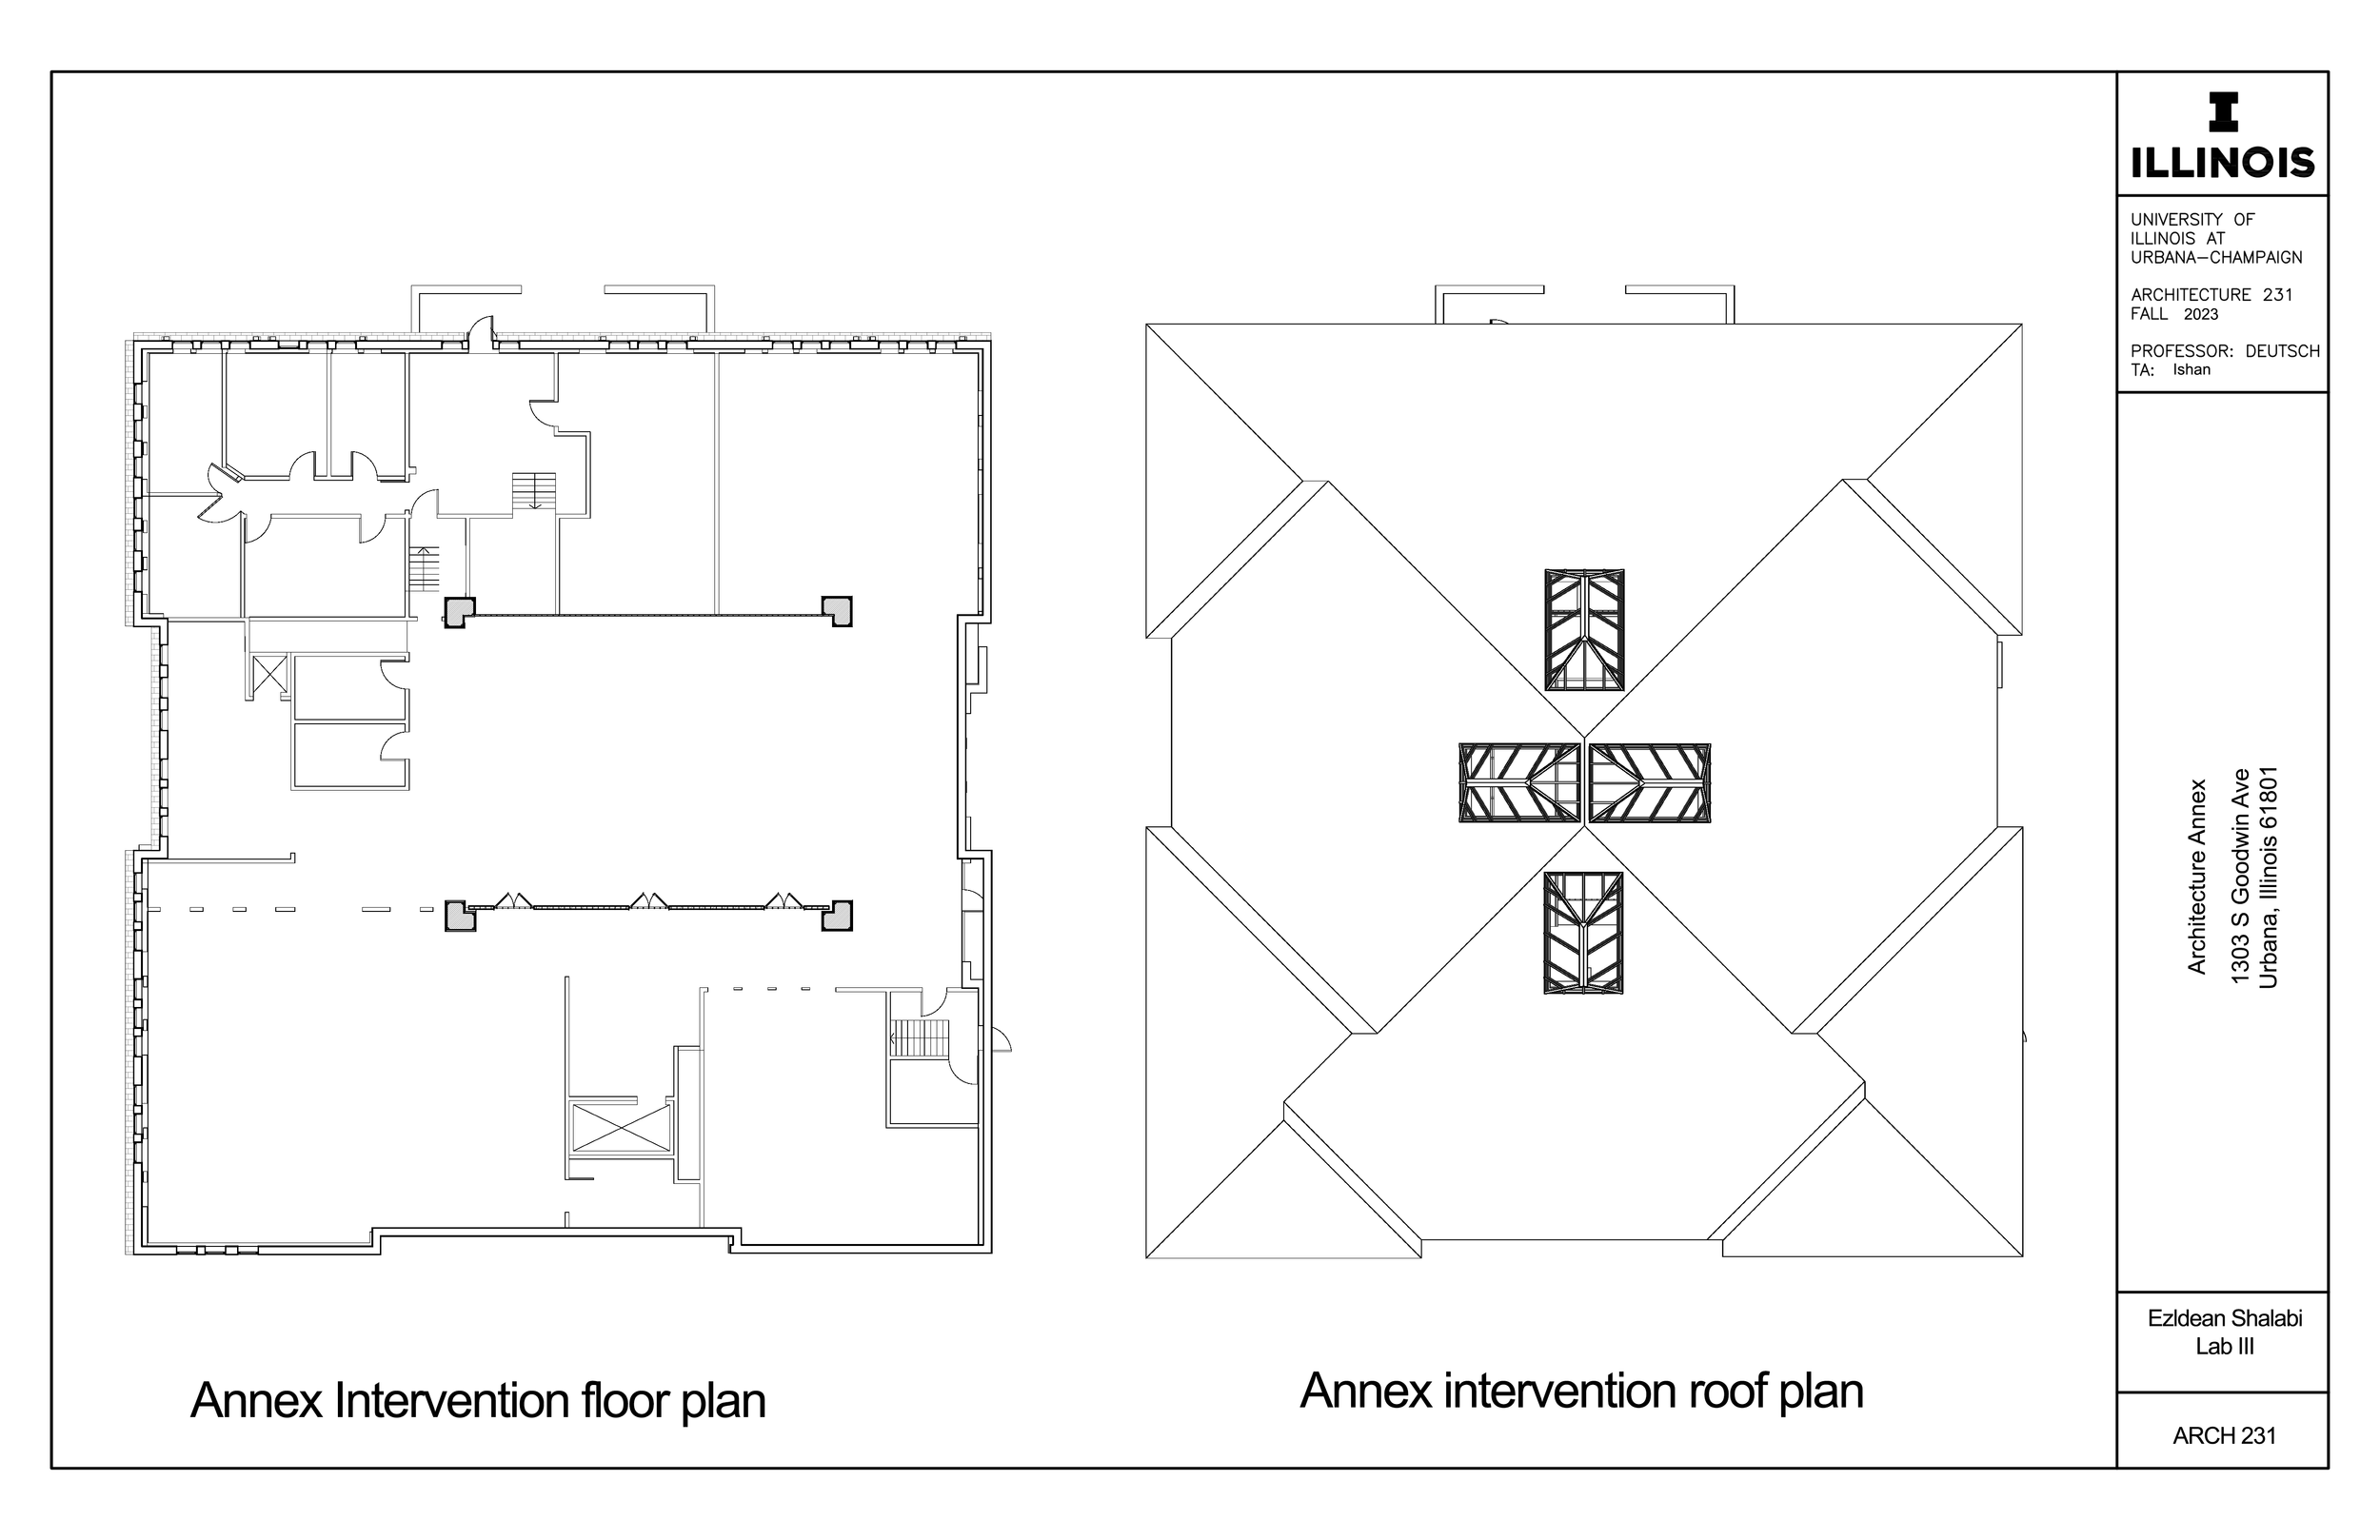
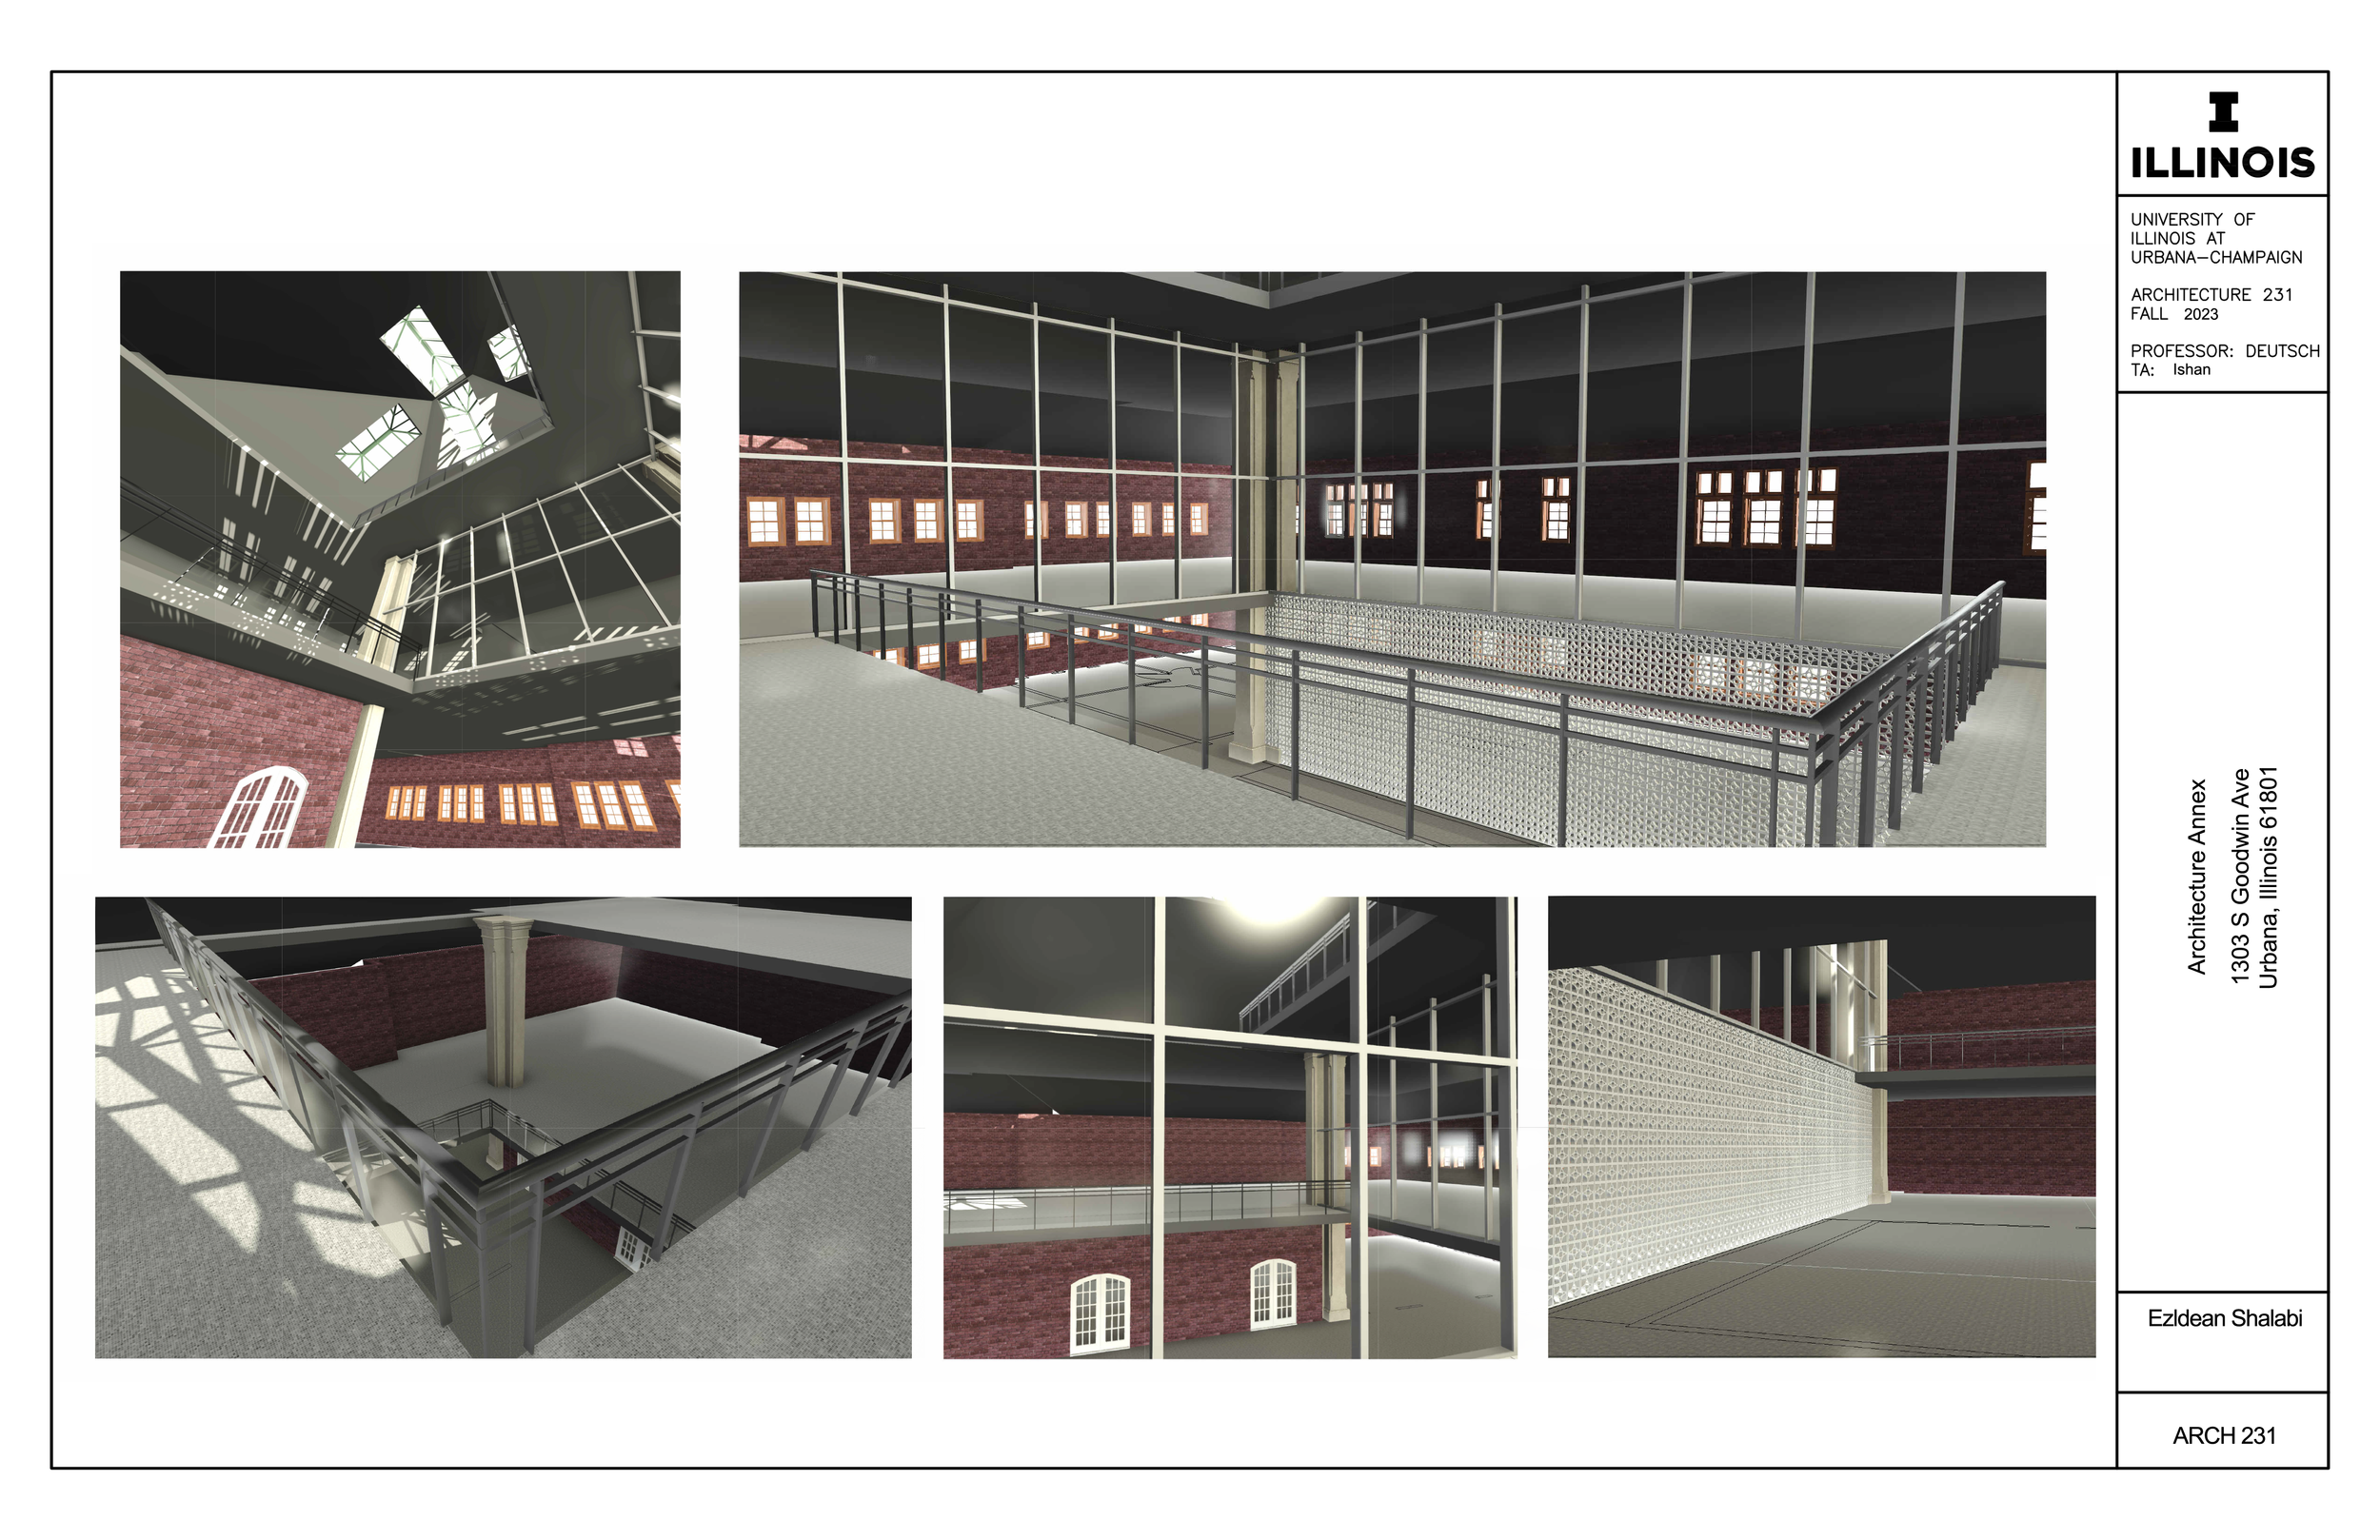
Here’s a collection of my work from my structures course! Throughout the semester, we were to plan out our custom intervention for the architecture annex building on the UIUC campus, which had me learning skills from sun mapping and measuring/scaling, to creating sections and Revit renders. This course employed Photoshop, Sketchup, Revit, Autocad, and Physical Modelling, all pictured below!


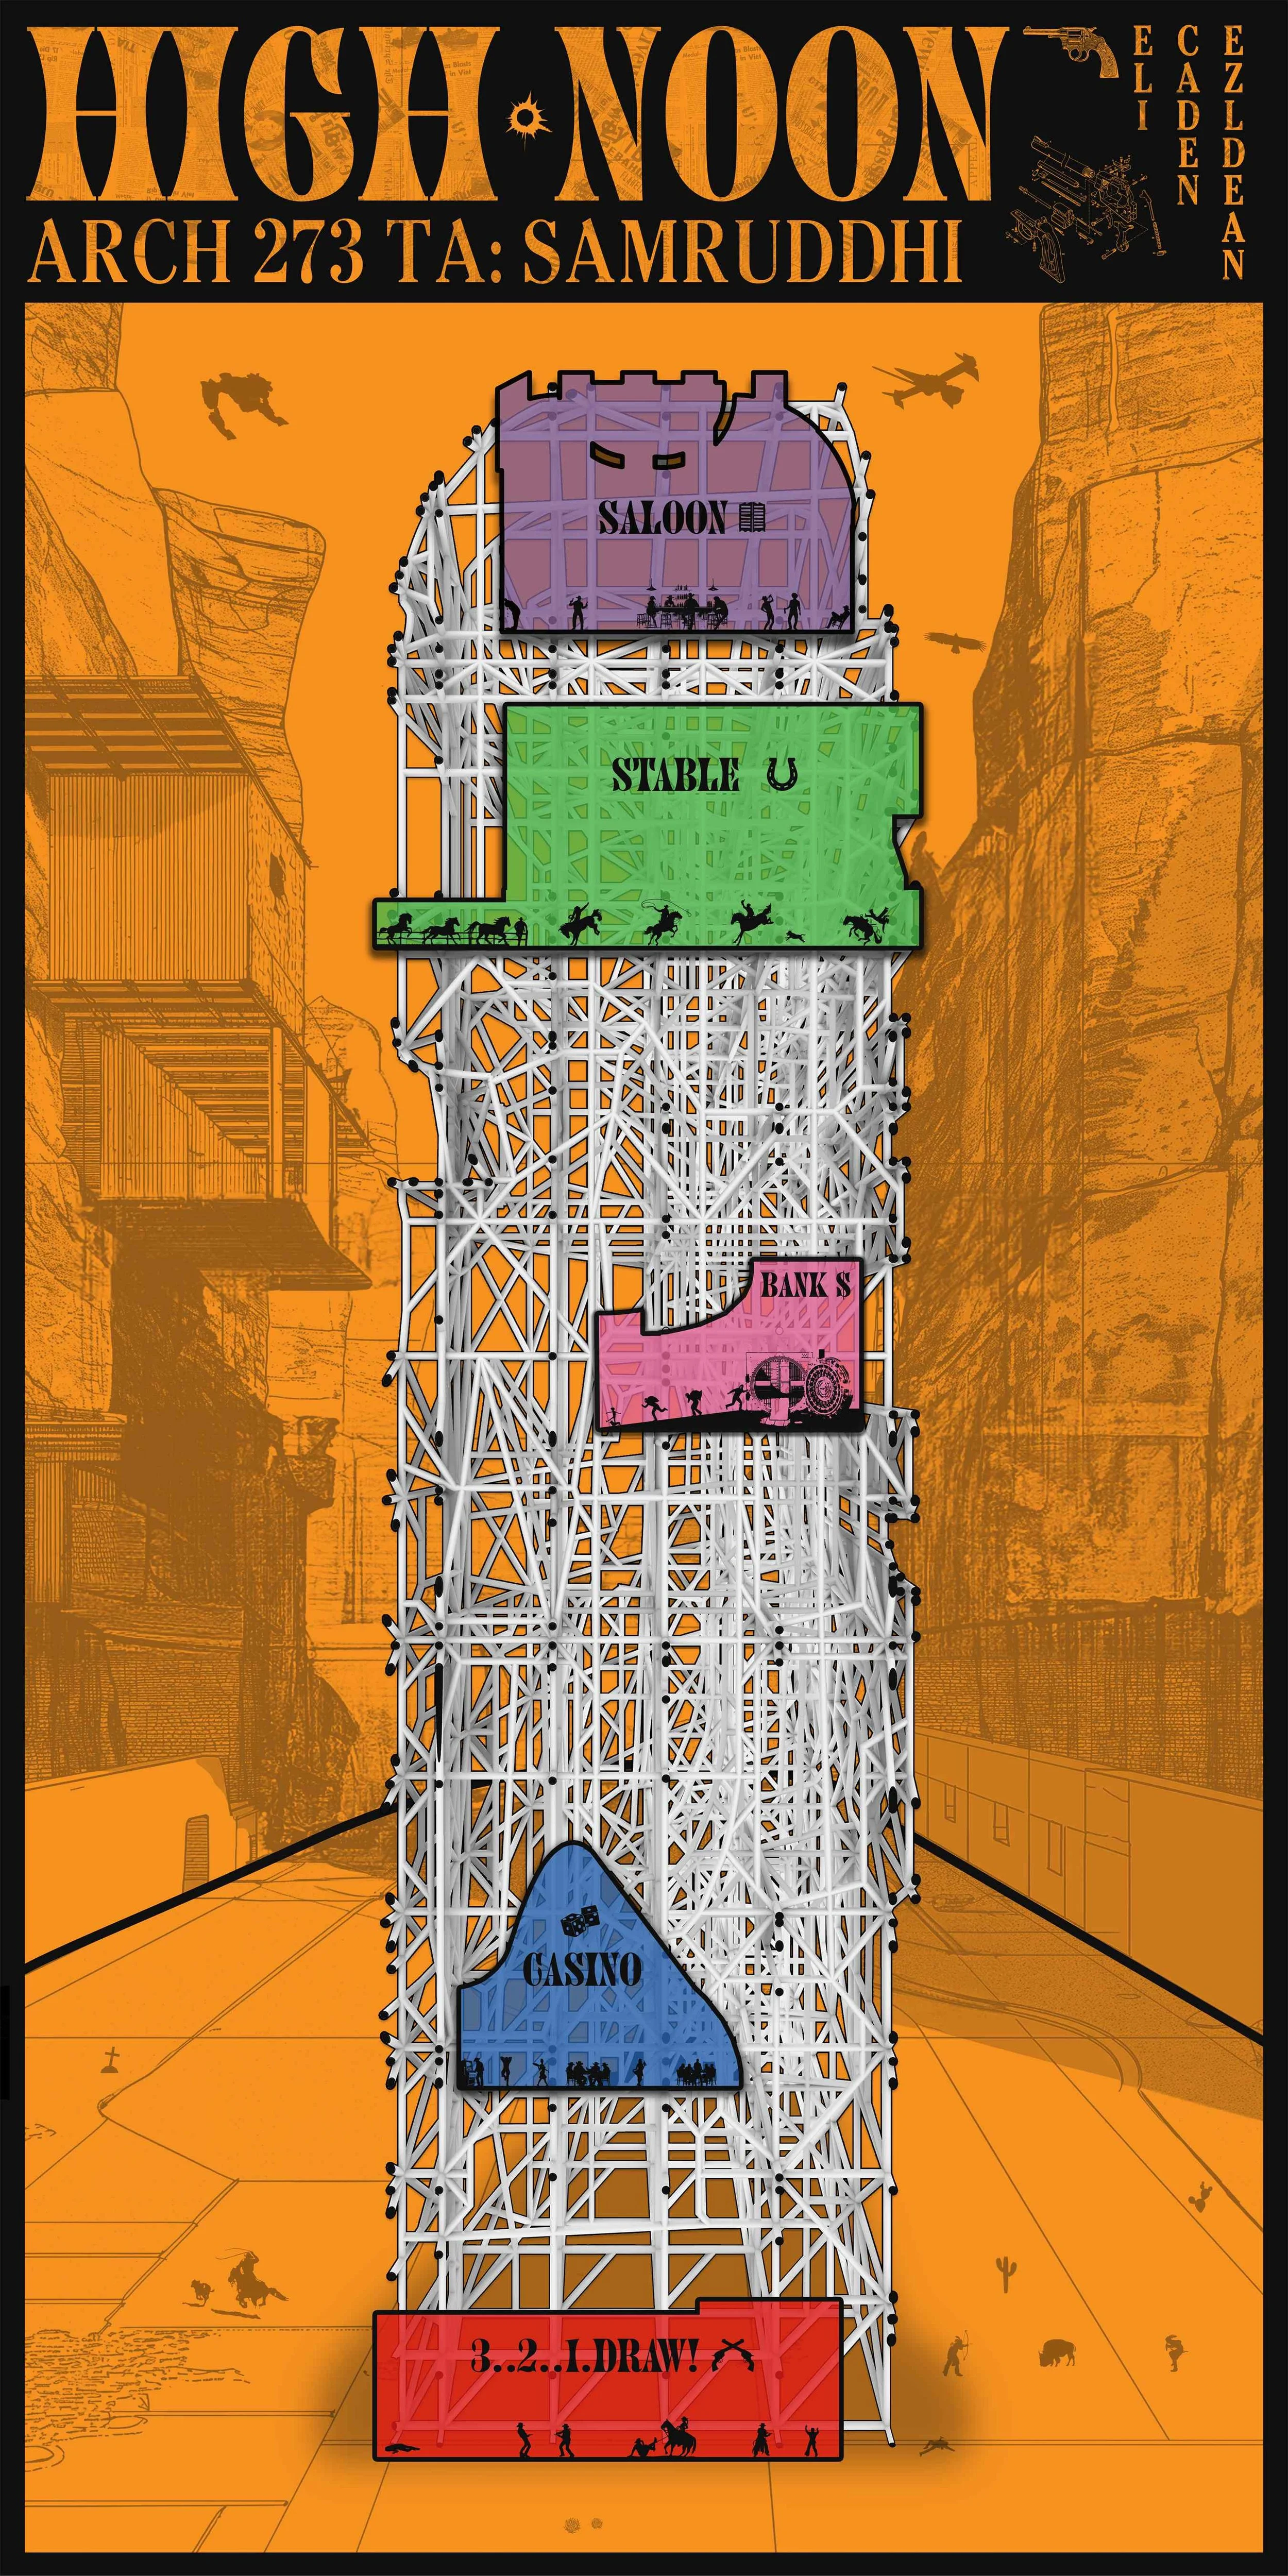
Final Project
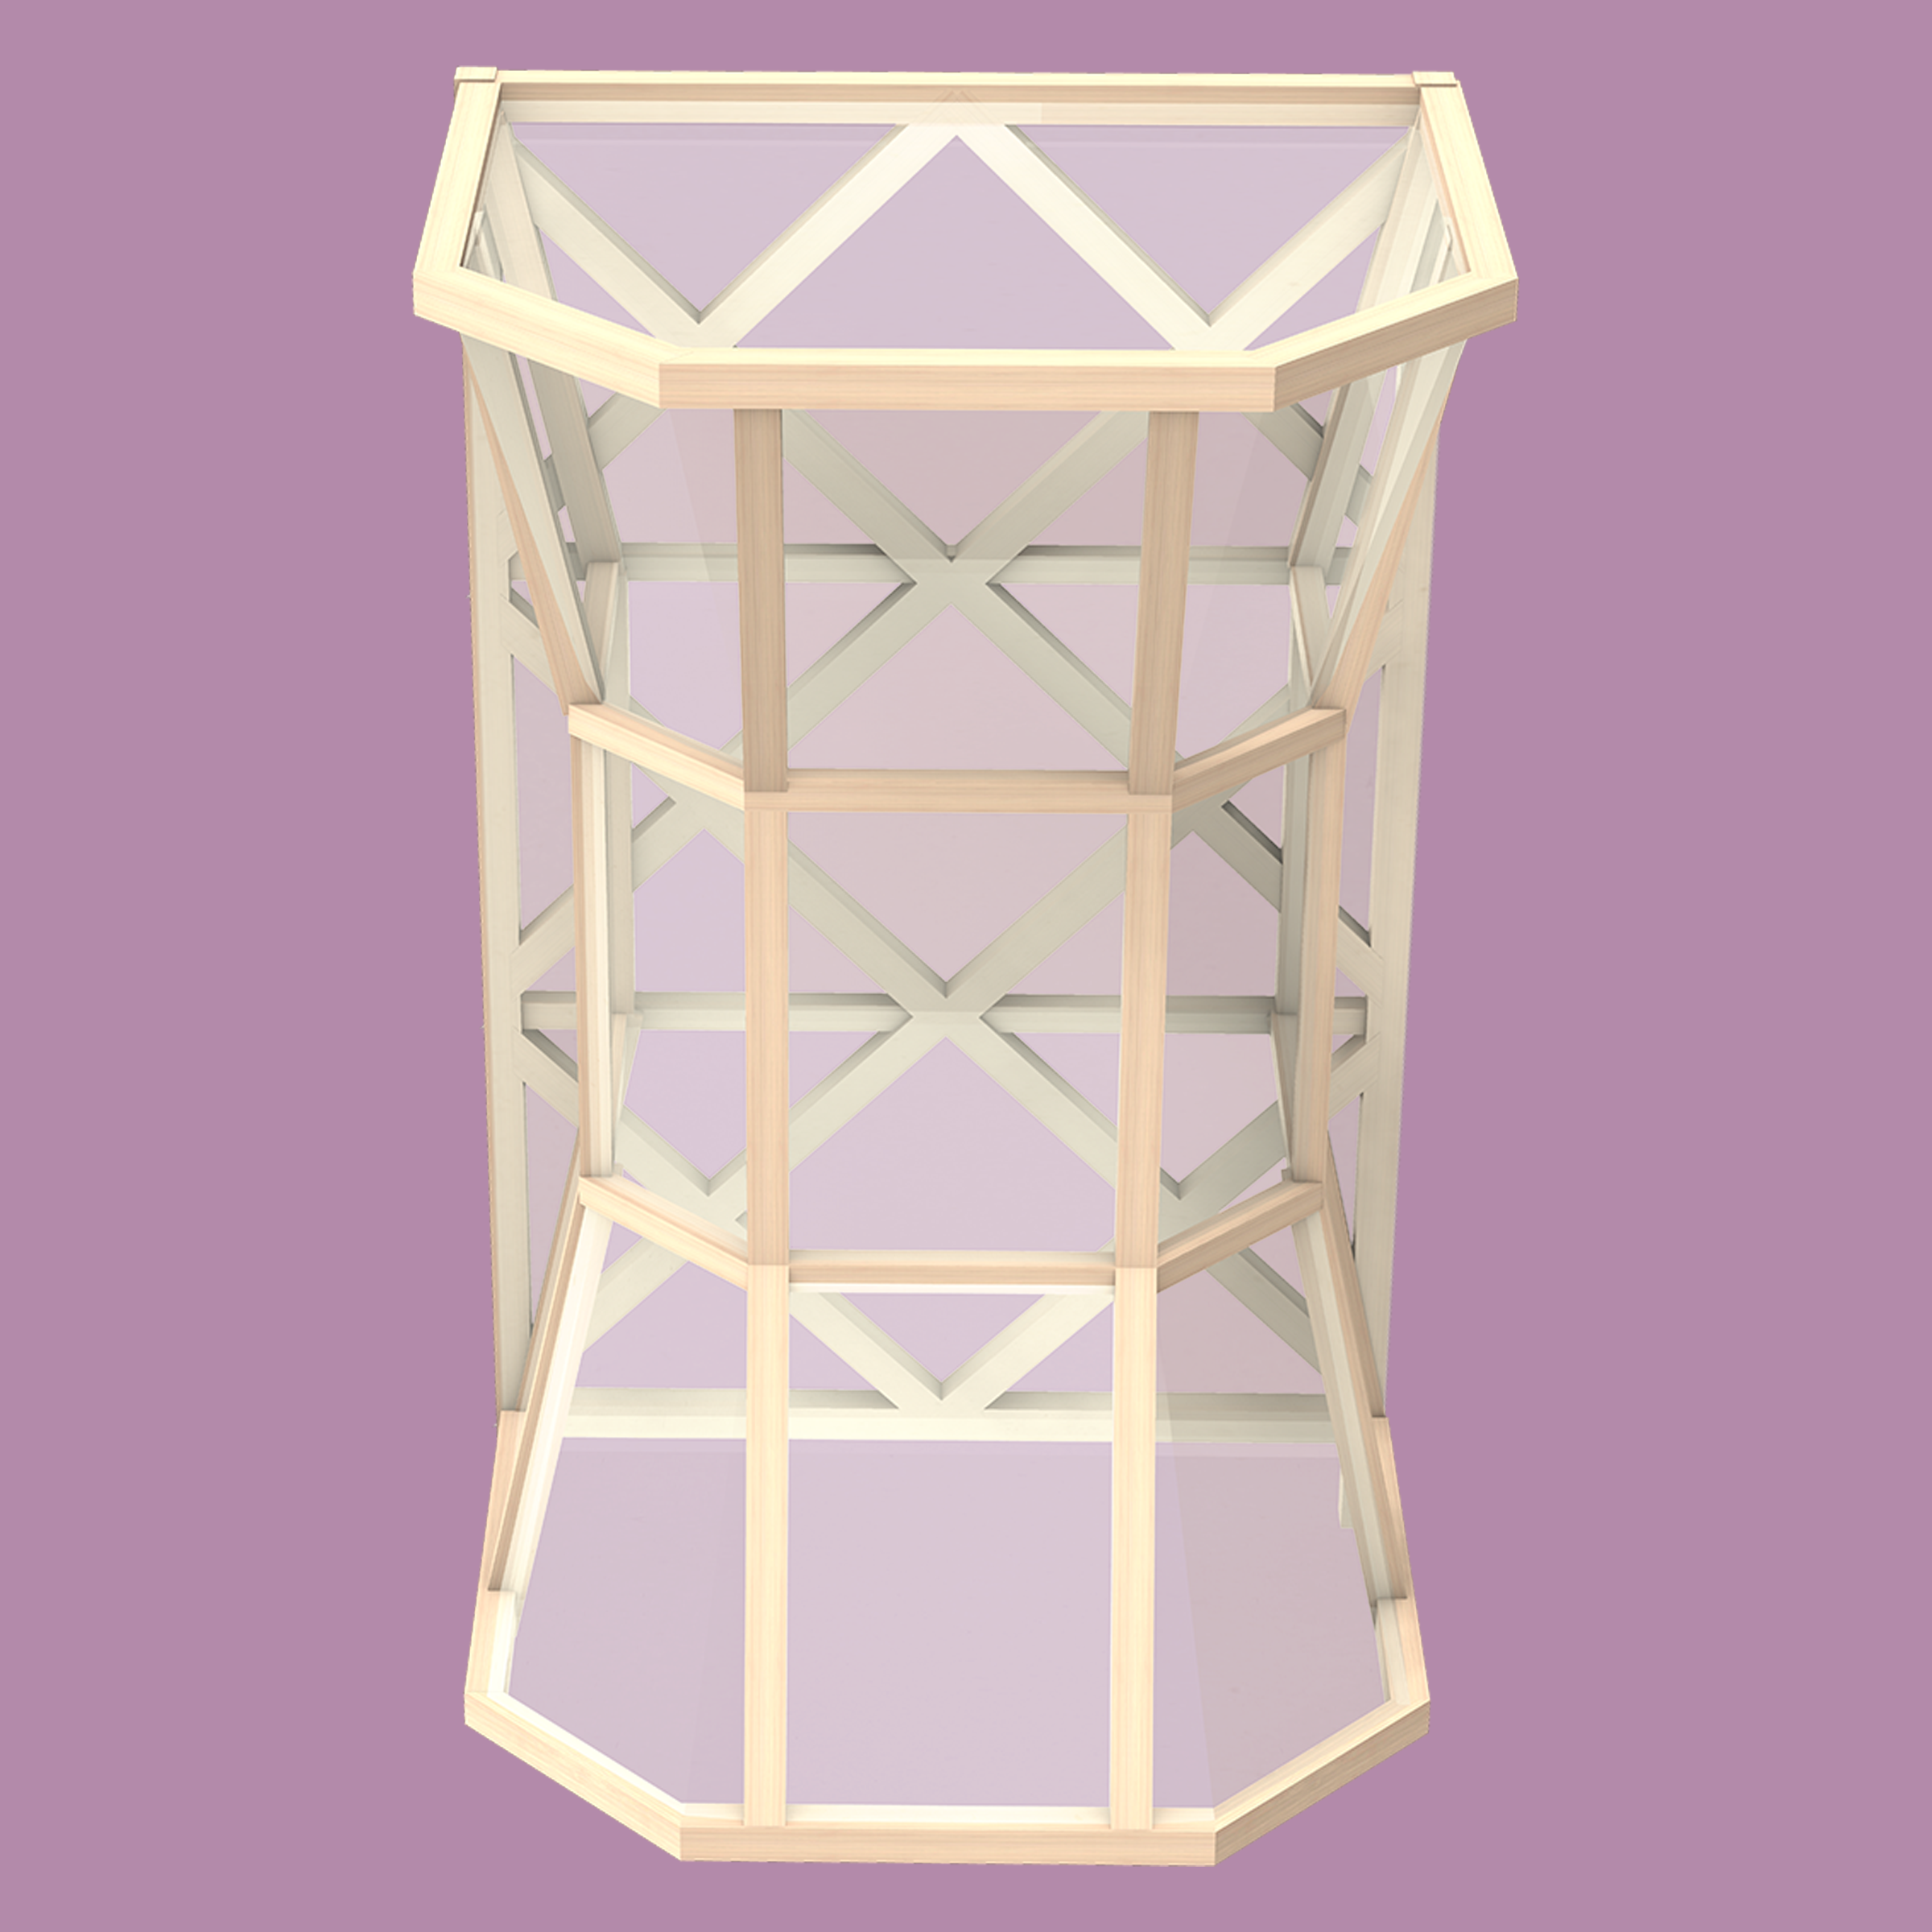
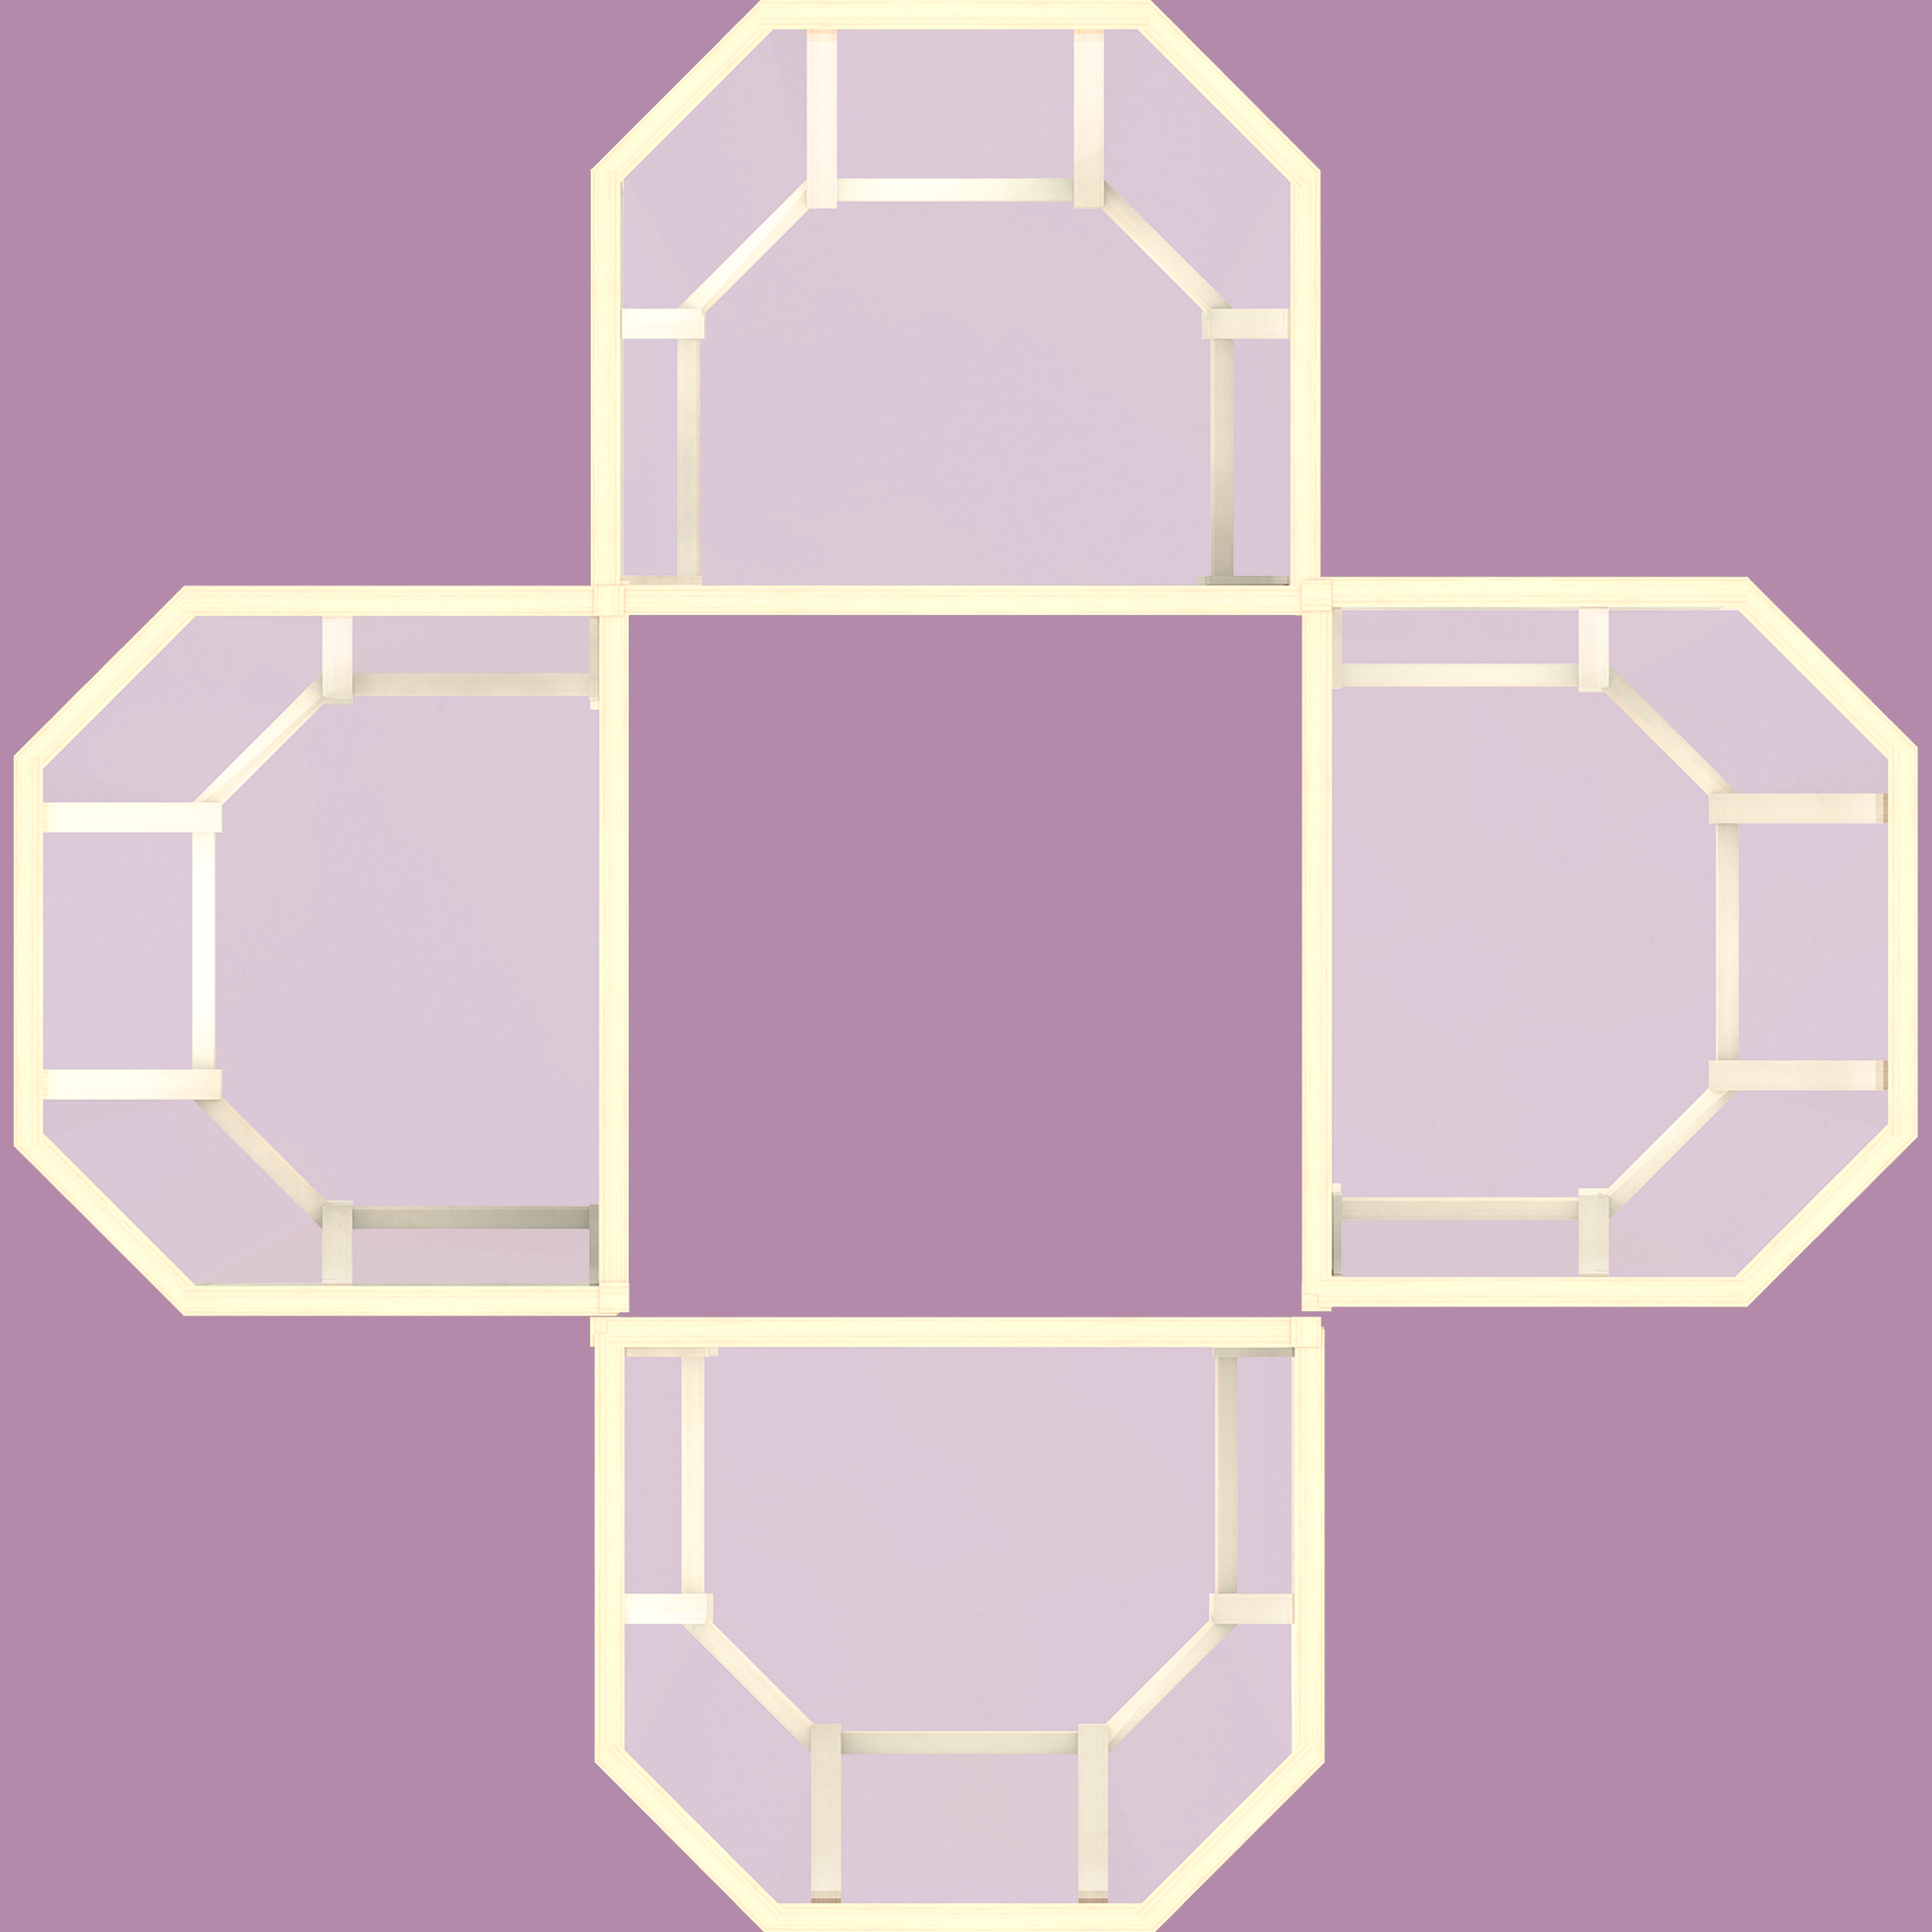
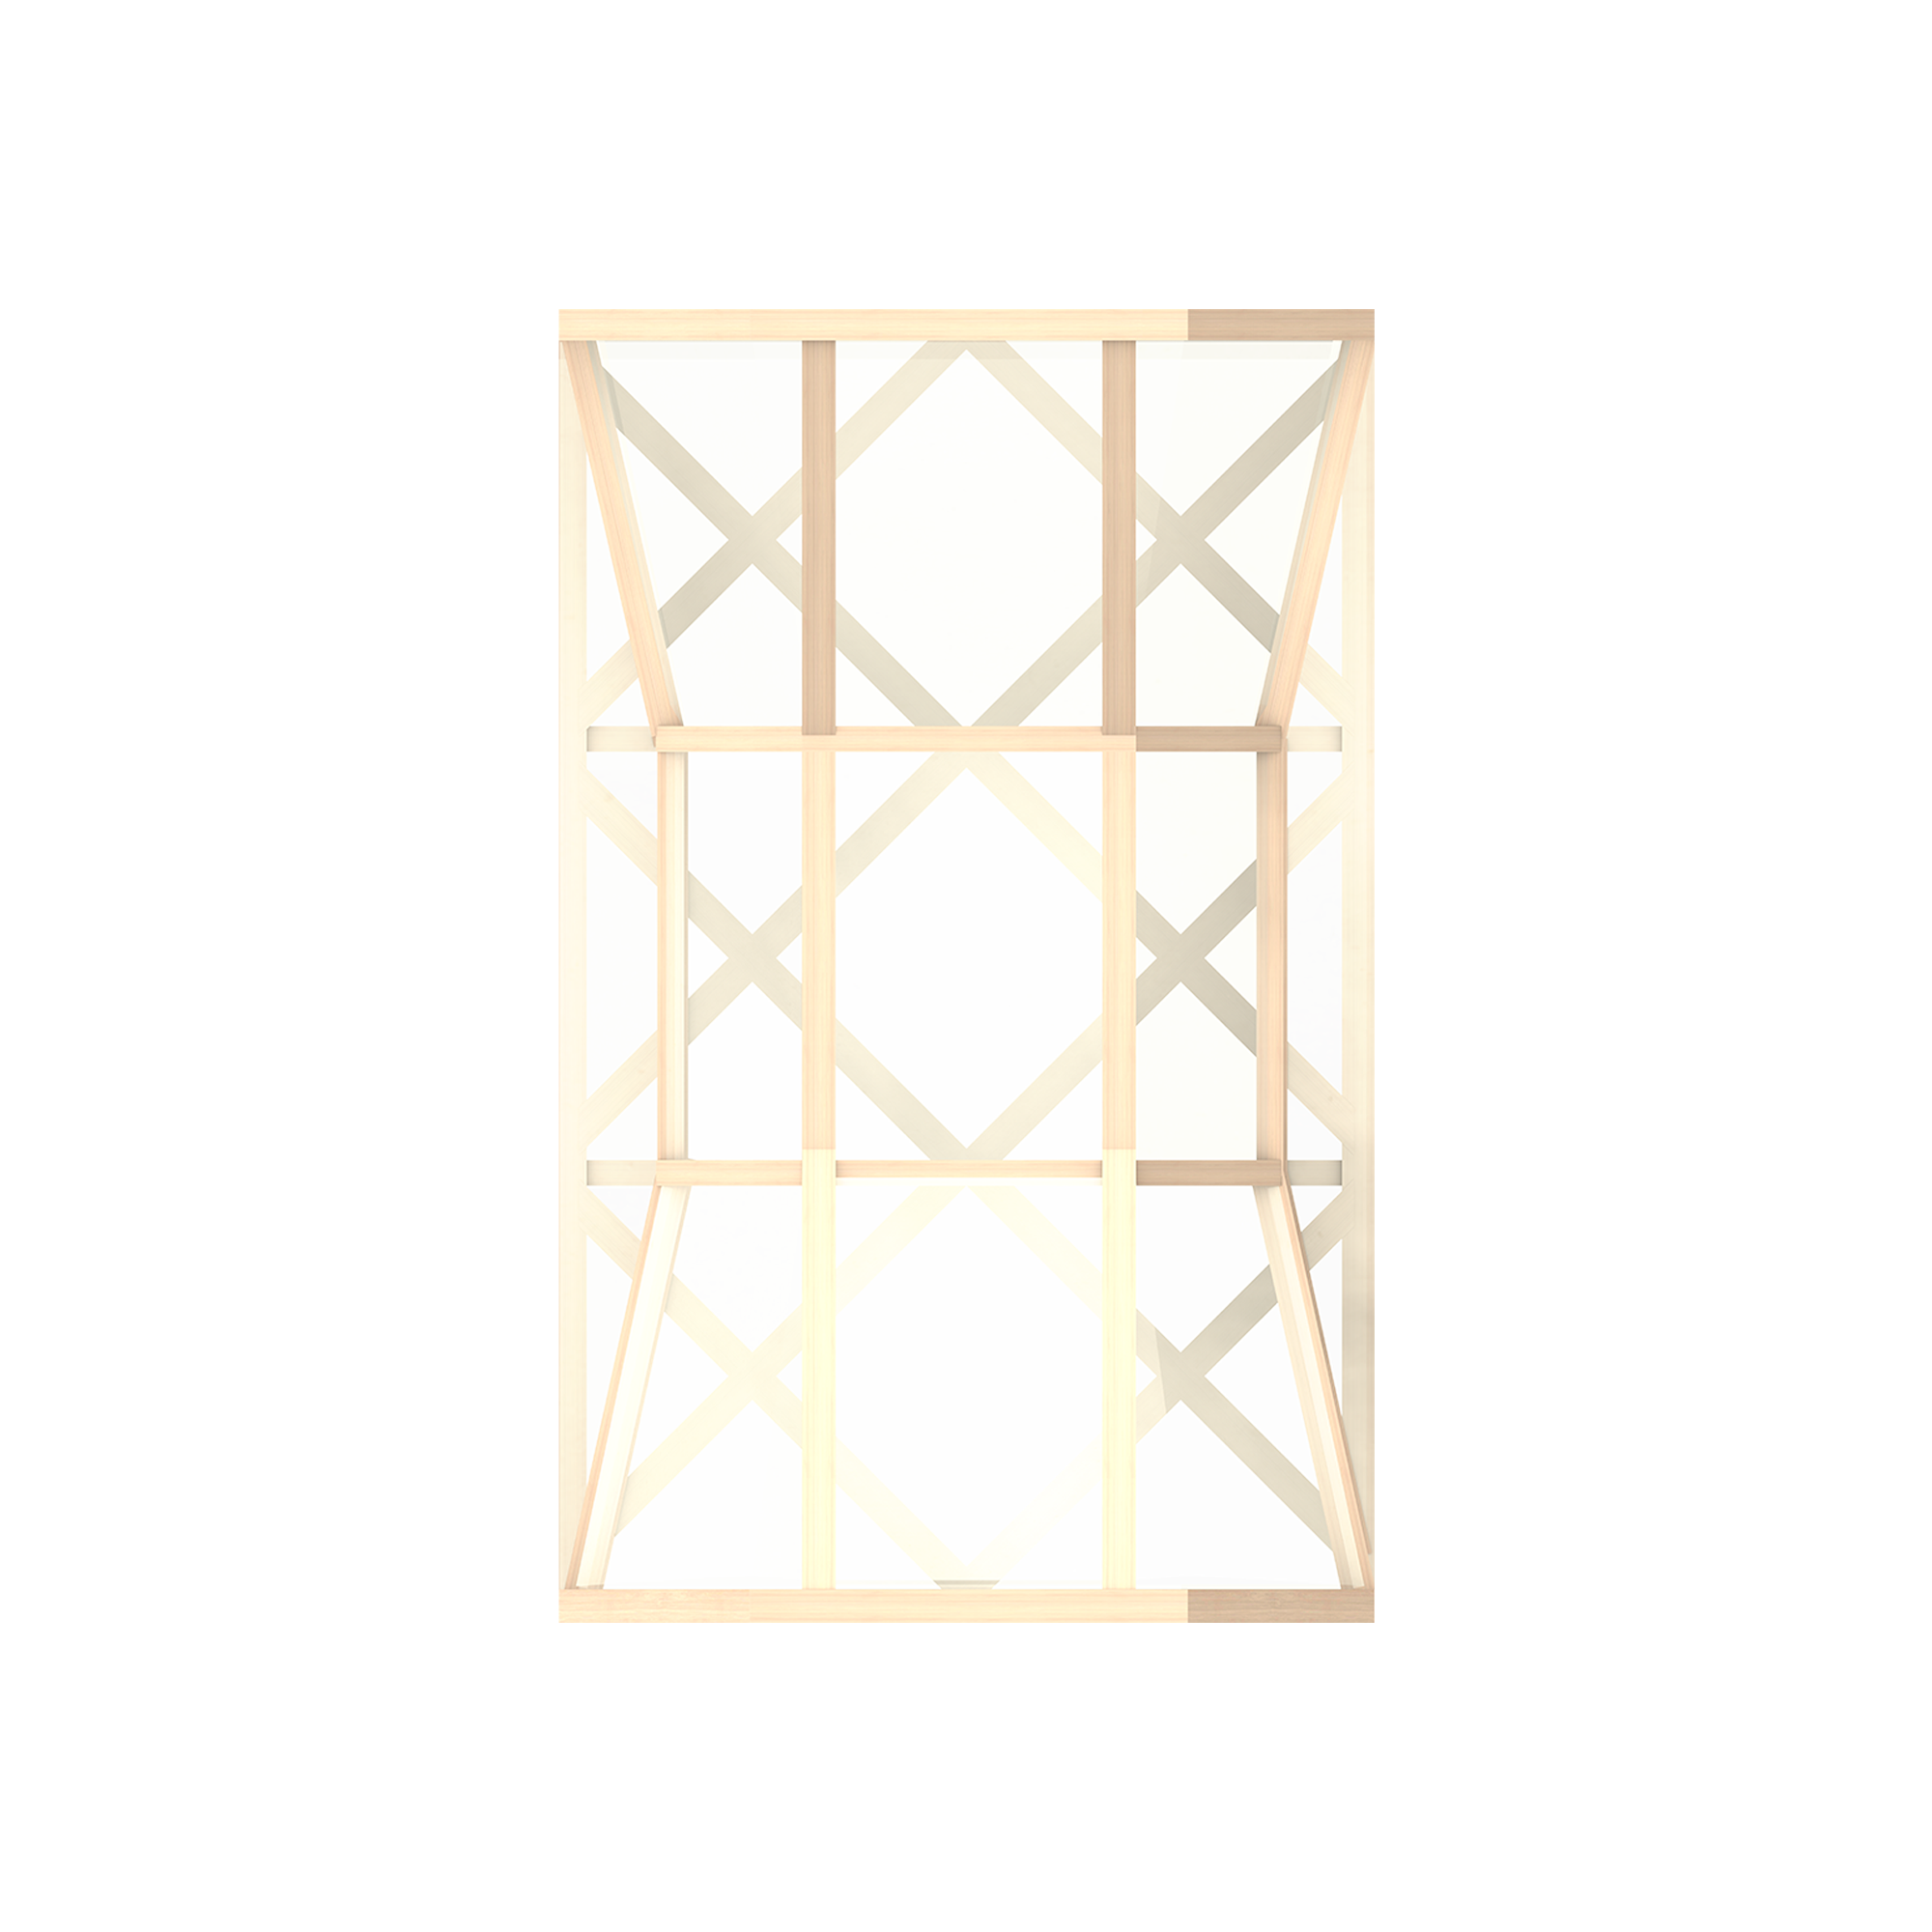
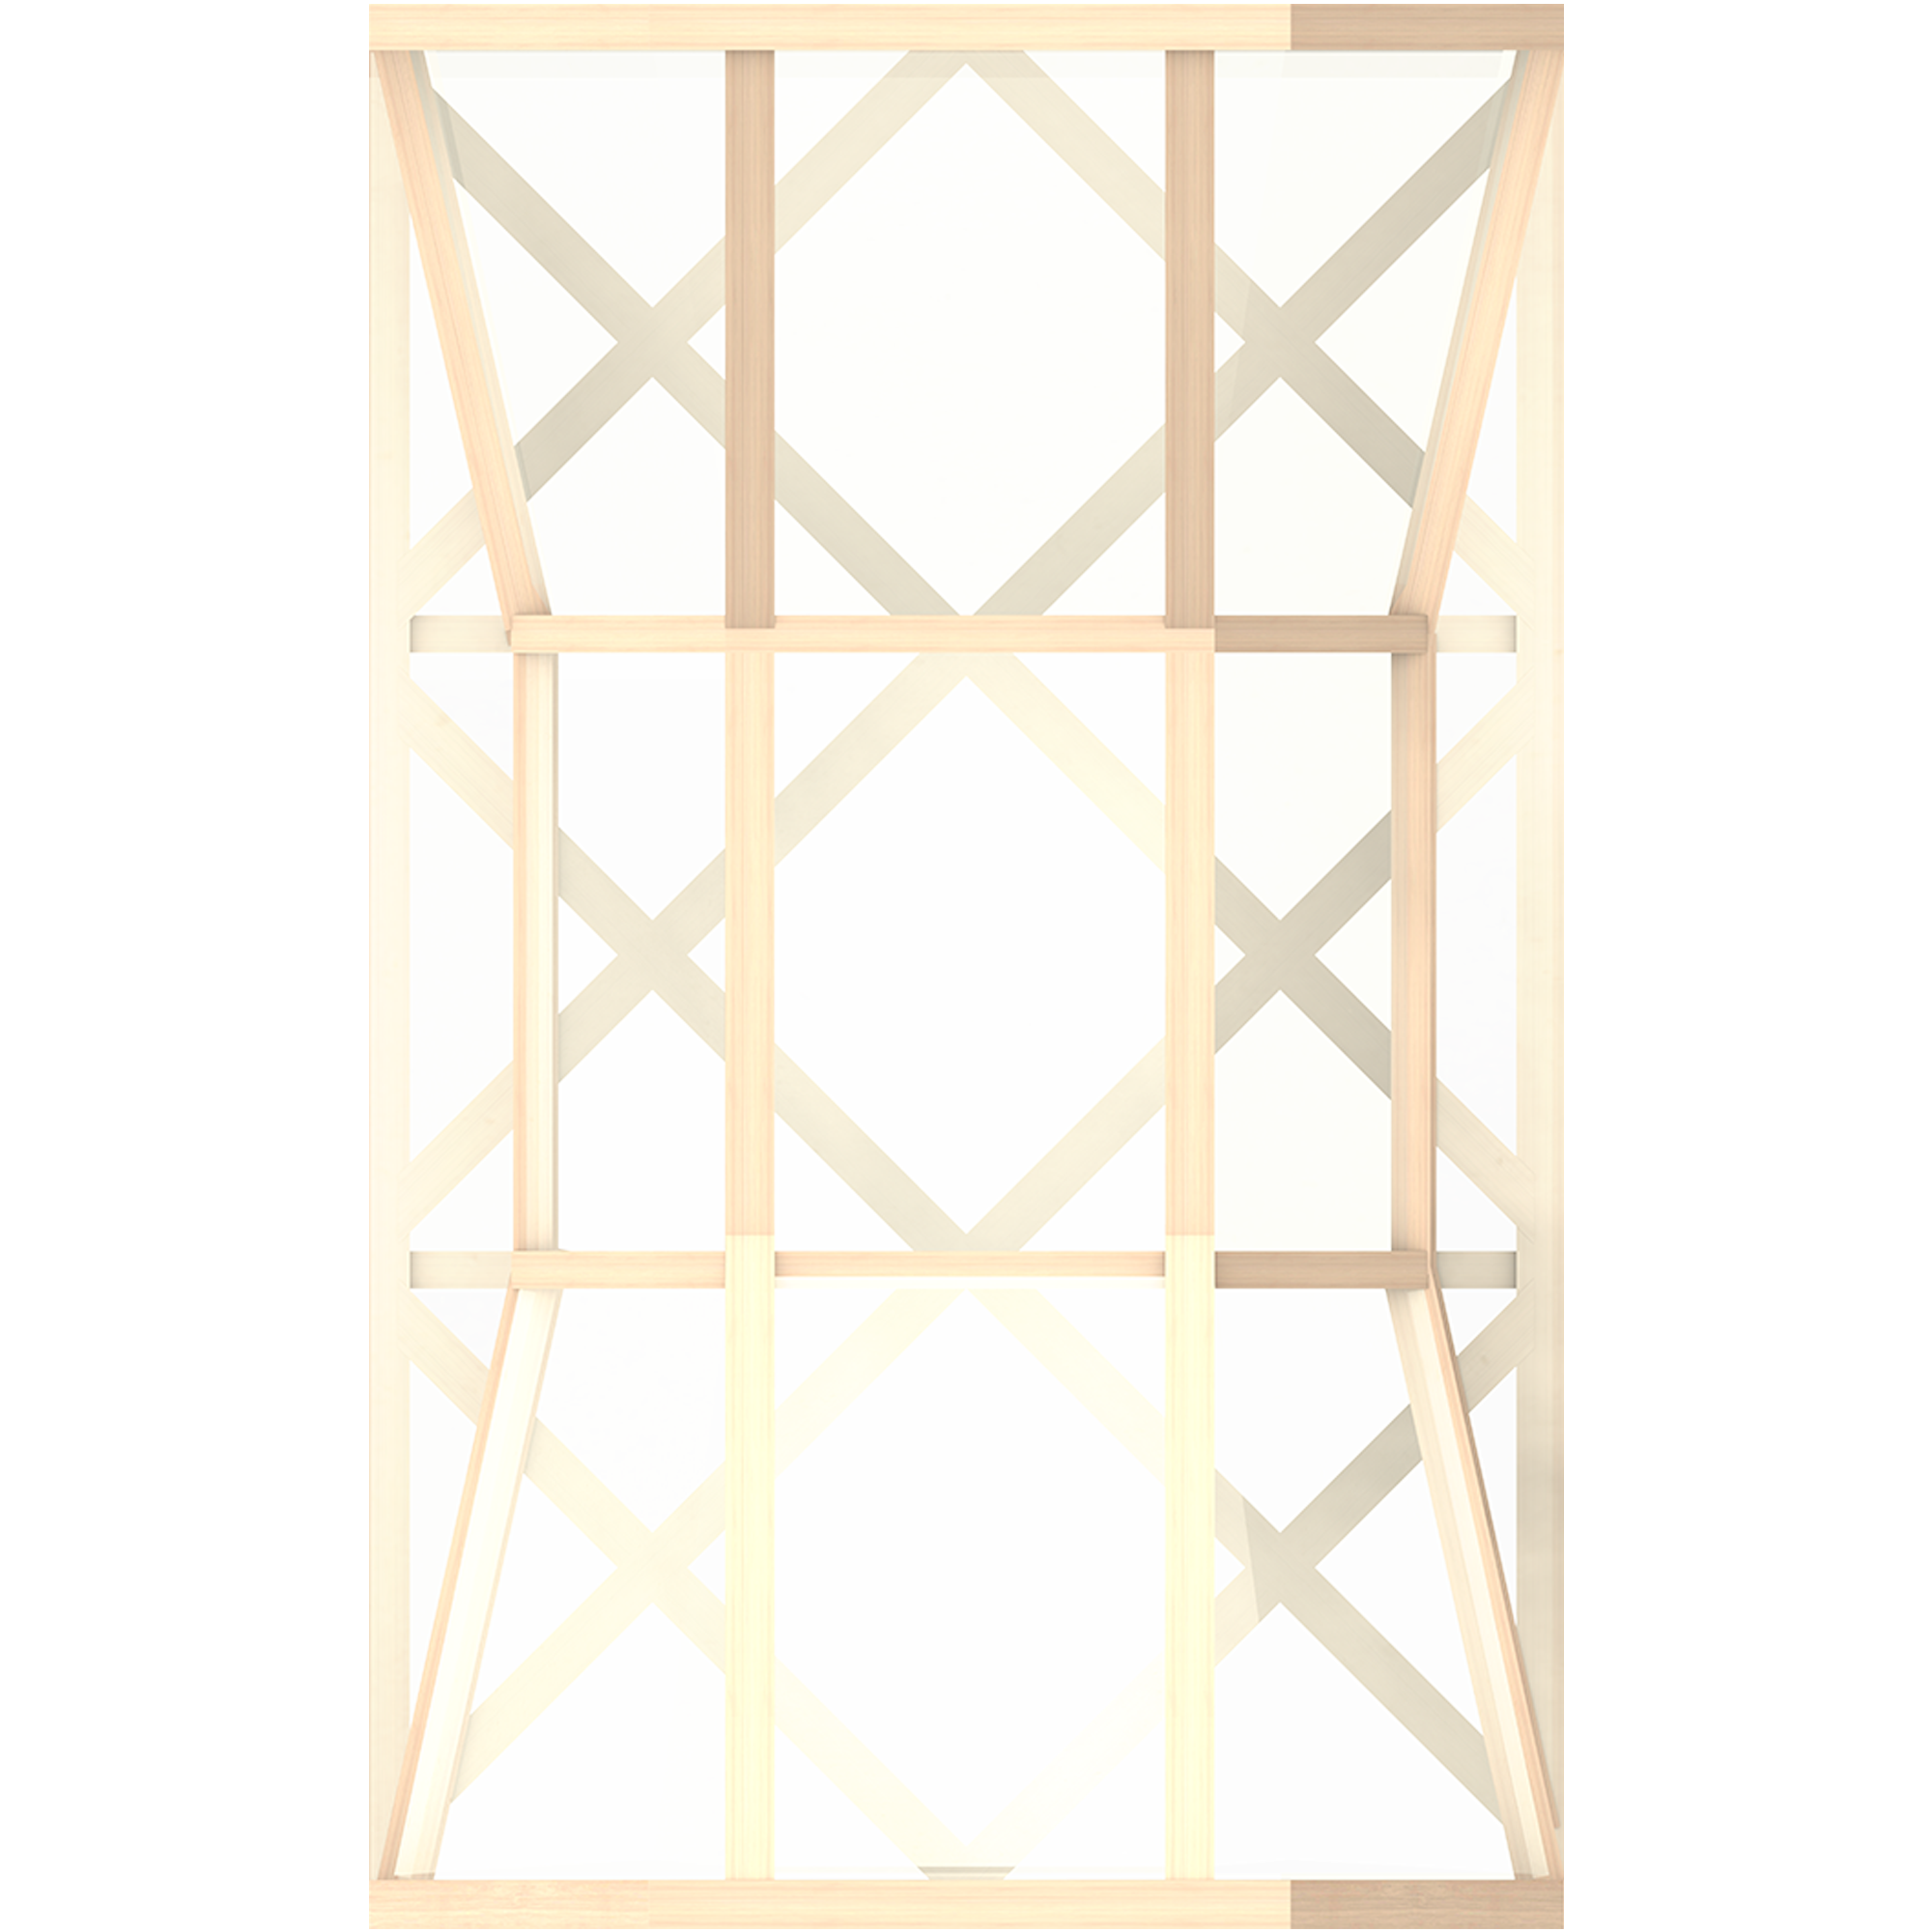
Given the experiments we conducted in the midterm, we were grouped into trios, and asked to combine concepts from each student’s individual model, to form one structure.
Frankenstein-like mixture of structures
wood and trace paper material constraints
Combining all concepts so far
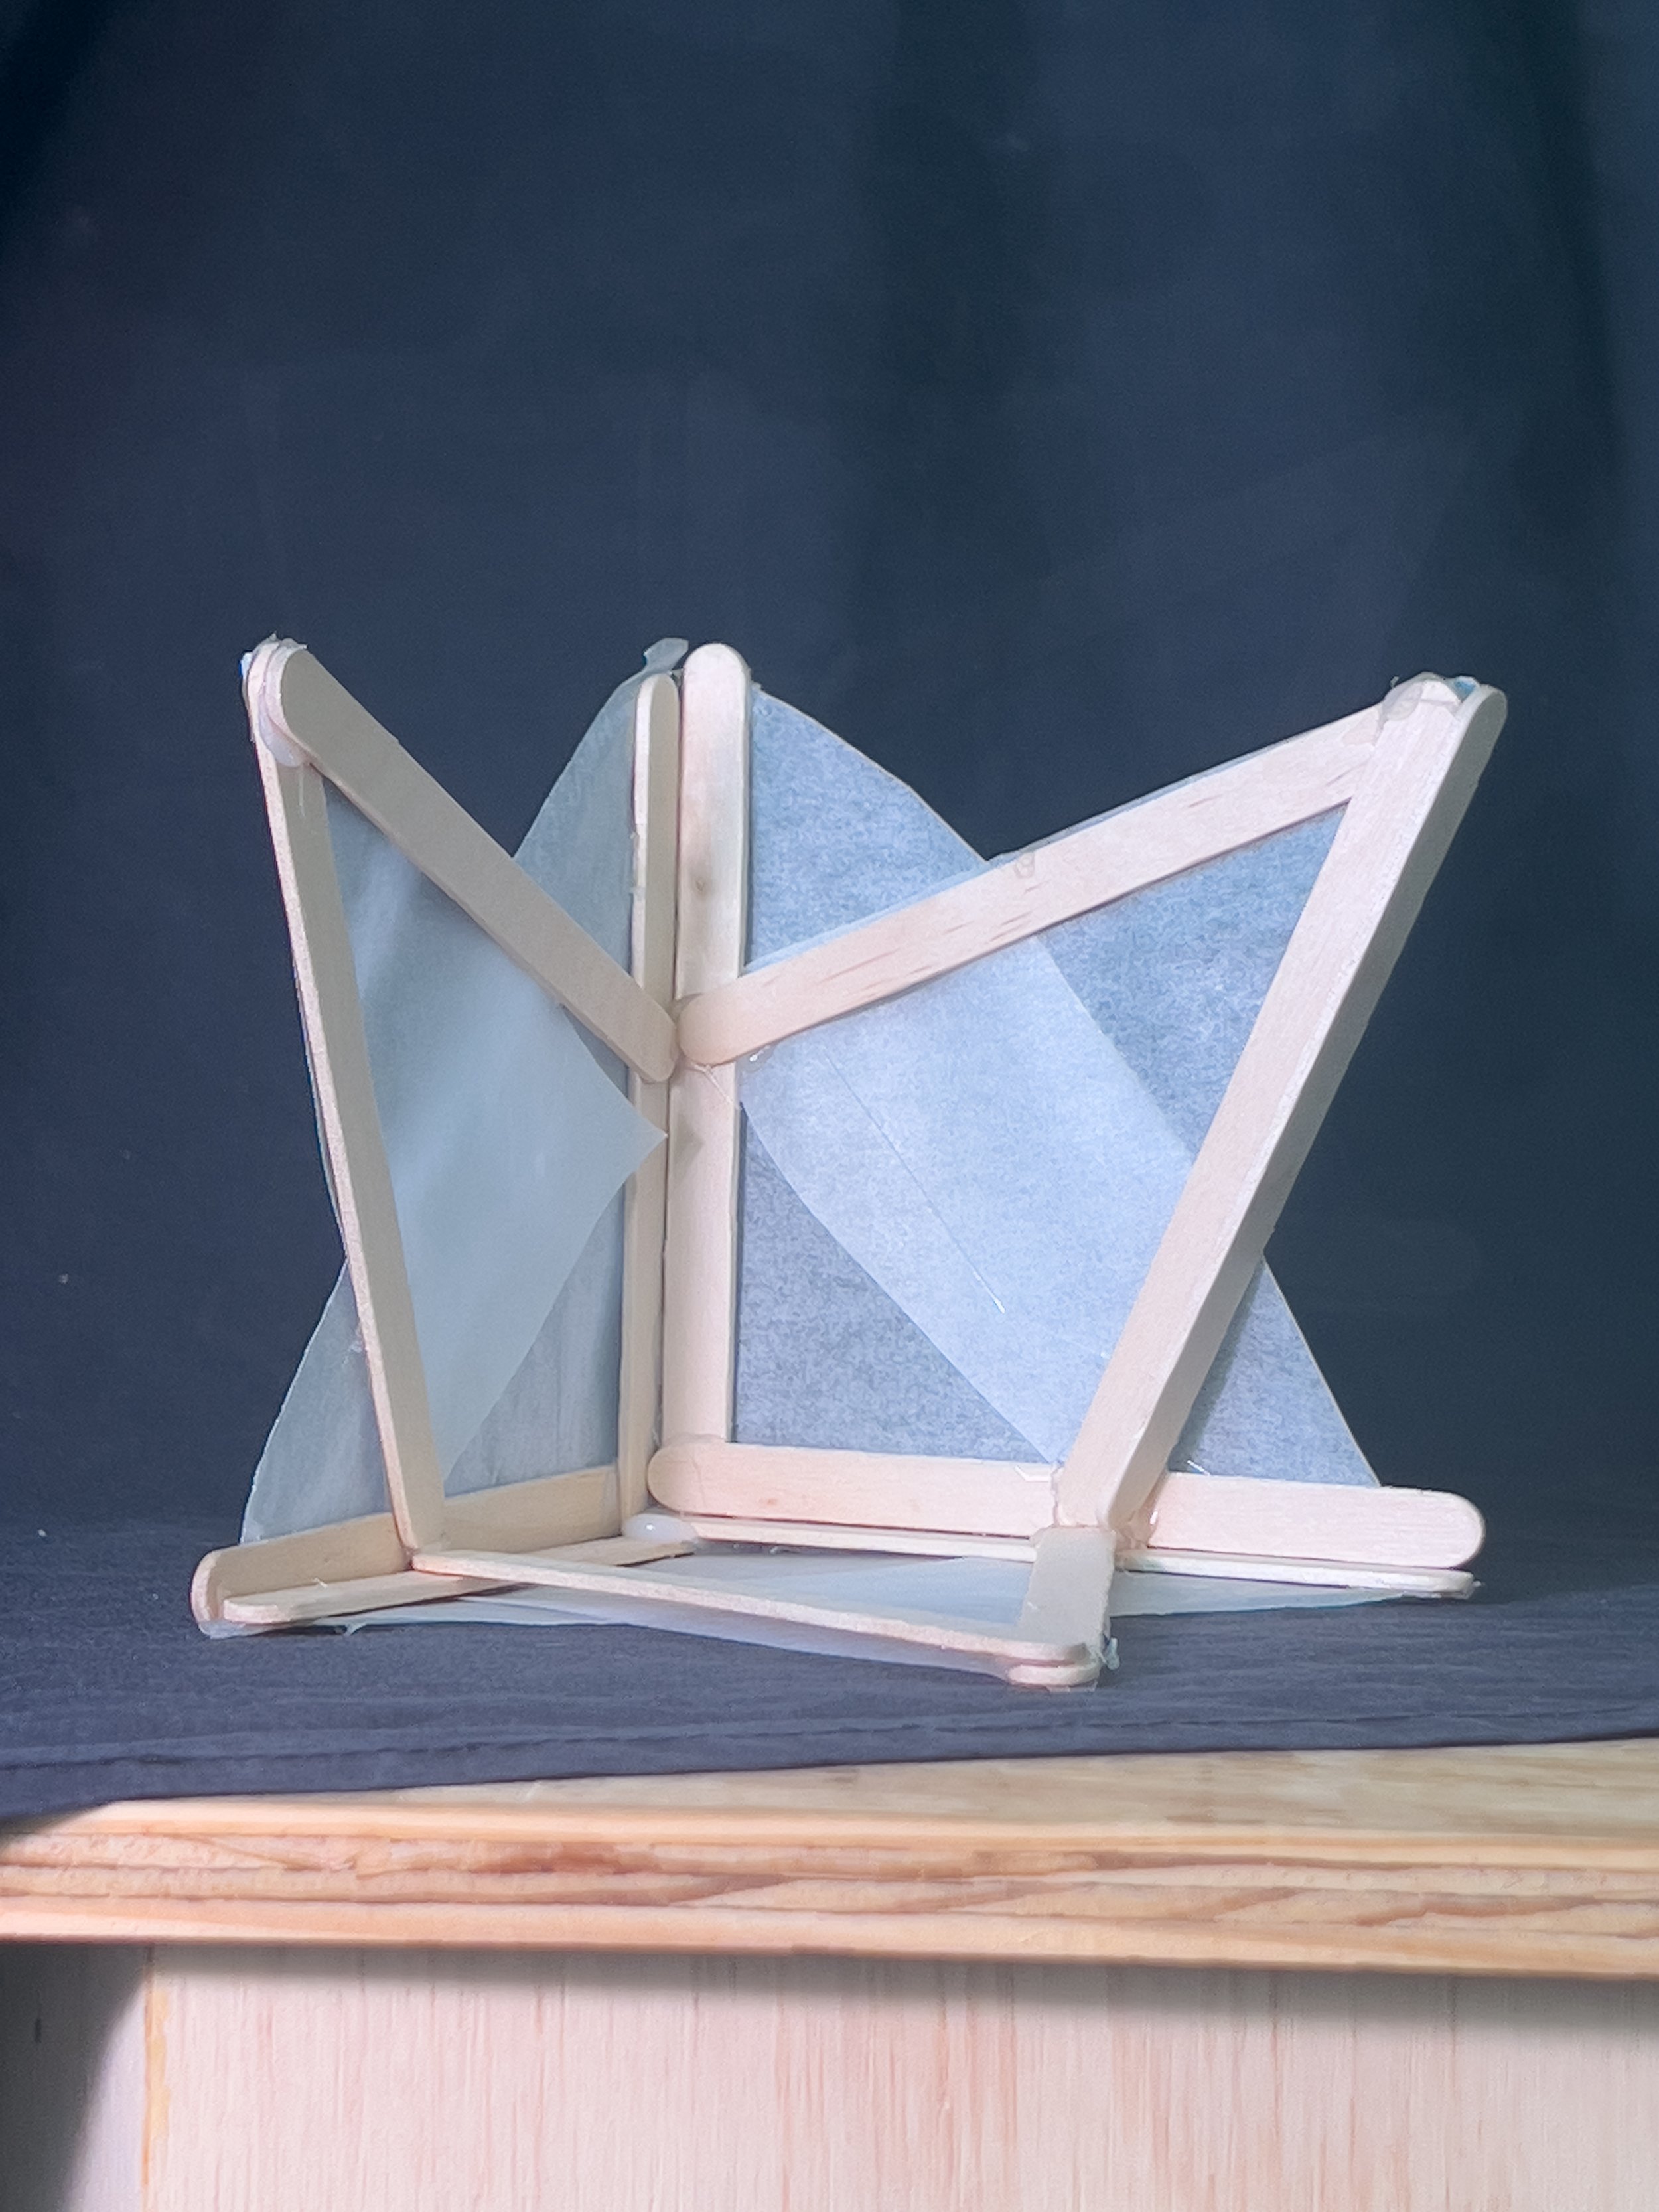
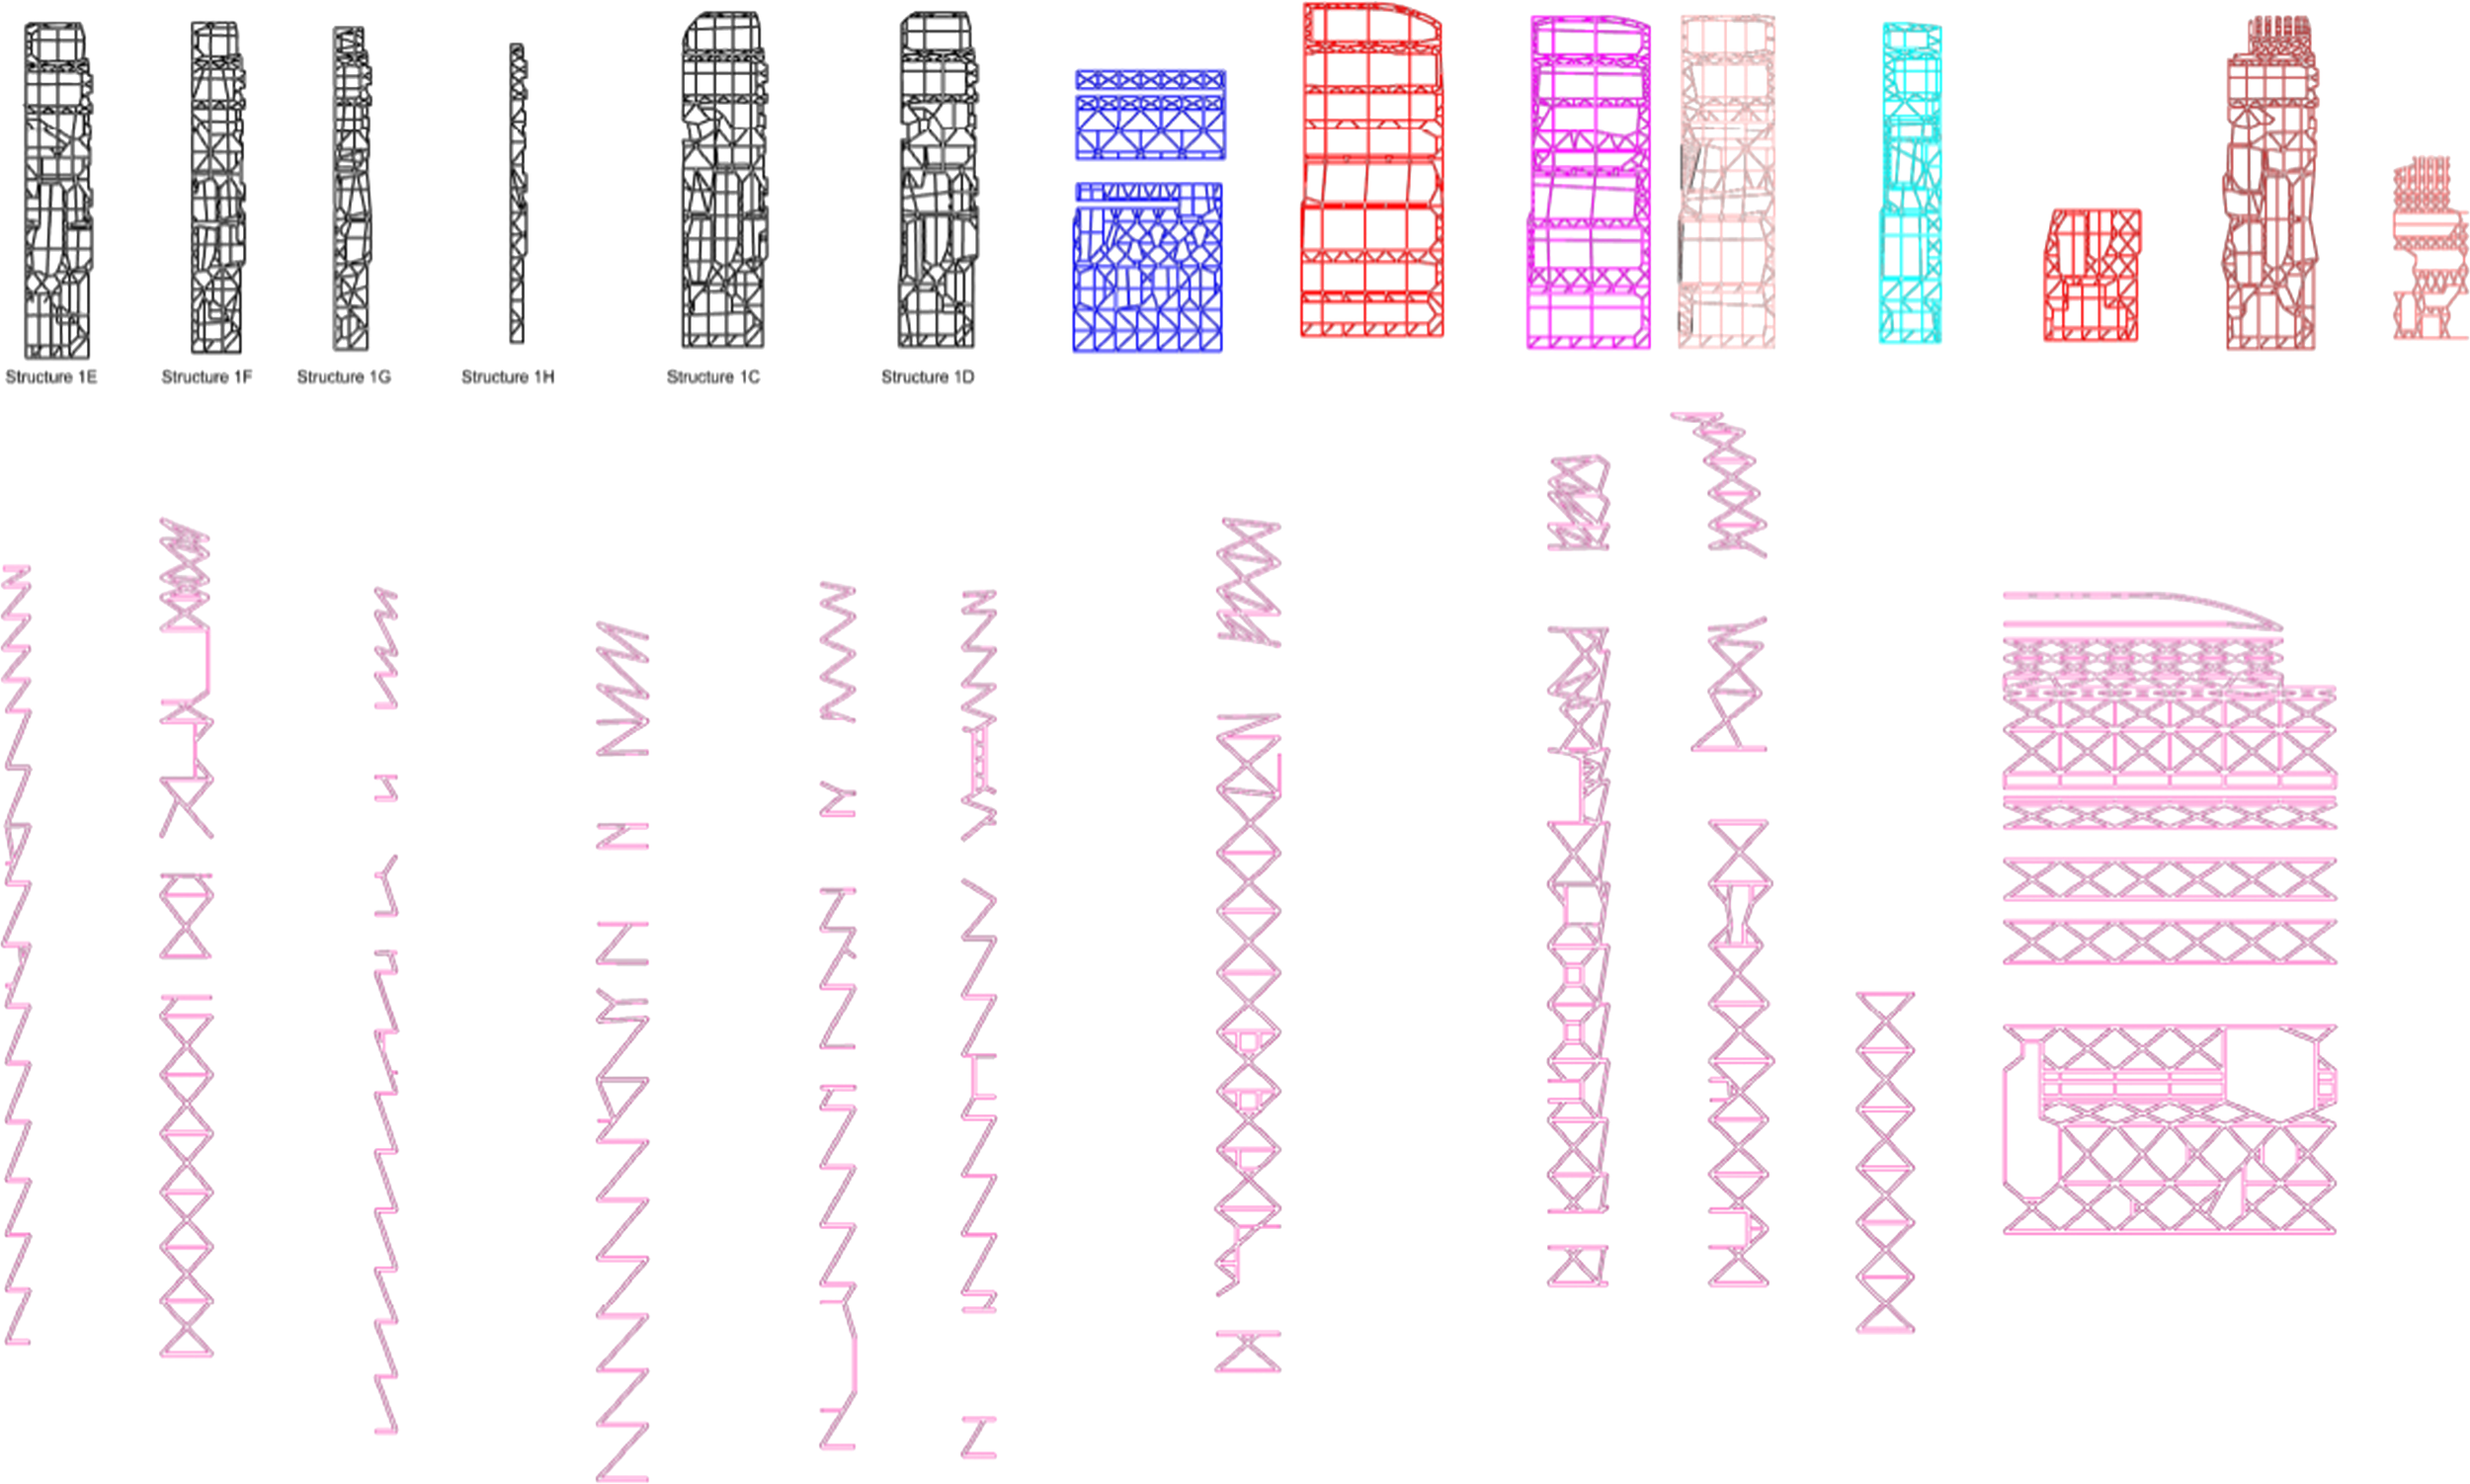
How we planned the physical model:
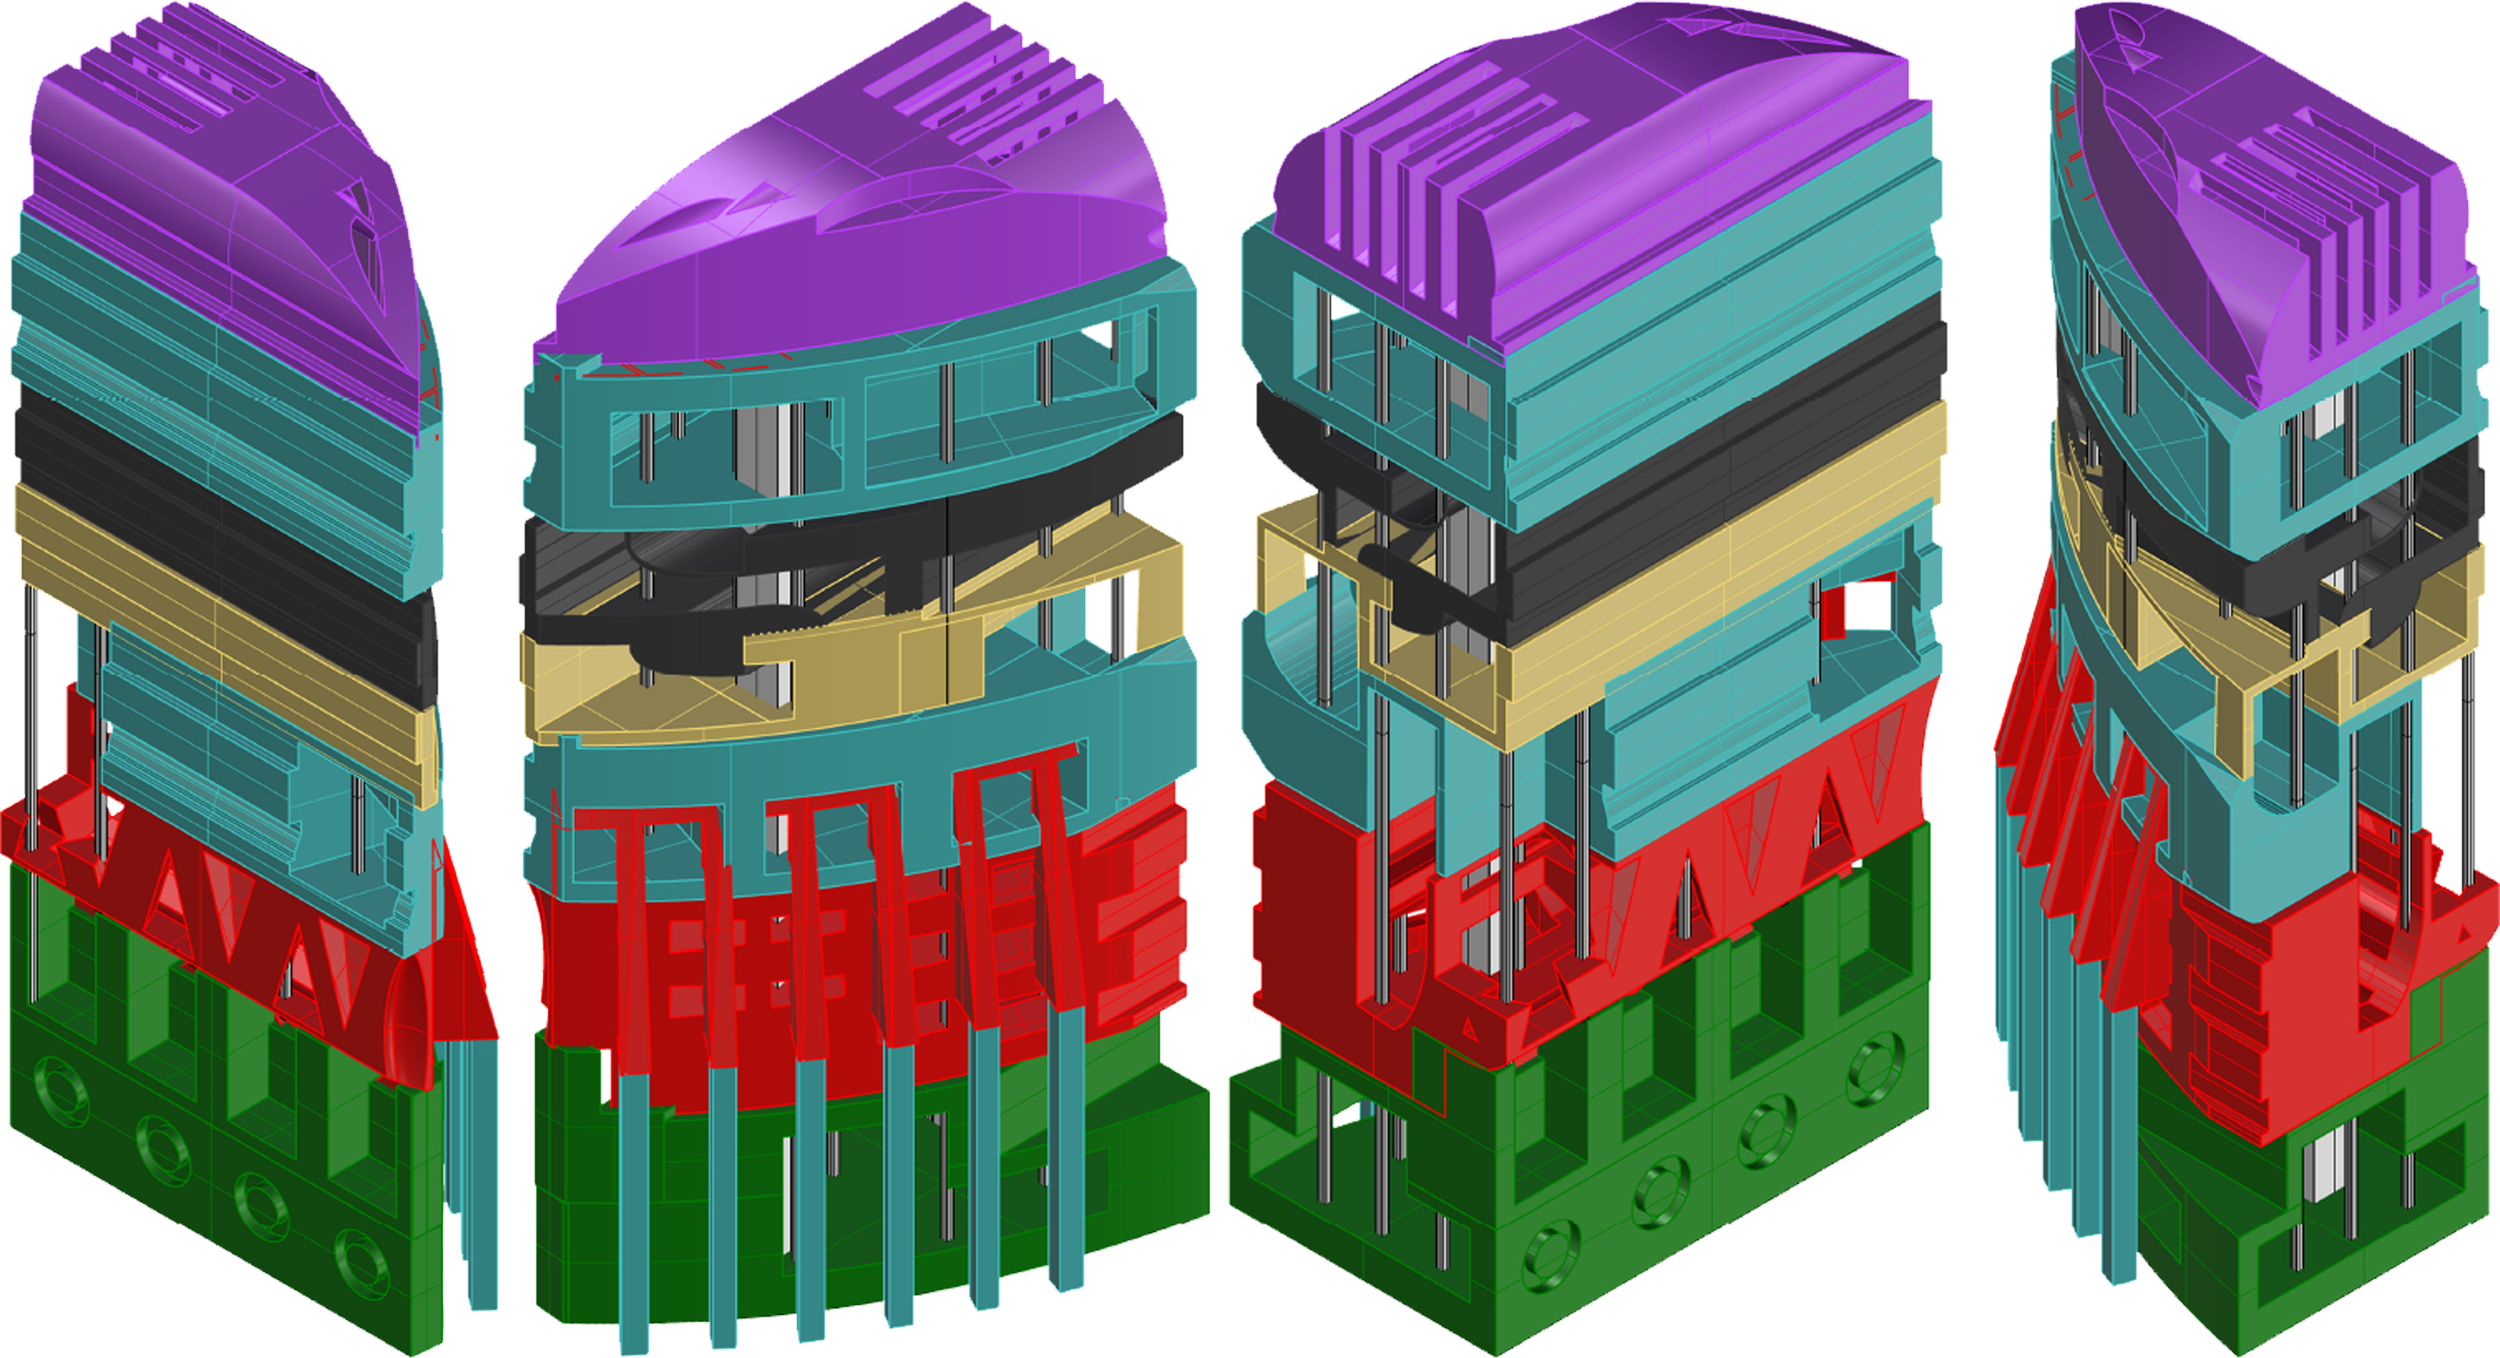
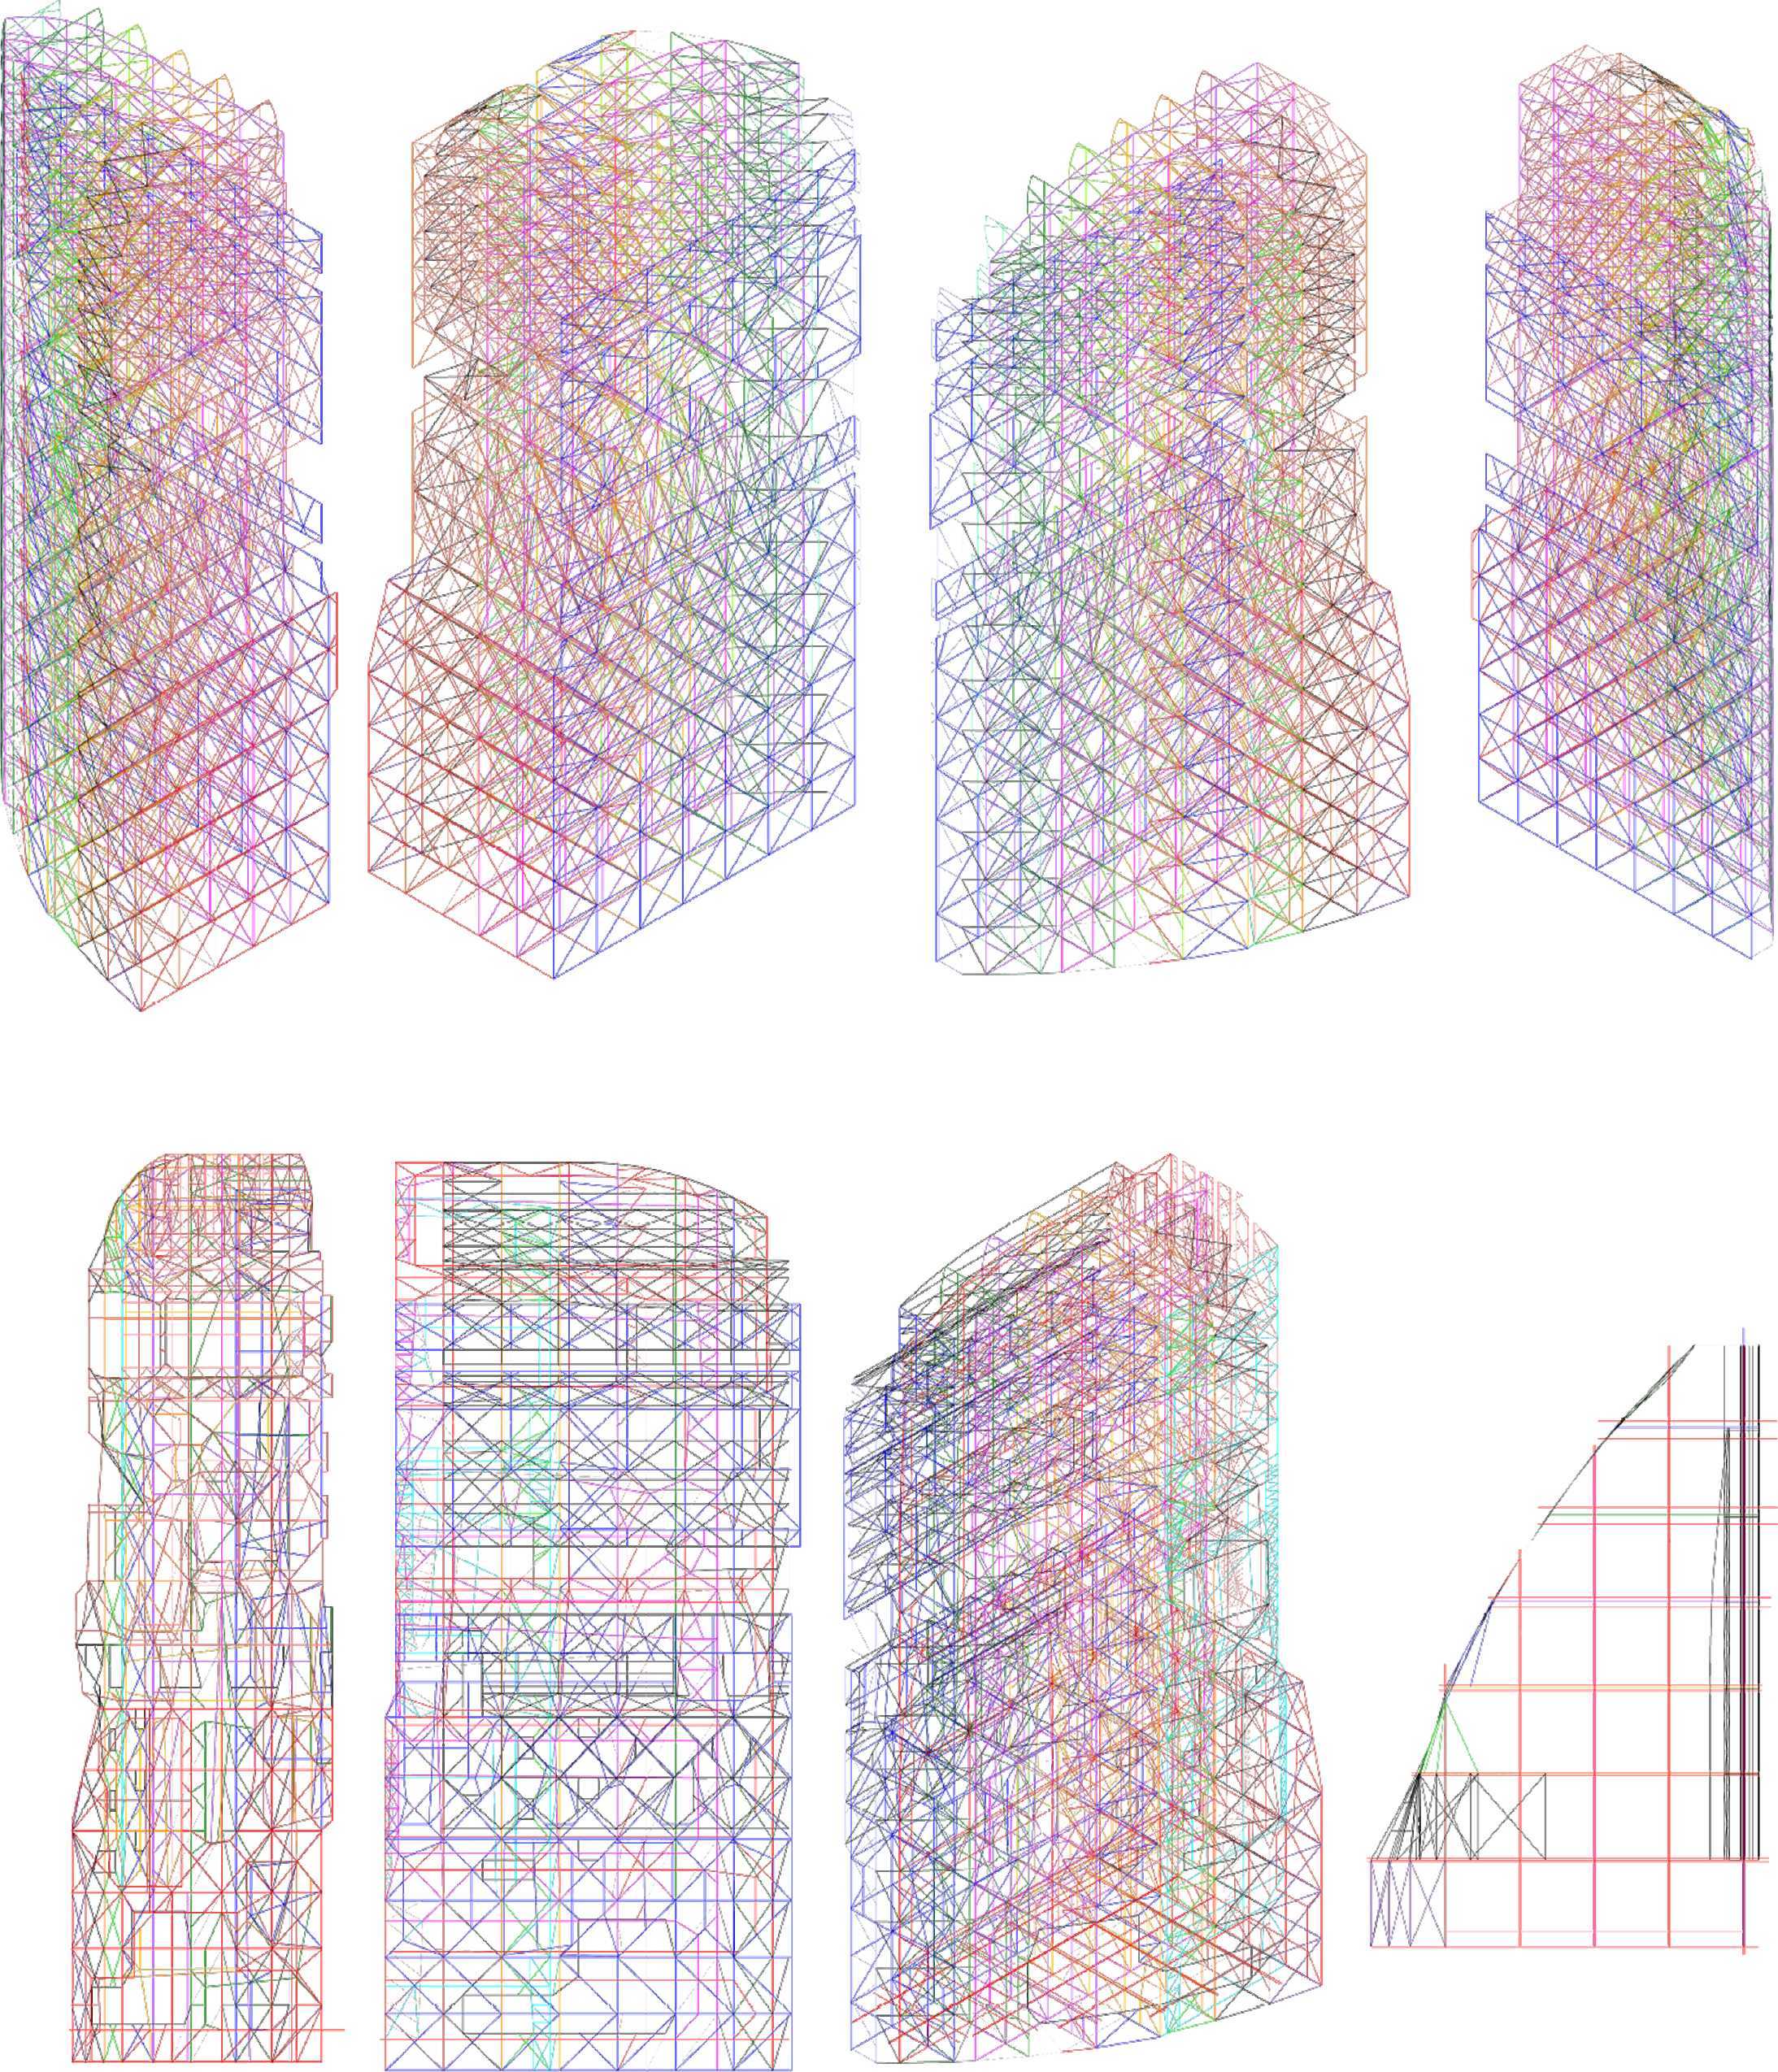
We took sections of each of our midterm designs, broke them into smaller portions from which we wanted to keep elements for our final design. We then took these segments and put them together three-dimensionally to create a full structure. This resulted in a dense, intricate wireframe which we laser cut and attached together. Our structure was complicated, but representative of all our ideas together!
Rhino
Grasshopper
Photoshop
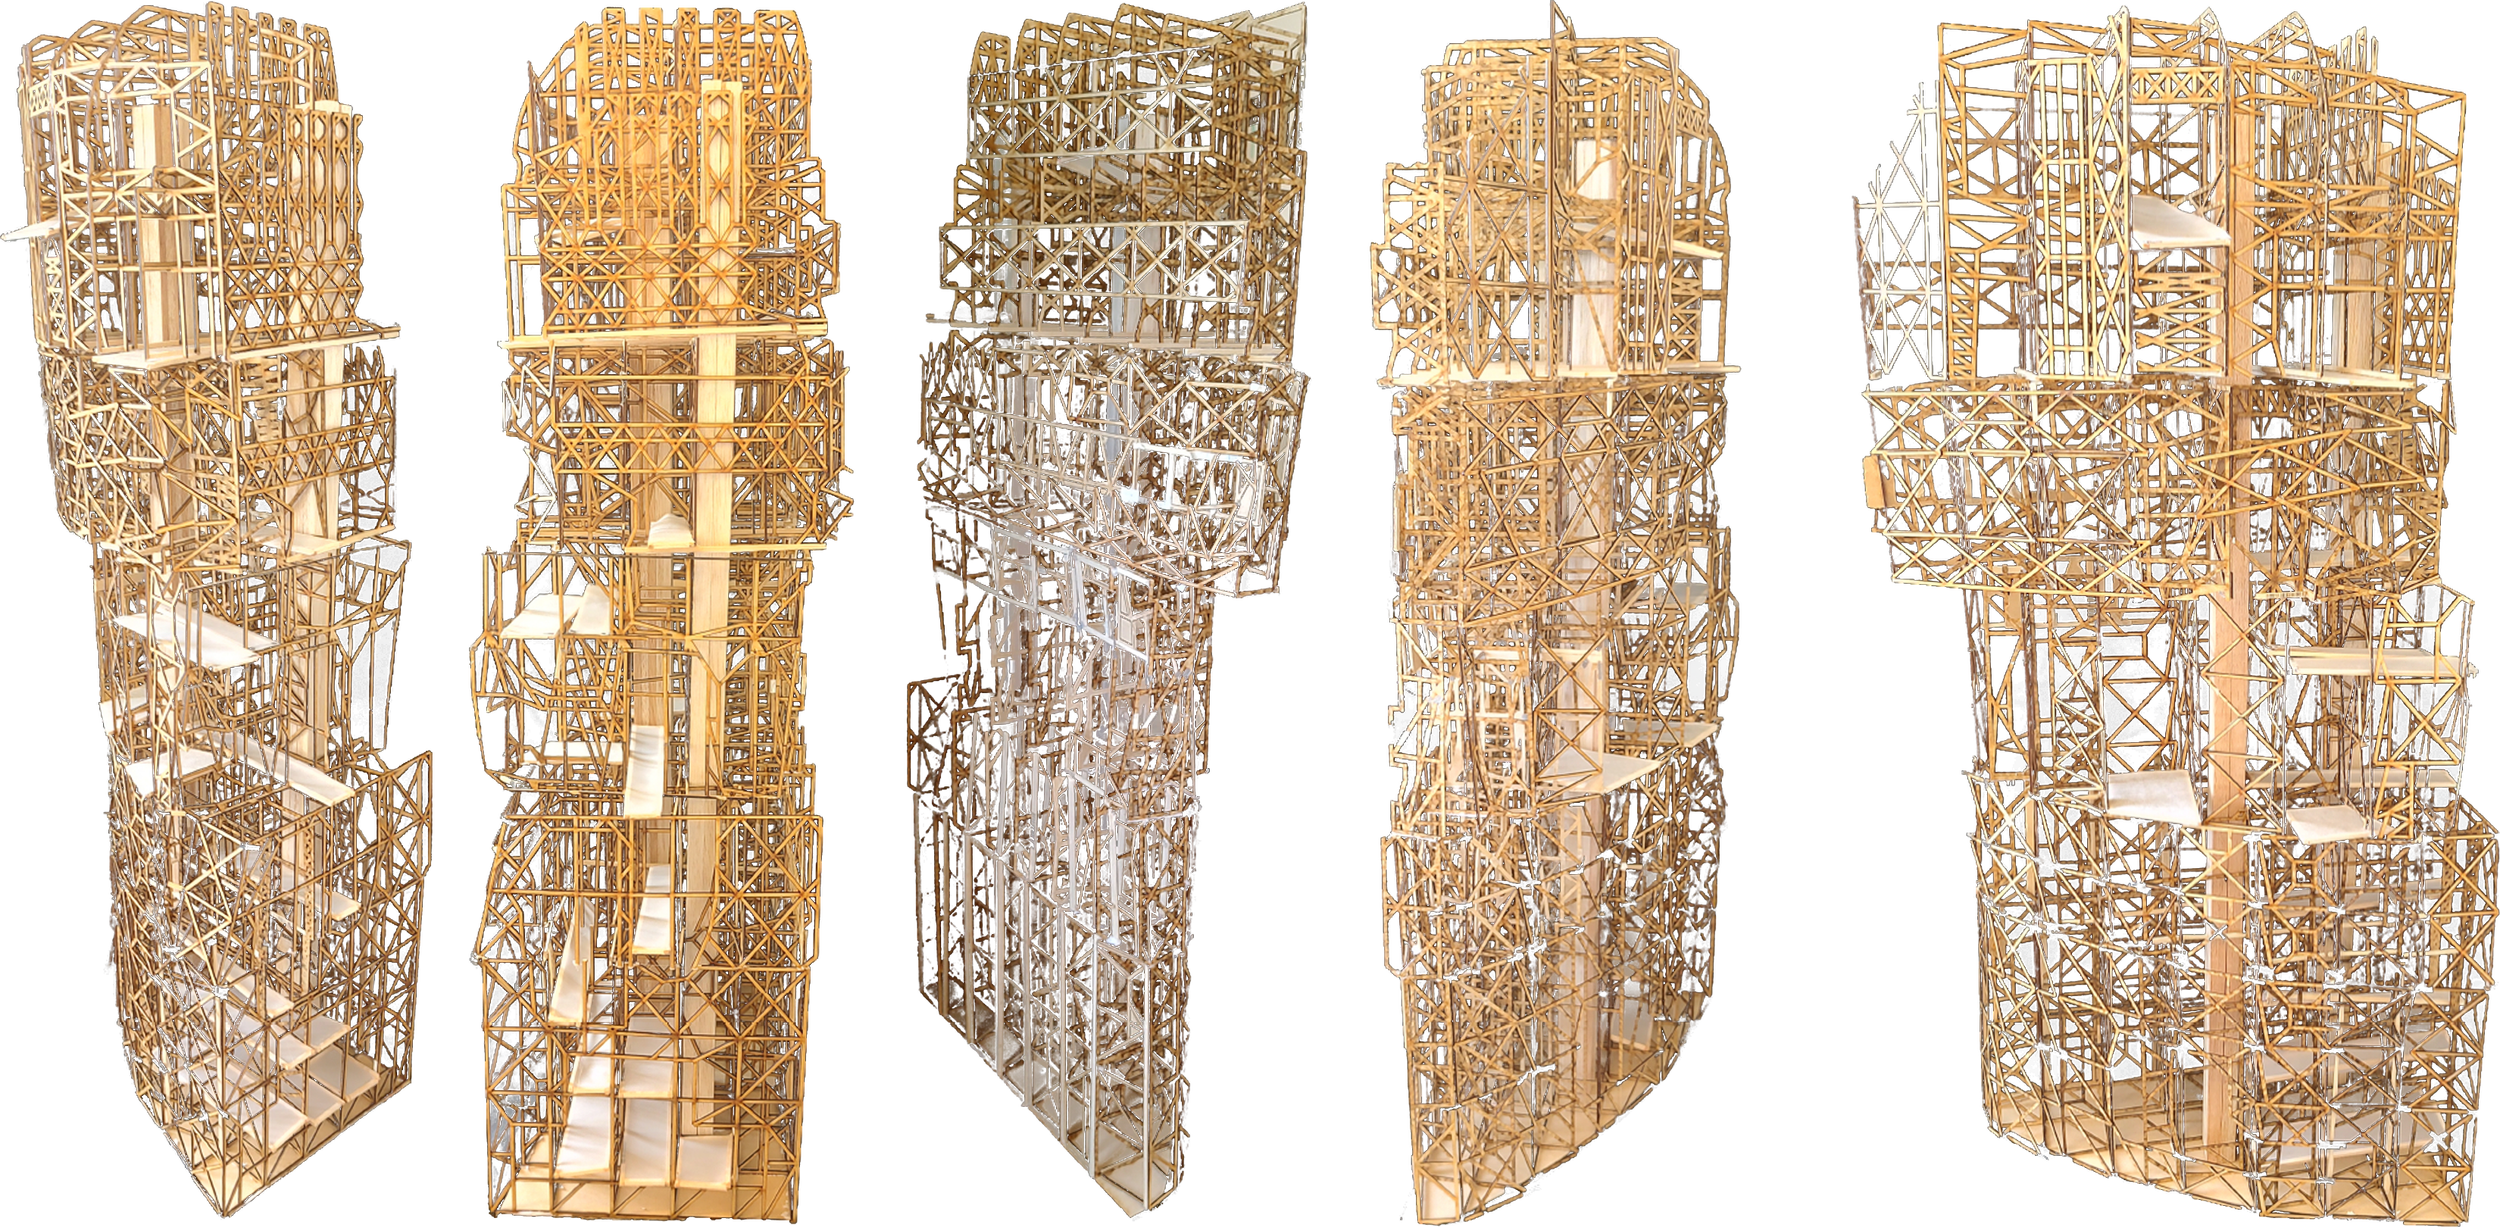
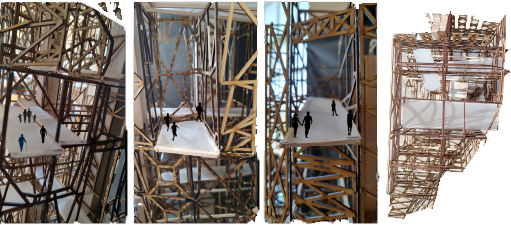
The Physical Model
Colors refer to ideas taken from each different team member’s perspective